Showing posts with label gluten free. Show all posts

Tuesday, 12 April 2016

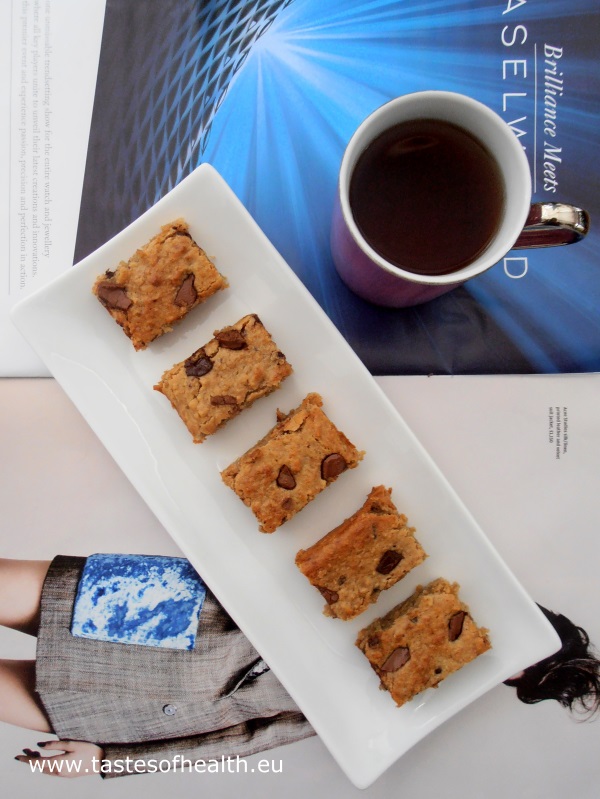
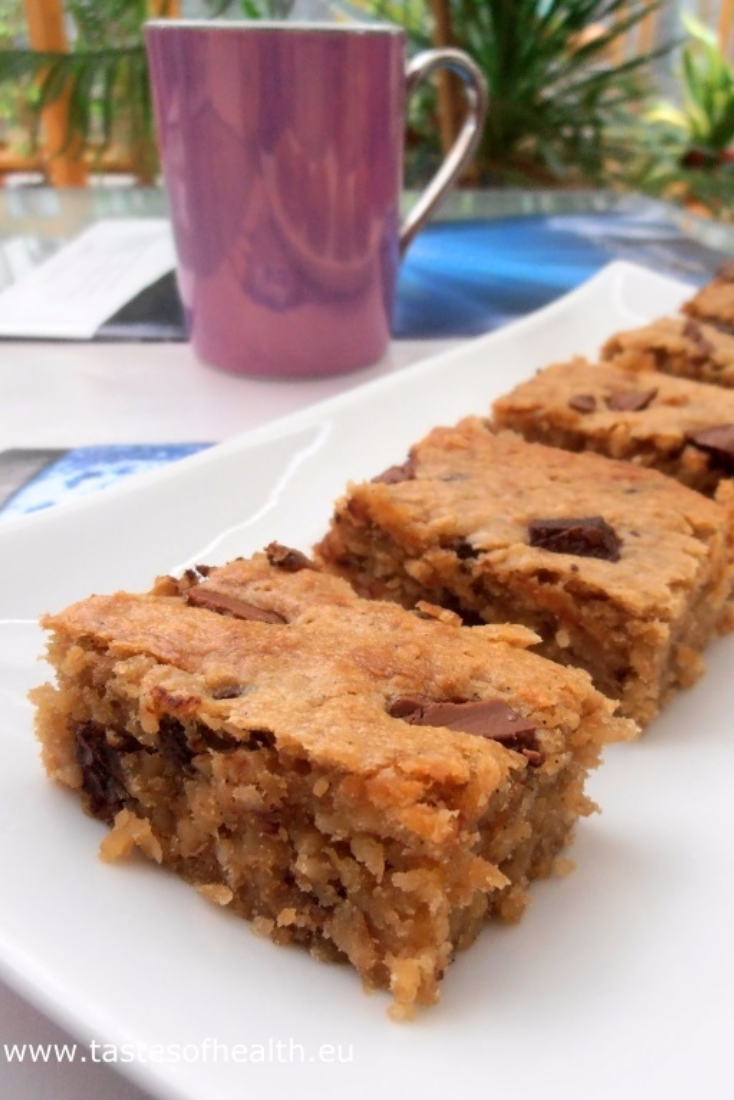
Banana Blondie with Chocolate [gluten free / vegan*]


blondie, blondies, banana blondie, banana blondies, vegan cake, chocolate, vegan blondie, banana, vegan, cake

My adventure with cooking really started with baking in my early teens. That is why it is difficult for me to imagine never eating cakes. However - since I know that cakes are better for your taste buds than your waistline - I try to test out healthier options where plain white flour is replaced by wholemeal or by almond flour. If possible, I also swap butter for healthy oil (e.g. rapeseed, though it doesn’t always work due to its strong smell), and I always try to use less sugar.

So I was extremely happy when I came across a recipe for blondies that neither requires butter nor flour. To make it vegan, I made some additional changes and at the end the cake turned out great: moist and fudgy. 

I know you may be skeptical about cakes without eggs, flour or butter. And I agree that they taste differently. But differently doesn't always mean bad. So even if you are one of the people thinking that vegan cakes are not really for you as they are “too healthy”, I think you will be nicely surprised.

* The cake is 100% vegan if you use vegan chocolate.

INGREDIENTS (for 16 small pieces):

2 bananas,
120g rolled oats,
1tsp baking powder,
40g demerara sugar,
60ml maple syrup,
150g smooth peanut butter,
1 tsp vanilla extract,
100g coconut cream (the thick part of the coconut milk that collects on top of a tin),
40g chopped chocolate (if the cake has to be 100% vegan, use vegan chocolate).

METHOD:
  1. Preheat the oven to 200C (180C for fan ovens) and line a 14x24cm (or similar small) baking tin with parchment paper.
  2. Put all the ingredients except for the chocolate to a food processor and process till smooth.
  3. Add the majority of the chocolate pieces to the batter and stir.
  4. Pour it into the prepared tin, smooth the top and sprinkle with the rest of chocolate.
  5. Put the tin to the hot oven for 20-25 minutes.
  6. Enjoy!
blondie, blondies, banana blondie, banana blondies, vegan cake, chocolate, vegan blondie, banana, vegan, cake


This cake was inspired by Cafe Delites recipe.

Thursday, 24 March 2016

Chocolate Cupcakes [gluten free]

cupcakes, chocolate cupcakes, gluten free cupcakes, chocolate gluten free cupcakes, gluten free


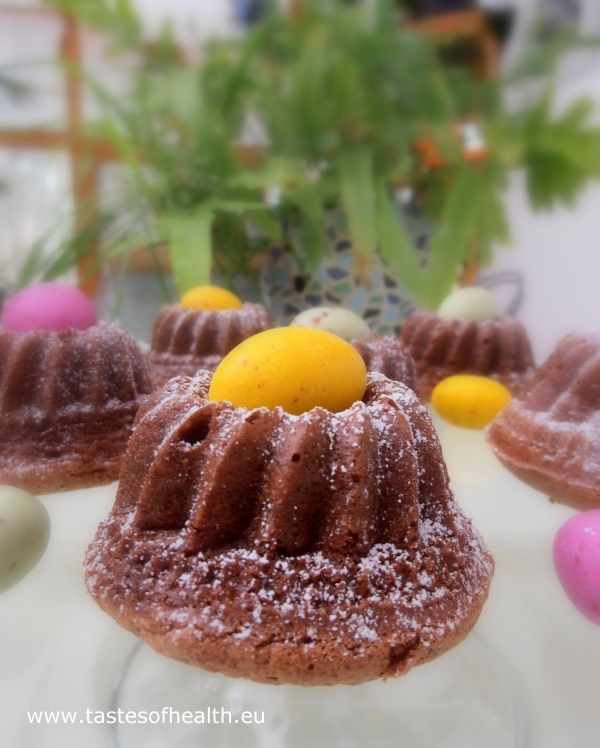
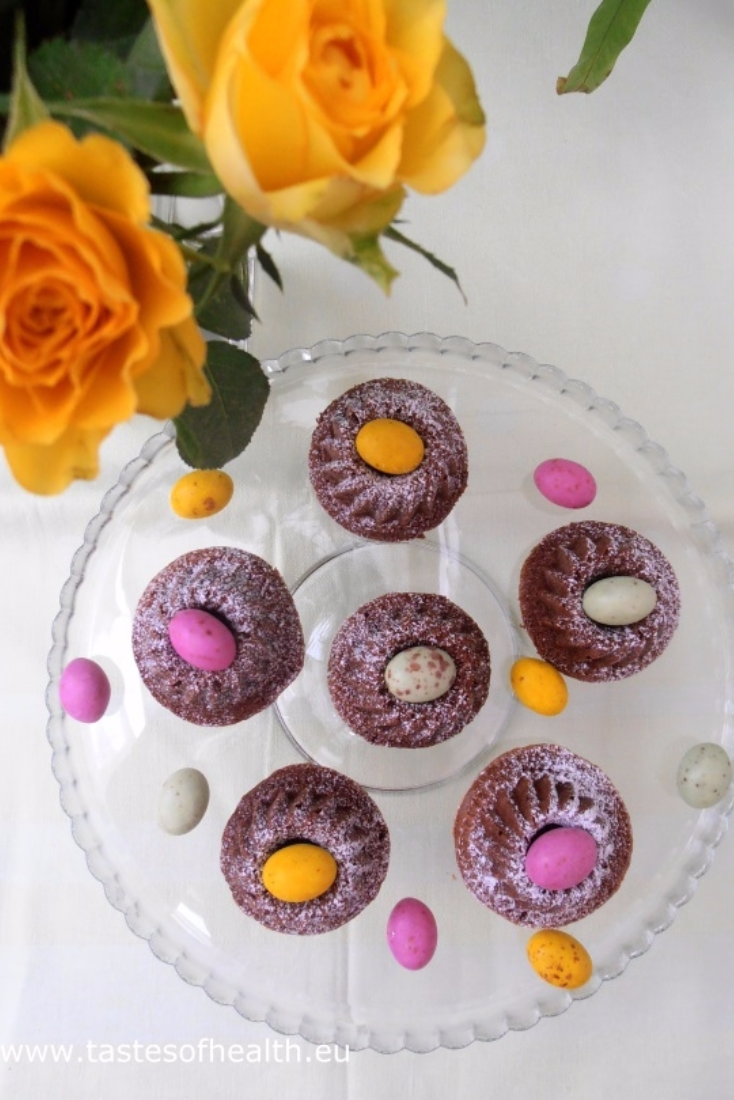
A few weeks ago I bought some new silicone cupcake forms. They are really cute as they look like forms for tiny Bundt cakes or Polish babka: fluted and ring shaped, perfect for Easter. I couldn’t wait to use them to see how the tiny babkas would look like.

Therefore, when I came across an interesting gluten free recipe* for cupcakes, I decided to give it a go. The recipe requires quite a lot of eggs and that is why even though there is no baking agent added, the cupcakes rose beautifully. They did fall afterwards but only a tiny bit. After they were baked, we couldn’t resist and tried them while they were still hot. And together with my husband we quickly agreed they needed something to be served with, like e.g. custard, as they were very delicate in texture. But when we ate them a day later, they had a completely different texture: moist and much heavier, and in truth, I preferred them that way.

P.S. There is not a lot of sugar used in this recipe. Therefore, if you prefer your bakes to be sweet, you may want to use some melted milk chocolate as icing on your baked cupcakes.

INGREDIENTS (for 12 pieces):

100g dark chocolate,
100g soft butter,
120 g sugar,
6 eggs, yolks and whites separated,
100g ground almonds,
butter and sugar for the cupcake forms,
icing sugar for dusting.

METHOD:
  1. Melt the chocolate over a pan of hot water, set aside to cool down.
  2. If you are using silicone cupcake forms, you don’t have to prepare them special way, otherwise grease them and sprinkle with sugar.
  3. Preheat and oven to 180C (160C for fan ovens).
  4. Beat the butter with approx. half of the sugar for a few minutes until the mixture gets fluffy; one by one add the egg yolks and then the cool chocolate, beat till everything is combined.
  5. Whisk the egg whites till stiff, add the rest of the sugar and whisk for 2 minutes longer.
  6. Add the third of the whisked egg whites and third of the ground almonds to the bowl with chocolate mixture, gently stir with a spatula. Repeat the process twice till you have used the egg whites and almonds.
  7. Divide the batter between 12 cupcake forms and put to the hot oven for 25-30 minutes until a wooden stick inserted to a cupcake comes out clean.
  8. Dust with icing sugar, or - if you prefer them to be sweeter – pour melted chocolate on top.
cupcakes, chocolate cupcakes, gluten free cupcakes, chocolate gluten free cupcakes, gluten free

* The recipe comes from a Polish cookbook "Ciasteczka - wyszukane smakoÅ‚yki z caÅ‚ego Å›wiata"

Wednesday, 24 February 2016

Healthy Avocado Brownies [gluten free]


avocado, avocado brownies, brownie, brownies, chocolate, gluten free, healthy, healthy brownies, recipe, recipes

Who doesn’t love brownies? For sure I don’t belong to this group of people because I love them like almost everything else that contains chocolate. I especially adore brownies that my daughters have baked for the last few years. Their brownies are moist, chocolaty and rich. They are unfortunately also full of calories and fat as there is butter and plenty of sugar in them… So whenever I have those brownies, my guilt grows proportionately to the number of pieces I eat.

That’s why when I came across a brownie recipe that uses avocado instead of butter, I quickly had to test it out. To be honest I wasn’t ecstatic about the final outcome: I used chocolate with a very high percentage of cocoa solids and the cake was on the edge of being bitter. As I really liked the concept of healthier brownies, I didn’t want to give up and adjusted the recipe to make it sweeter without adding any more sugar. So I used a different type of chocolate and added lots of nuts as well as cranberries. That strategy worked really well: the result of my second attempt was most delicious.

INGREDIENTS (for 16 pieces):

100g dark chocolate (no more than 65% cocoa),
2 medium, ripe avocados, peeled and roughly mashed,
150g sugar,
2 tsp vanilla extract,
2 eggs,
40g cocoa powder,
45g almond flour or ground almonds,
40g dried cranberries,
100g mixed nuts (cashews, pistachios, Brazil nuts), roughly chopped,

METHOD:
  1. Preheat an oven to 175 Celsius degrees (or 150 for fan ovens).
  2. Line a small (e.g. 14cm x 24cm) baking tray with a parchment paper.
  3. Melt the chocolate in a microwave or over a pan of simmering water.
  4. Put to a food processor the avocados, sugar and vanilla extract; process them till smooth.
  5. Stir in the melted chocolate then add the eggs and process again till everything is combined.
  6. Add the cocoa powder and almond flour, mix well until combined.
  7. Stir in the dried cranberries and nuts; transfer to the baking tray and smooth the top.
  8. Bake for 30-35 minutes.

brownie, brownies, healthy brownies, avocado brownies, recipe, recipes, healthy, gluten free, avocado, chocolate


Based on a Half Baked Harvest's recipe  

Subscribe to our Delicious and Healthy Recipes Newsletter

* indicates required


Wednesday, 27 January 2016

Pistachio Cookies [gluten free]


pistachio, cookies, cookie, biscuits, biscuit, pistachio cookies, Italian

Whenever I go on holiday or for a short break, I prefer to go to a different destination each time. There are simply so many wonderful places to visit and there are only so few days of holiday.  But I have some exceptions from this rule and Rome is one of them. I love this city, I could walk there for hours every day and it really doesn’t matter to me that I have already seen some of the places there several times.

While we were wandering around Rome a few years ago, we came across a bakery. It was really small and not fancy at all but the biscuits on the display looked really appetizing and - as we checked later – they tasted divine.  We ended up going there almost every day, we also recommended it to everyone who was going to Rome. Oh, I didn’t mention this was also Julia Robert’s favorite cookie place when she was filming “Eat, Pray, Love” in Rome.

So whenever we went to the Eternal City, this little bakery was a staple point to visit, almost like Fountain di Trevi or the Colosseum.  And then last year we found out it was not there anymore. Supposedly it moved to a different location but we never found it… We have missed all their biscuits so much that I knew I would have to try to recreate at least the favorite one: pistachio cookies. I adapted the below formula from an Italian recipe for almond biscuits. They are probably not the same as the original recipe, but I can assure you they taste wonderfully of pistachios and Rome.  

INGREDIENTS (for approx. 25 cookies):

250g pistachio nuts,
150g icing sugar,
2 egg whites,
extra icing sugar for coating.

METHOD:
  1. Process the pistachio nuts in a food processor until you get “pistachio flour”.
  2. Add the icing sugar and stir.
  3. Whisk the egg whites with the electric mixer till stiff.
  4. Gradually add the egg whites into the pistachio and sugar mixture; stir till all ingredients are combined and you end up with a sticky dough.
  5. Let the dough rest for 12 hours in a fridge.
  6. Preheat an oven to 160 Celsius degrees.
  7. Form small balls from the mixture (approx. walnut size), coat them in icing sugar, place on a baking sheet covered with parchment paper and flatten slightly.
  8. Bake in the hot oven for 15 minutes, the cookies shouldn’t get golden so they remain soft inside.
pistachio, cookies, cookie, biscuits, biscuit, pistachio cookies, Italian


Subscribe to our Delicious and Healthy Recipes Newsletter

* indicates required


Friday, 11 December 2015

Marzipan Cookies [gluten free]


biscuits, cookies, almond biscuits, marzipan, marzipan cookies, almond cookies, recipe, recipes


I didn’t even plan to bake these biscuits. I wanted to make Italian almond cookies but didn’t read the recipe carefully enough when I came across it some time ago, and didn’t notice the batter had to rest for 12 hours. I simply didn’t have the time as I already had a craving for almond tasting biscuits. So I had no choice, but to find a satisfactory replacement.

In one of my Polish cookbooks* I found a marzipan cookies recipe that met my needs, meaning they could be ready to eat in 30 minutes. I did change it slightly: I used half of the sugar and omitted the chocolate glazing as I felt they would be sweet enough anyway. I was extremely happy with the result: the biscuits were crunchy on the outside but soft and chewy on the inside. And even though I am still planning to make the real Italian almond cookies, I know, I will make this fast and delicious marzipan variation often, too.

INGREDIENTS (for 25 pieces):

250g marzipan, cut into pieces,
75g sugar,
1 egg white,
0.5 tsp grated lemon rind,
0.5 tsp almond flavoring,
Icing sugar for sprinkling.

METHOD:
  1. Put all the ingredients (except from the icing sugar) to a bowl and beat with an electric mixer until everything is well combined.
  2. Preheat an oven to 180 Celsius degrees (160 for fan ovens) and line a baking tray with parchment paper.
  3. Take a walnut size portion of the batter and with wet hands roll into a ball, place on the tray and flatten slightly; repeat with the rest of the batter.
  4. Bake the biscuits in the hot oven for 20 minutes; when cooled down, sprinkle with icing sugar.
* "Ciasteczka - wyszukane smakołyki z całego świata"

biscuits, cookies, almond biscuits, marzipan, marzipan cookies, almond cookies, recipe, recipes


Friday, 9 October 2015

4 Ingredients Peanut Butter and Amaranth Bars [gluten free]


amaranth, peanut butter, chocolate, healthy diet, recipe, recipes, health, gluten free


When I was wondering who would like these bars the most, I couldn’t make up my mind. For obvious reasons this is a great option for peanut butter and chocolate lovers as well as everybody who has a sweet tooth. But including amaranth in this recipe and using high quality ingredients makes it a healthy treat so whoever is into healthy diet, will also be extremely happy with them. And also, you need only 4 ingredients and max. 15 minutes to make these bars so either people who don’t like complicated recipes or those who don’t like to (or can’t) spend too much time in the kitchen should be ecstatic as well.

So I still don’t know which group would like them the most. But what I do know is that my family loved them: they disappeared in no time!

INGREDIENTS (for 16 bars):

160g peanut butter,
100g honey,
30g amaranth popping,
100g dark chocolate (60% cocoa).

METHOD:
  1. Cover a bottom and sides of a small baking tray (I used 14 cm x 23cm) with baking parchment.
  2. Put the peanut butter and honey to a pan and warm up on a medium heat until runny (but don’t boil them).
  3. Add the amaranth popping and stir well.
  4. Transfer it into the prepared tin and smooth with the back of a spatula.
  5. Melt the chocolate in the microwave or over a pan of simmering water and pour over the amaranth mixture.
  6. Spread it and leave in the fridge for at least 30 minutes.
amaranth, peanut butter, chocolate, healthy diet, recipe, recipes, health, gluten free

These bars have been inspired by a recipe from www.simplyquinoa.com

Wednesday, 30 September 2015

Egg Pancake with Cottage Cheese and Fruit [gluten free]


egg, breakfast, healthy breakfast, pancake, gluten free


Breakfast is the most important meal of a day. Unfortunately many of us either forget about it, or simply think they don’t have enough time in the morning to prepare something healthy, tasty and nutritious. But in truth this is only an excuse because proper breakfast can be prepared in minutes. And the below recipe is just one example of such a breakfast recipe.

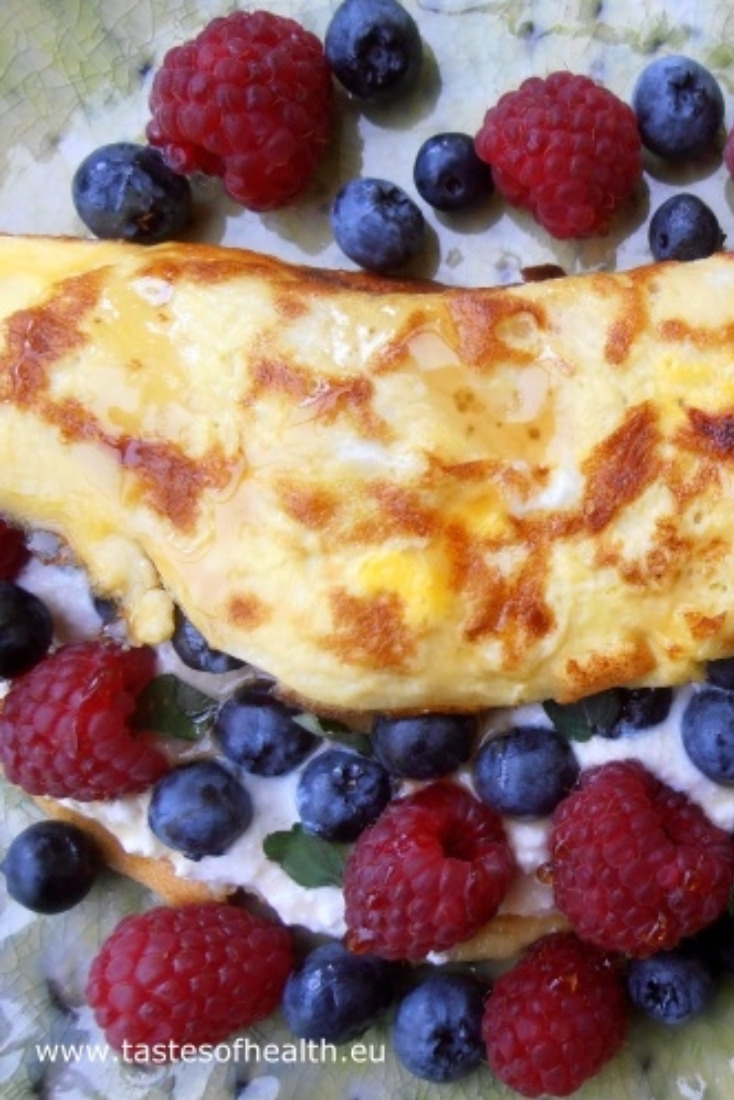
The base of the recipe is something between a pancake and an omelette, I call it Egg Pancake as it is made only with an egg and a drop of milk, but it is very thin just like pancakes are. It is topped with cottage cheese (for extra proteins) and berries (for vitamins). Because there is no flour added to this pancake, people with gluten intolerance can eat it, too. Making this dish takes a few minutes only but you end up with a delicious and super healthy breakfast that will give you lots of energy to start your day very well.

INGREDIENTS (for 1 portion):

1 egg,
1 tbsp milk,
a drop of olive oil,
3 tbsp cottage cheese,
0.5 tsp honey,
pinch of cinnamon,
raspberries, blueberries, mint leaves,
extra honey for serving.

METHOD:
  1. In a cup beat quickly with a fork the egg and milk.
  2. Mix the cottage cheese with the honey and cinnamon.
  3. Put a drop of olive oil on an 18cm-diameter non-stick frying pan (you can use a smaller one but it shouldn’t be bigger as the pancake will be very thin and difficult to handle) and smear it all over the frying pan with a paper towel.
  4. Heat the frying pan and pour the beaten egg.
  5. Fry the pancake till it sets, gently flip it over the other side with a spatula. To prevent the pancake from breaking, pry the edge of the pancake with the spatula at first.
  6. Place the pancake on a plate, cover half of it with the cottage cheese, put the fruit and mint leaves on top and cover with the other half of the pancake.
  7. Serve with extra honey on top.
egg, breakfast, healthy breakfast, pancake, gluten free


Friday, 22 May 2015

Gluten Free Lemon Drizzle Cake


Lemon drizzle cake, gluten free, gluten free lemon drizzle cake


Lemon Drizzle Cake has been one of my family’s favourite cakes for years now. It is loved so much that my daughters have even asked me a few times to make it for their birthday instead of any other creamy or chocolate birthday cakes.

The recipe for the very much loved cake comes from a magazine from many years ago and it has been perfect until I thought of making it healthier and gluten free. I was a bit anxious about the result of replacing the regular flour with a mixture of gluten free flours. Simply, when you have a recipe with ingredients that work perfectly you worry that changing anything may destroy the final outcome. In case of Lemon Drizzle Cake I was afraid that using gluten free flour mixture could make this cake dry. I thought about it so much that I actually dreamt the solution: ground almonds! They give moisture to the cake so it is equally delicious as the regular version but can also be enjoyed by people who can’t tolerate gluten.

INGREDIENTS (for 16 portions):

Cake:
120ml sunflower oil,
60g corn flour,
40g rice flour,
60g ground almonds,
2.5tsp baking powder,
170g sugar,
2 eggs,
6 tbsp milk,
grated rind of 1 lemon.

Icing:
100g sugar,
4 tbsp lemon juice.

METHOD:
  1. Preheat an oven to 180 Celsius degrees (160 for fan oven).
  2. Line with baking paper a 20cm x 26cm cake tin.
  3. Put all the cake ingredients to a food processor and process for 2-3 minutes. You could also use an electric mixer to beat the batter.
  4. Transfer the batter to the prepared tin, put to the oven and bake for 30 minutes.
  5. Prepare the icing by mixing the sugar and lemon juice together.
  6. Spread the icing evenly on the baked but still hot cake, let it cool down.
Lemon drizzle cake, gluten free, gluten free lemon drizzle cake


Friday, 20 February 2015

Quinoa Chocolate Cake [gluten free]


quinoa, cake, chocolate, gluten free


When I came across a cake made of quinoa, I couldn’t imagine it would be so good as I had only used it previously for savoury dishes. I could understand using millet: sometimes we do have millet with fruit and honey for breakfast, I even bake a tart with millet. But a cake with quinoa?!

I was so curious that I simply decided to give it a try. The result was surprising and delicious: the cake was very moist and rich and you couldn’t taste the quinoa. It only gave a slight “bite” to the cake but this was in truth an extra value added to its texture.

If a thought of the wonderful taste of this cake hasn’t convinced you yet to bake it, maybe its healthiness will: it contains a super grain but it doesn’t include any flour or butter (I replaced it with healthy rapeseed oil). So what can be better than a piece of an (almost) guilt-free chocolate cake?

INGREDIENTS (for 8-10 portions):

130g quinoa,
250ml water,
dash of olive oil,
80ml milk,
4 eggs,
1tsp vanilla extract,
150ml rapeseed oil,
175g Demerara sugar,
85g cocoa powder,
1.5tsp baking powder,
0.5 tsp baking soda,
0.5 tsp salt.

Icing:
100g dark chocolate
100g white chocolate
6 tbsp milk,
optionally 0.5 tsp beetroot juice (or a few drops of pink food colorant)

METHOD:
  1. Prepare the quinoa: put it to a fine mesh strainer, rinse it under running cold water rubbing the seeds with each other with your fingers (for at least 1 minute) and drain well. Heat a drizzle of olive oil in a pot over a medium heat and fry the drained quinoa for about 1 minute till the rest of water evaporates. Add water, 0.25 tsp salt and bring to a boil. Lower the heat and cook covered for approx. 15 minutes. Take it out from the heat and let it rest covered for 5 minutes more. Fluff the quinoa with a fork. The quinoa has to be dry, in case there is still some water left, transfer it to a strainer and let it drain completely.
  2. Preheat an oven to 170 Celsius degrees (fan oven).
  3. Grease a 23cm loose-bottom cake tin with oil and line it with baking paper.
  4. In a food processor combine together milk, eggs and vanilla extract; add oil and cooked quinoa, whizz again until smooth.
  5. Sieve the cocoa, baking powder and baking soda to a bowl; mix it with the sugar and salt, add the quinoa mixture and stir it well.
  6. Pour the mixture to the tin and put to the hot oven. Bake for 40 minutes.
  7. Make the icing: melt each type of chocolate separately with 3 tbsp of milk in a heatproof bowl over a pan of boiling water (if you would like to get pink icing add the beetroot juice or the colorant to the white chocolate).
  8. When the cake is baked, take it out from the oven, leave it in the tin for 10 min. Afterwards put it on a plate and cool. Spread the dark icing and then pour the pink (white) icing in a decorative way.

Based on: Decadent Chocolate Cake by Mel’s Kitchen Cafe.


quinoa, cake, chocolate, gluten free

Tuesday, 10 February 2015

2 in 1 Valentine’s Cake [gluten free]


cake, Valentine's day, chocolate, raspberries, gluten free, recipe, recipes


Right from the beginning I knew exactly what sort of a cake I wanted to make for the Valentine’s Day: it had to be a combination of chocolate and raspberries, it also had to be rich and heavy from one hand and light and airy from the other. Why such a combination? – Chocolate is supposed to be an aphrodisiac so it is perfect for such an occasion, raspberries are red and this is a colour of love. As far as textures are concerned, I was certain that - as per “the opposites attract” saying – these characteristics will work also for a cake!

I obviously wanted the cake to be of a heart shape but unfortunately the form I used was a bit too shallow (only 3.5cm high) so I was able to use only half of the raspberry mousse. Of course it wasn't wasted as even eaten by itself was delicious J. But I think it would be preferable to use the whole amount on top of the chocolate base, even if you were to make a sacrifice and not have the heart shape. At least this is what I am going to do next time to enjoy this Valentine’s Cake to the fullest.

INGREDIENTS (for 10-12 portions):

Chocolate base:
100g dark chocolate, broken into pieces,
2 tbsp rum,
90g butter in a room temperature,
120g sugar,
3 eggs, separated,
a pinch of salt,
50g ground almonds,
35g corn flour (or all purpose flour, if you don’t have to have a gluten-free cake),

Raspberry mousse:
500g raspberries (if frozen than they should be defrosted),
2 tbsp vanilla sugar,
6 sheets of gelatine (or 1 tbsp of gelatine powder),
500g double cream,
80g icing sugar,
extra raspberries for decoration.

METHOD:
  1. Put the chocolate and the rum to a bowl that is placed on top of a pan with barely simmering water; stir occasionally and melt.
  2. While the chocolate is cooling down, beat with an electric mixer the butter with half of the sugar till it is nice and creamy.
  3. Add the egg yolks; beat some more.
  4. Preheat an oven to 180 degrees and grease a baking tin. I used a silicon 29cm heart shaped form but it can be replaced by a 20-22cm diameter round tin with a removable bottom. If you are using the round tin, additionally put a disc of baking paper on its bottom.
  5. Whisk the egg whites with the salt until soft peaks form; add the rest of sugar and whisk till stiff.
  6. Add to the butter mixture the cooled down melted chocolate and the ground almonds, stir well.
  7. Now add 1 tbsp of whisked egg whites and 1 tbsp of the flour, stir gently. Repeat till you have used all the flour; at the end add the rest of the whisked egg whites and mix gently again.
  8. Pour the batter to the prepared form, put it to the oven and bake for 20 minutes.
  9. Put the raspberries to a blender and liquidise them; then press through a fine sieve to eliminate the pits and mix with the vanilla sugar.
  10. Prepare the gelatine as per its packet instruction.
  11. Whisk the double cream until stiff, slowly add the sugar.
  12. Add a few tablespoons of the liquidised raspberries to the pan with dissolved gelatine, stir and then add the rest of the raspberries.
  13. Combine the cream with the raspberries.
  14. Keep the baked base in the tin and when it is cold, pour the raspberry mousse to the tin, smooth the top and put the cake to the fridge for a few hours, preferably overnight.
  15. When set, decorate with raspberries.
cake, Valentine's day, chocolate, raspberries, gluten free,


Saturday, 6 December 2014

Millet Chocolate Mousse Tart (gluten free)


millet, gluten free, chocolate tart, tart,chocolate, recipe, recipes, cake


My first experience with millet was poor: I really didn't like the bitter taste. But having read so many articles about health benefits of eating millet, I decided to give it another try. I did some research and learnt how to prepare it to eliminate the bitter taste: before you cook it, you have to either dry fry it for approx. 1 minute till it releases its aroma, or you have to pour boiling water into a pan with the millet, stir it well, transfer to a fine mesh strainer and drain it. I personally prefer the first method as it is faster and almost fuss-free and this is especially important in the morning when still half asleep I prepare healthy breakfast for my daughter (millet with fruit).

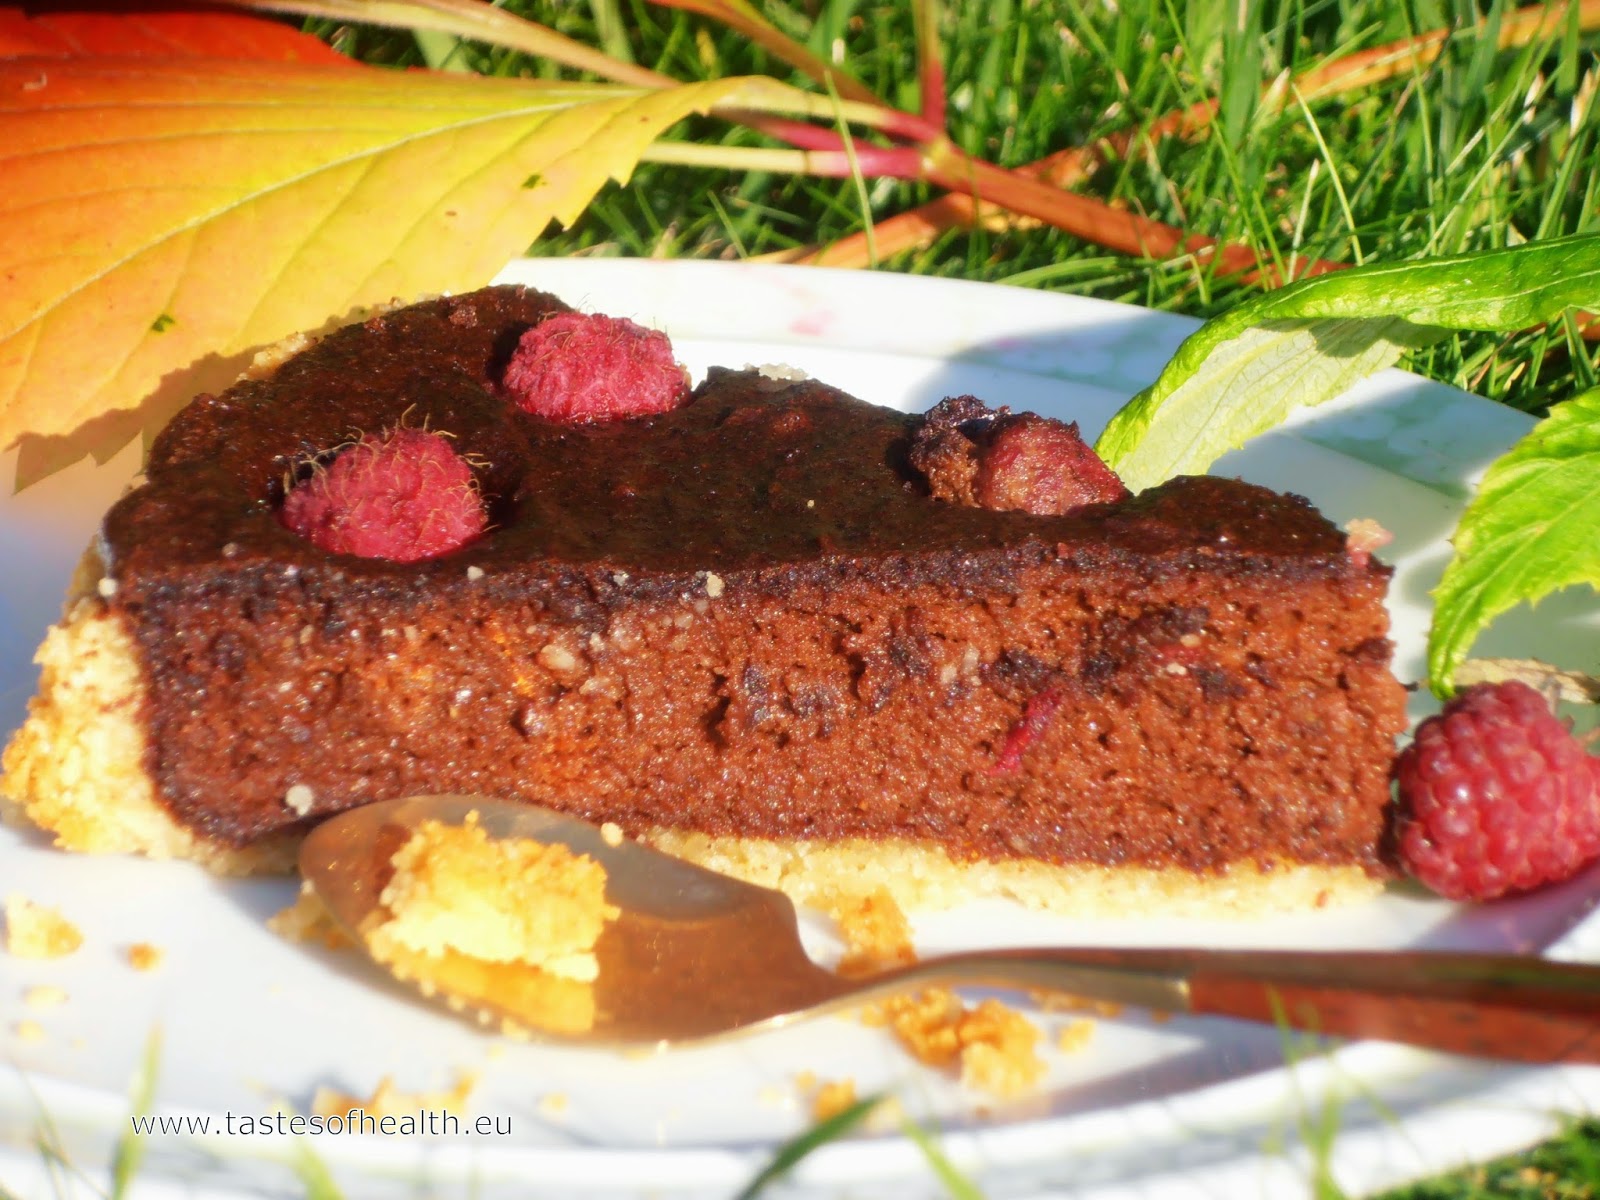
In the recipe below I used millet to make something more complex - a filling for a chocolate tart. Adding whisked egg whites made the millet chocolate mixture light, almost like a mousse and I really liked that. 

Since millet is gluten free I didn't want to “spoil it” by using wheat flour to make a base so I used a recipe with ground almonds instead. The result was very delicious, especially for a millet and chocolate lover: light and airy millet chocolate mousse in a delicate wheat flour-free crust.

INGREDIENTS (8 portions):

Base:
150g ground almonds,
1 tbsp Demerara sugar,
pinch of salt,
0.5 tsp cinnamon,
75g butter.

Mousse:
100g millet,
pinch of salt,
375ml water,
100g dark chocolate,
1 tbsp cocoa,
2 eggs separated,
70ml sunflower oil,
3 tbsp Demerara sugar,
1 tsp baking soda,
0.5 tsp vanilla extract,
some raspberries.

METHOD:
  1. In a bowl mix ground almonds, salt, cinnamon and sugar.
  2. Cut butter into small pieces, add to the dry mixture and work with your fingers through, till it resembles small crumbs.
  3. Put the crumbs together to form a ball.
  4. Grease sides of a 20 cm round baking tin and put a greaseproof paper on the bottom.
  5. Working with your fingers spread the almond dough on the bottom of the tin and raise it slightly (1.5-2 cm) on the sides.
  6. Put the tin with the base to a fridge for 10-15 minutes and start preheating an oven to 175 Celsius degrees.
  7. Put the millet to a frying pan and start heating it up (dry) till it releases aroma.
  8.  Transfer the millet to a pot; pour boiling water mixed with salt and after it reaches the point of boiling, cook gently for 15-20 minutes till the millet absorbs the water and is soft.
  9. Put the base to the oven and bake for 10 minutes.
  10. When the millet is cooked but still hot add the chocolate broken into small pieces, stir well till it melts.
  11. Put the chocolate millet, oil, sugar, cocoa, baking soda, vanilla and egg yolks into a food processor and process it till the mixture is smooth.
  12. Whisk the egg whites till stiff and add half to a bowl with the chocolate mixture, stir gently and then repeat with the other half.
  13. Spread the mixture gently over the baked almond base and put raspberries on top, pressing them down gently.
  14. Bake for 30 min.


millet, gluten free, chocolate tart


Recipe for the almond base comes from craftsy.com