Friday, 29 April 2016

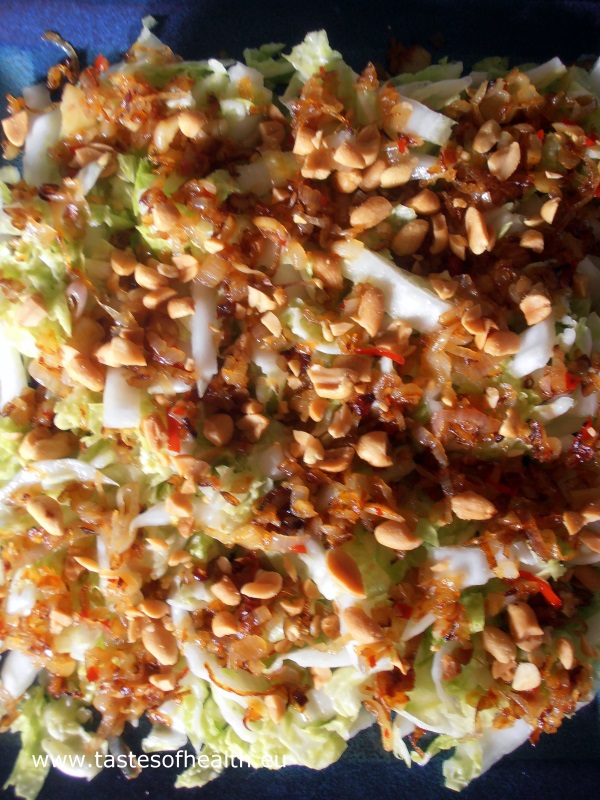
Chinese Cabbage Salad [vegetarian]


Chinese salad, Chinese cabbage, salad, vegetarian, recipe, recipes, healthy


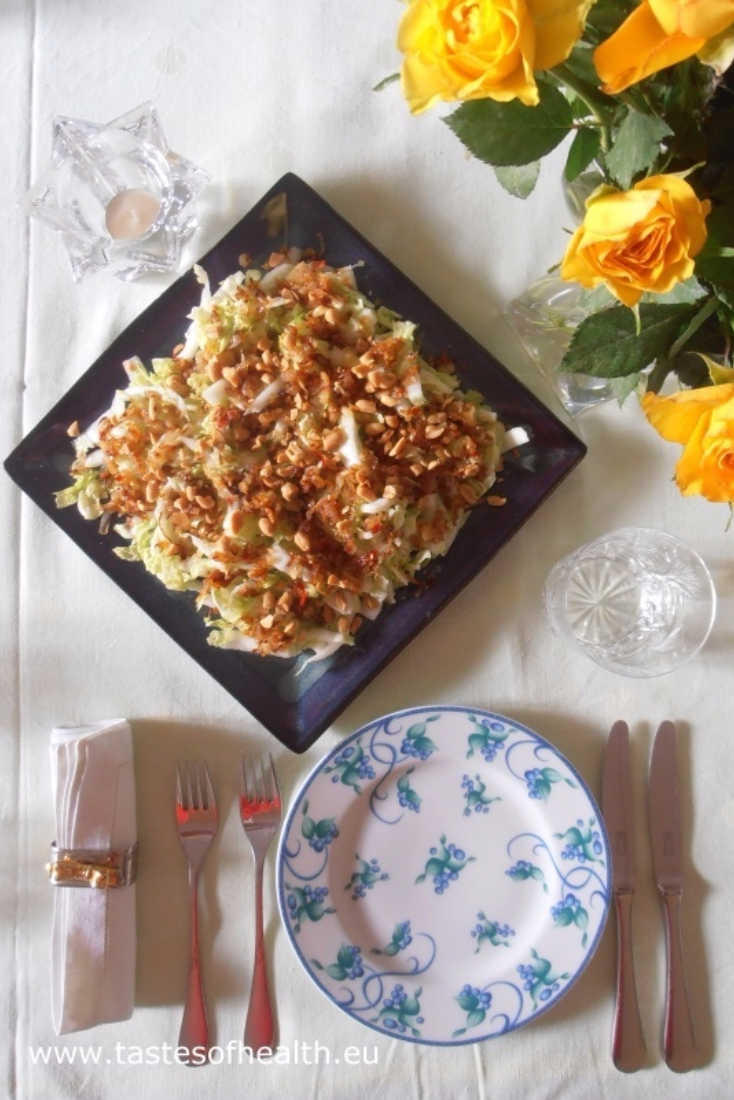
A few weeks ago we had some friends over for dinner. I was planning to make a Peking duck for the main course, and I knew what dessert I was going to make, but somehow I was stuck with a starter. I wanted to make a light salad without any meat or seafood, as having duck for main was already very meat-y. And this was when I realized that I had probably never made a Chinese salad fulfilling these requirements. I looked through some books and finally, I found a recipe that seemed just right.

In the book, a regular cabbage was used, so it had to be blanched after it was shredded. I decided to use a raw Chinese cabbage instead. The salad was very refreshing and light, just as I wanted it to be. And it was indeed a perfect starter for Peking duck!

INGREDIENTS (for 4-6 portions):

2 tbsp vegetable oil,
5 shallots, halved and thinly sliced,
5 garlic cloves, thinly sliced,
0.5 chilli, thinly chopped,
1 Chinese cabbage (weighing approx. 0.5 kg), shredded,
2 tbsp coarsely chopped roasted peanuts,

Dressing:
2 tbsp fish sauce,
grated rind of 1 lime,
2 tbsp lime juice,
120ml coconut milk.

METHOD:

  1. On a medium size frying pan warm up the oil, add the shallots, garlic and chili, and stir fry on a medium heat for 12-15 minutes until the shallots are brown (but not burnt).
  2. In a bowl, mix the dressing ingredients.
  3. Pour the dressing over the cabbage and stir very well.
  4. Transfer the cabbage onto a big serving dish, and sprinkle the top with the fried mixture and the peanuts.
  5. Voila!

Chinese salad, Chinese cabbage, salad, vegetarian, recipe, recipes, healthy

This recipe is based on a recipe from "The Complete Wok and Stir-Fry Cookbook"
Friday, 22 April 2016

Vegetable Salad [vegetarian]


salad, carrots, carrot, parsnip, parsnip, celeriac, apple, apples, mayonnaise, stock, vegetable stock, vegetarian, recipe, recipes, healthy


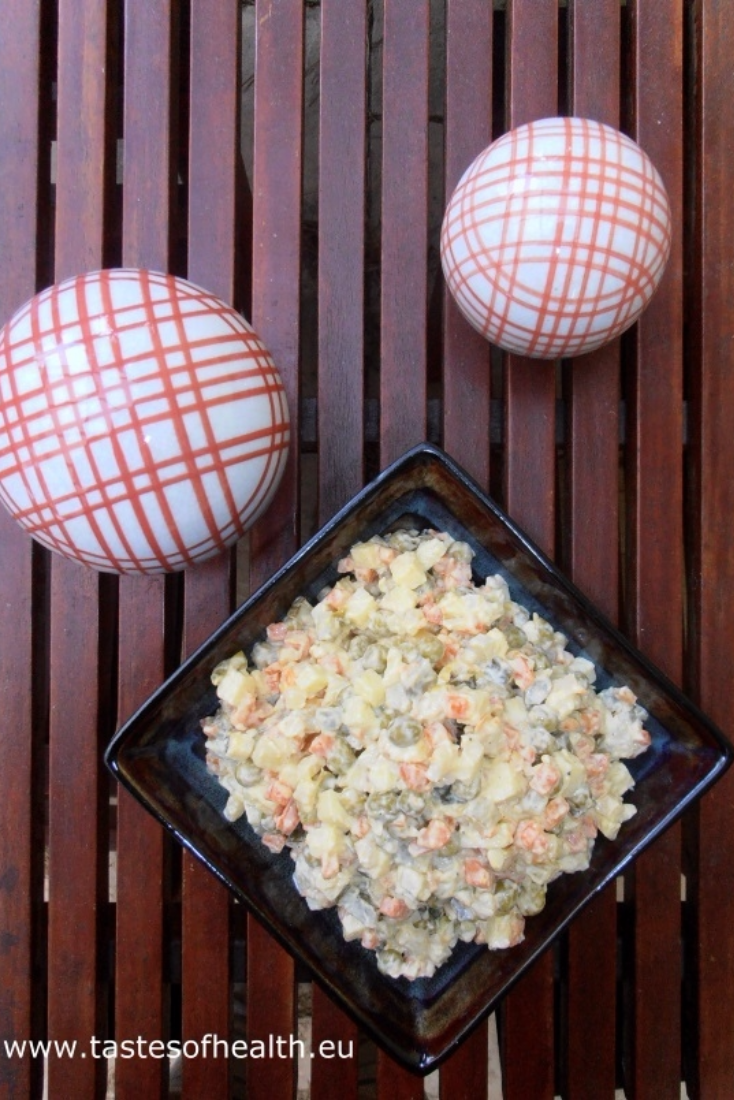
Although I realize that outside my country, this salad is often called 'Russian Salad', here we all know it as 'Vegetable Salad'. It was the most popular salad in Poland for many, many years. No party, celebration or social gathering happened without this dish. Even preparing this salad was a bit of a social occasion, as it was always made in big quantities and very often, at least 2 people were cutting the vegetables and chatting while they were doing it. I remember from my childhood that the women from my family were always cutting the vegetables very thinly because we believed that if the cubes were too big, the salad would not taste as good as it should ;) Nowadays, I actually prefer the salad not to be made of such tiny pieces. It still tastes great, but the preparation doesn’t take as long as it used to in the past.

What I also like about this salad is that you end up with a great by-product – good quality vegetable stock that can be used as a base for many different soups. Obviously, it also works the other way around: you cook the stock that you need and then you use the vegetables to make the salad. Whichever way you are going to do it; you will enjoy the two results!

INGREDIENTS (for 4-6 portion):

4 carrots, peeled,
2 parsnips, peeled,
0.25 celery (approx. 200g), peeled and cut into 2 pieces,
1 small leek*,
1 celery stalk*,
2 apples,
3-4 sour gherkins,
1 tin green peas,
3 tbsp mayonnaise,
salt and pepper.

METHOD:

  1. Put the carrots, parsnips, celery, leek* and celery stalk* to a big pan, pour 1-1.5l of water, add salt and pepper and bring to boil.
  2. Lower the heat and cook the vegetables until they are tender (approx. 20 minutes).
  3. Take the vegetables out from the stock, cool them down.
  4. In the meantime, cut the apples and sour gherkins into 0.5-1 cm cubes. After you chop the gherkins, make sure to squeeze out the liquid.
  5. When the cooked vegetables are cool, cut the carrots, parsnips and the celery into the 0.5 -1cm cubes (the celery stalk and leek can be discarded).
  6. Put all the chopped vegetables, apples and gherkins to a bowl, add the mayonnaise, seasoning and stir well.
* optional, required only if you are making the stock as well.

salad, carrots, carrot, parsnip, parsnip, celeriac, apple, apples, mayonnaise, stock, vegetable stock, vegetarian, recipe, recipes, healthy


Tuesday, 12 April 2016

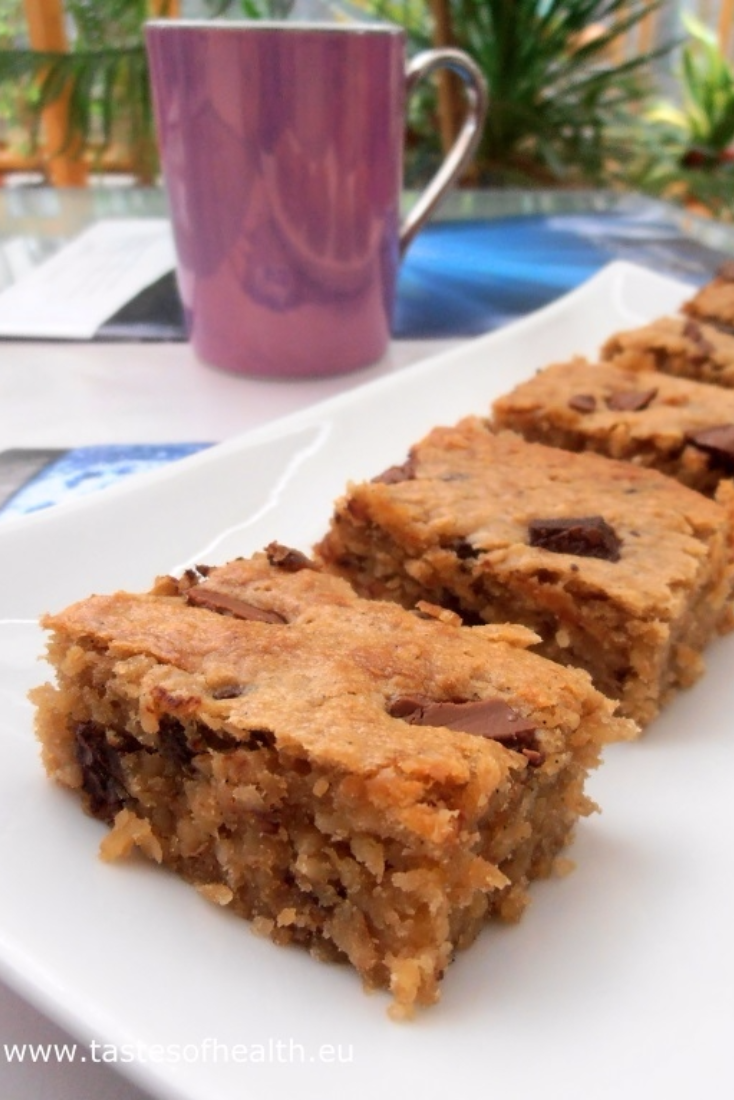
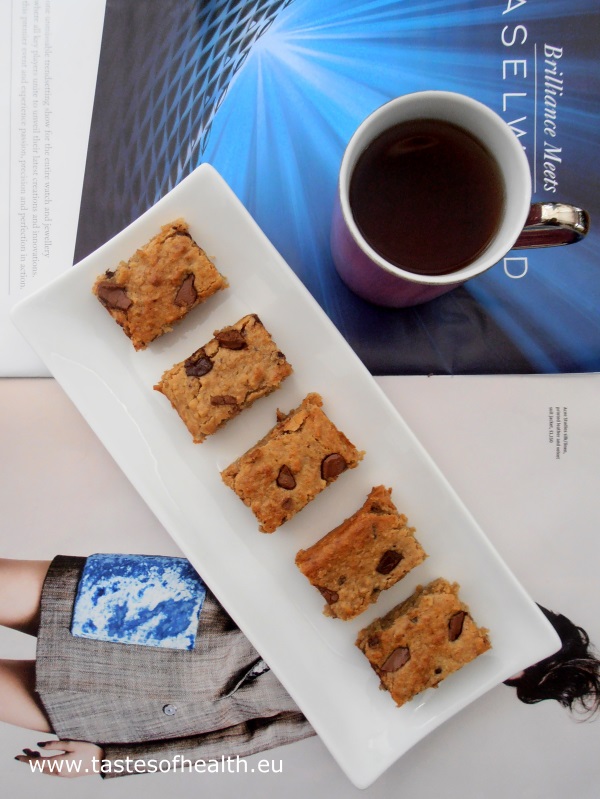
Banana Blondie with Chocolate [gluten free / vegan*]


blondie, blondies, banana blondie, banana blondies, vegan cake, chocolate, vegan blondie, banana, vegan, cake

My adventure with cooking really started with baking in my early teens. That is why it is difficult for me to imagine never eating cakes. However - since I know that cakes are better for your taste buds than your waistline - I try to test out healthier options where plain white flour is replaced by wholemeal or by almond flour. If possible, I also swap butter for healthy oil (e.g. rapeseed, though it doesn’t always work due to its strong smell), and I always try to use less sugar.

So I was extremely happy when I came across a recipe for blondies that neither requires butter nor flour. To make it vegan, I made some additional changes and at the end the cake turned out great: moist and fudgy. 

I know you may be skeptical about cakes without eggs, flour or butter. And I agree that they taste differently. But differently doesn't always mean bad. So even if you are one of the people thinking that vegan cakes are not really for you as they are “too healthy”, I think you will be nicely surprised.

* The cake is 100% vegan if you use vegan chocolate.

INGREDIENTS (for 16 small pieces):

2 bananas,
120g rolled oats,
1tsp baking powder,
40g demerara sugar,
60ml maple syrup,
150g smooth peanut butter,
1 tsp vanilla extract,
100g coconut cream (the thick part of the coconut milk that collects on top of a tin),
40g chopped chocolate (if the cake has to be 100% vegan, use vegan chocolate).

METHOD:
  1. Preheat the oven to 200C (180C for fan ovens) and line a 14x24cm (or similar small) baking tin with parchment paper.
  2. Put all the ingredients except for the chocolate to a food processor and process till smooth.
  3. Add the majority of the chocolate pieces to the batter and stir.
  4. Pour it into the prepared tin, smooth the top and sprinkle with the rest of chocolate.
  5. Put the tin to the hot oven for 20-25 minutes.
  6. Enjoy!
blondie, blondies, banana blondie, banana blondies, vegan cake, chocolate, vegan blondie, banana, vegan, cake


This cake was inspired by Cafe Delites recipe.


Friday, 1 April 2016

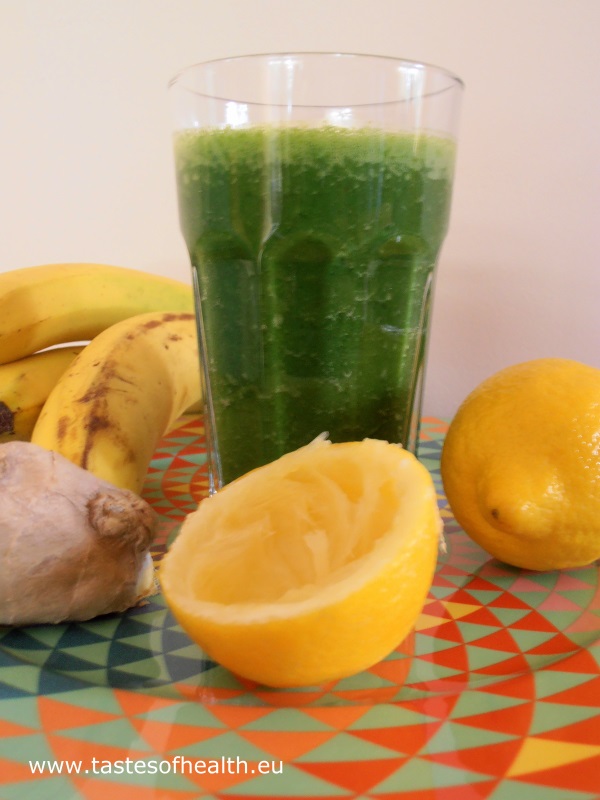
Spinach, Ginger and Banana Smoothie


smoothie, spinach, banana, ginger, spinach smoothie, banana smoothie, healthy breakfast, breakfast smoothies


I must admit that only recently I started making smoothies but I am already asking myself why I have waited so long?! Smoothies are a great way to very quickly have a delicious and packed with nutrients drink or – I would even say – light meal:
very quickly – because it takes literally a few minutes to put all the ingredients to a blender and process them till they are smooth,
delicious – because there can be so many different combinations of ingredients that surely everybody will find something to their liking,
packed with nutrients – because smoothies are made of fresh vegetables and fruit that are full of everything that is good for us, and finally
light meal – they are pretty filling so you can easily have it for healthy breakfast or even replace another meal with it, especially if you had (or plan to have) a heavier lunch or dinner.

The below combination of ingredients works beautifully and I am pretty sure that even somebody who is not keen on spinach will enjoy this healthy smoothie.

INGREDIENTS (for 1 portion):

50g spinach,
1 banana,
200ml coconut water,
juice from 0.5 lemon,
0.5 tsp grated ginger.

METHOD:
  1. Put all the ingredients to a blender and process on high for 1-2 minutes until you have a smooth drink.
smoothie, spinach, banana, ginger, spinach smoothie, banana smoothie, healthy breakfast, breakfast smoothies


Thursday, 24 March 2016

Chocolate Cupcakes [gluten free]

cupcakes, chocolate cupcakes, gluten free cupcakes, chocolate gluten free cupcakes, gluten free


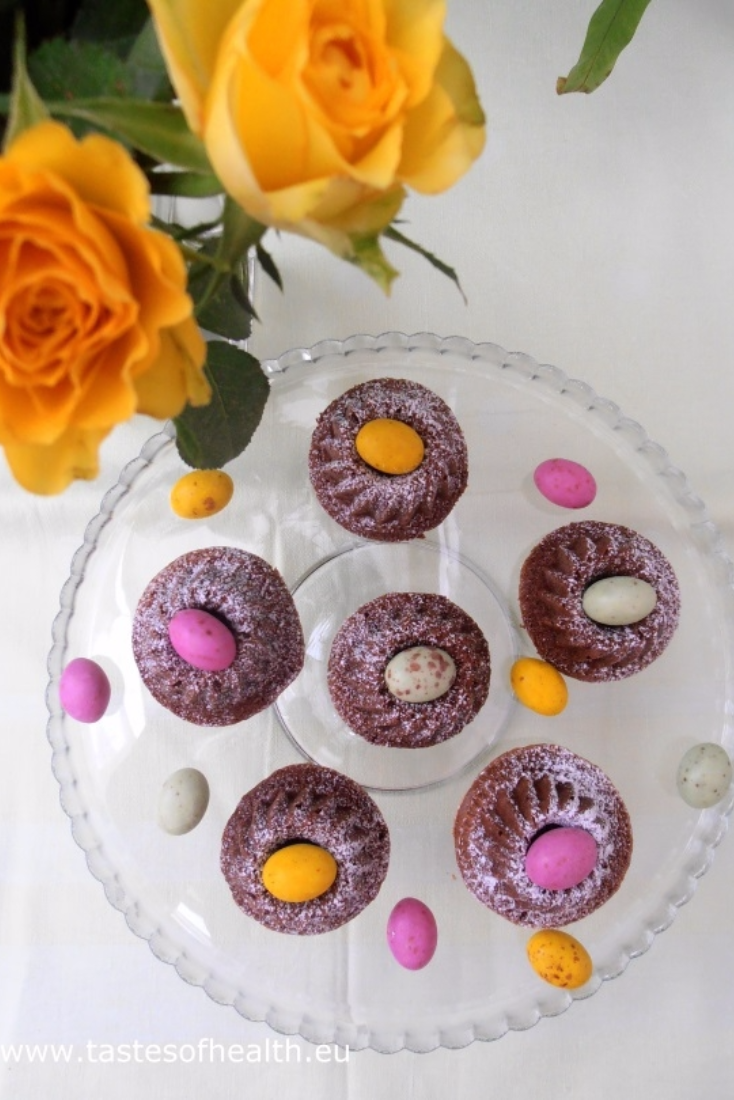
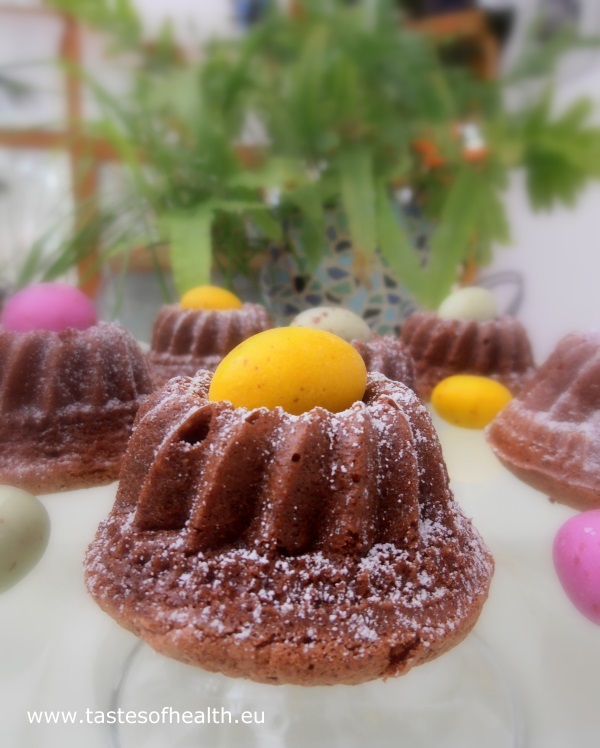
A few weeks ago I bought some new silicone cupcake forms. They are really cute as they look like forms for tiny Bundt cakes or Polish babka: fluted and ring shaped, perfect for Easter. I couldn’t wait to use them to see how the tiny babkas would look like.

Therefore, when I came across an interesting gluten free recipe* for cupcakes, I decided to give it a go. The recipe requires quite a lot of eggs and that is why even though there is no baking agent added, the cupcakes rose beautifully. They did fall afterwards but only a tiny bit. After they were baked, we couldn’t resist and tried them while they were still hot. And together with my husband we quickly agreed they needed something to be served with, like e.g. custard, as they were very delicate in texture. But when we ate them a day later, they had a completely different texture: moist and much heavier, and in truth, I preferred them that way.

P.S. There is not a lot of sugar used in this recipe. Therefore, if you prefer your bakes to be sweet, you may want to use some melted milk chocolate as icing on your baked cupcakes.

INGREDIENTS (for 12 pieces):

100g dark chocolate,
100g soft butter,
120 g sugar,
6 eggs, yolks and whites separated,
100g ground almonds,
butter and sugar for the cupcake forms,
icing sugar for dusting.

METHOD:
  1. Melt the chocolate over a pan of hot water, set aside to cool down.
  2. If you are using silicone cupcake forms, you don’t have to prepare them special way, otherwise grease them and sprinkle with sugar.
  3. Preheat and oven to 180C (160C for fan ovens).
  4. Beat the butter with approx. half of the sugar for a few minutes until the mixture gets fluffy; one by one add the egg yolks and then the cool chocolate, beat till everything is combined.
  5. Whisk the egg whites till stiff, add the rest of the sugar and whisk for 2 minutes longer.
  6. Add the third of the whisked egg whites and third of the ground almonds to the bowl with chocolate mixture, gently stir with a spatula. Repeat the process twice till you have used the egg whites and almonds.
  7. Divide the batter between 12 cupcake forms and put to the hot oven for 25-30 minutes until a wooden stick inserted to a cupcake comes out clean.
  8. Dust with icing sugar, or - if you prefer them to be sweeter – pour melted chocolate on top.
cupcakes, chocolate cupcakes, gluten free cupcakes, chocolate gluten free cupcakes, gluten free

* The recipe comes from a Polish cookbook "Ciasteczka - wyszukane smakoÅ‚yki z caÅ‚ego Å›wiata"

Friday, 18 March 2016

Smoked Salmon and Tomato Salad


salad, winter salad, tomatoes, smoked salmon, smoked salmon salad, tomato salad, healthy salad

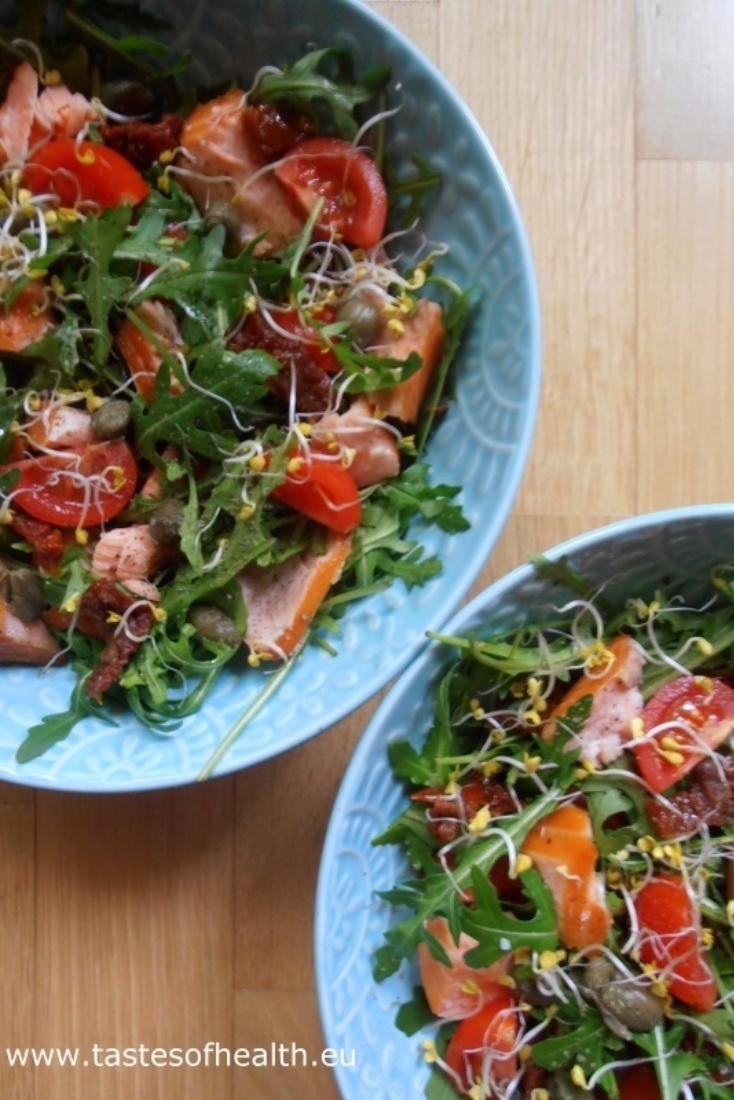
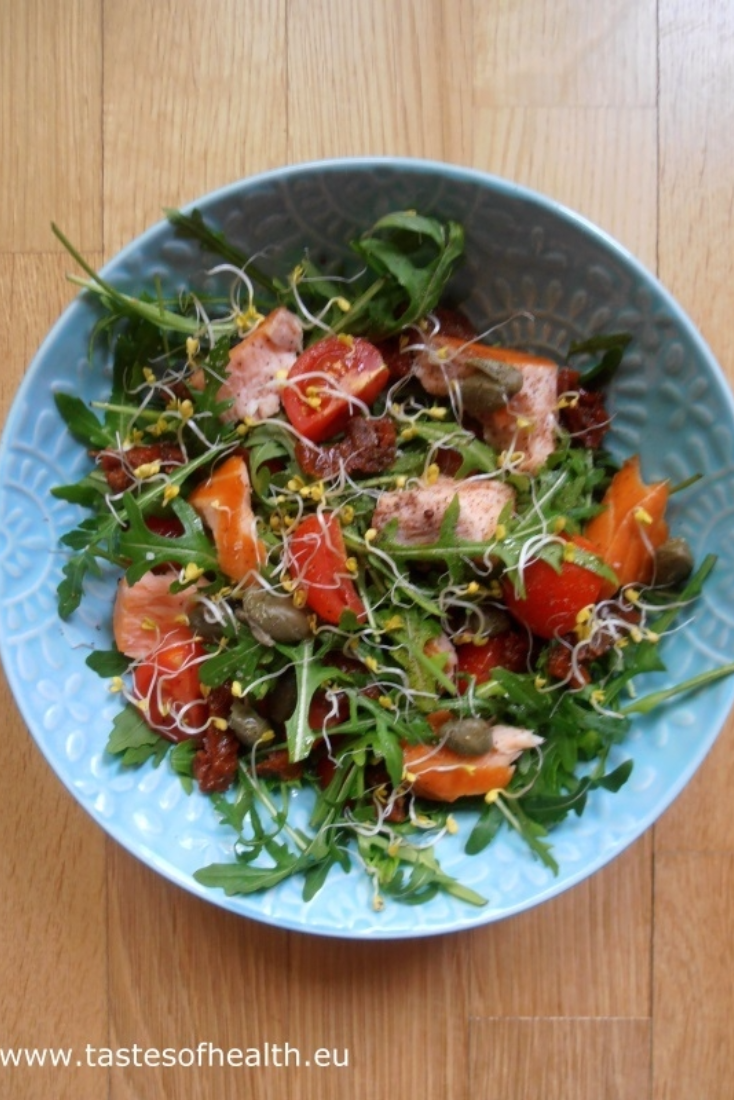
Although when I want to have something light to eat in winter months, I usually choose soups, I do fancy salads from time to time. The below recipe is, in my opinion, a great option for a winter salad: it is light but - thanks to the smoked salmon - substantial enough to keep you going and not feeling hungry for a few hours. The tomatoes, capers and lemony, slightly spicy dressing balance out the oily fish so you end up with a pretty refreshing and very delicious salad that can be made in a few minutes and is impressive enough to be served to your guests too.


Smoked Salmon and Tomato Salad

Ingredients

  • 50g rocket,
  • 150g cherry tomatoes, cut in halves or quarters, if bigger,
  • 40g sundried tomatoes, cut into strips,
  • 150g hot-smoked salmon, flaked,
  • 1 tbsp capers,
  • 2 tbsp radish sprouts,
  • salt and pepper,
  • 1 tbsp olive oil,
  • 1 tbsp lemon juice,
  • 2 tsp sweet chilli sauce.
Serves 2.

Instructions

  1. Arrange on two plates the first six ingredients.
  2. Mix the olive oil, lemon juice and sweet chilli sauce in a small bowl till combined to make a dressing and pour over the salad, season.

salad, winter salad, tomatoes, smoked salmon, smoked salmon salad, tomato salad, healthy salad


Tuesday, 15 March 2016

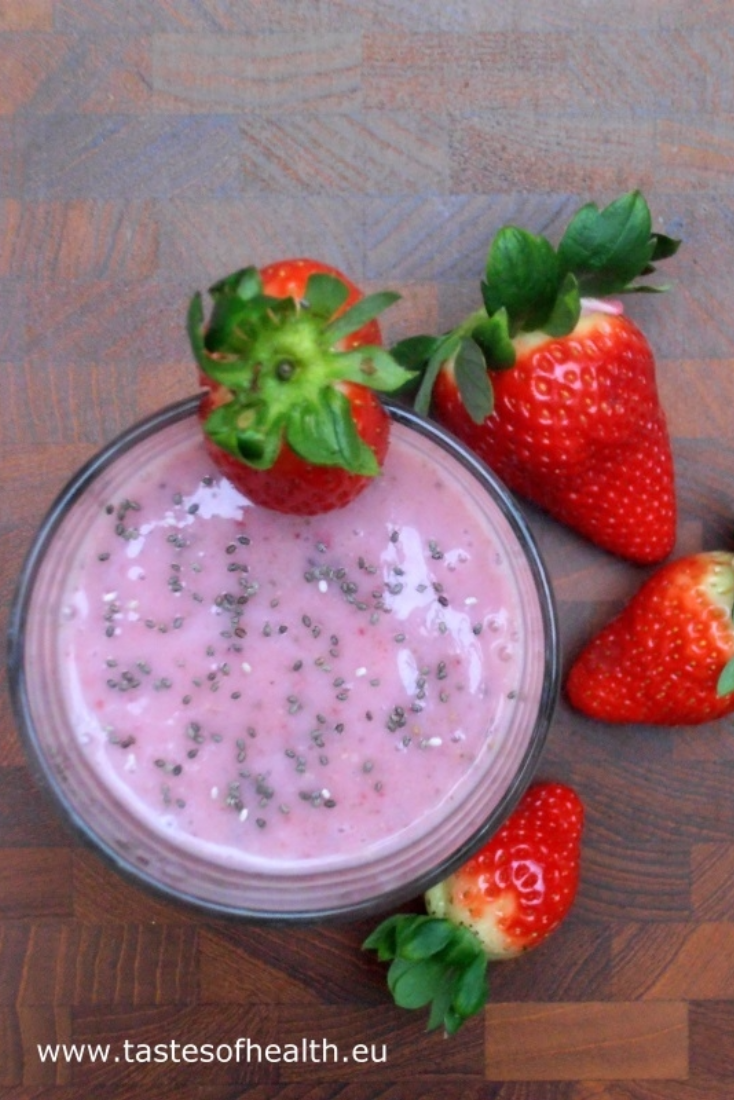
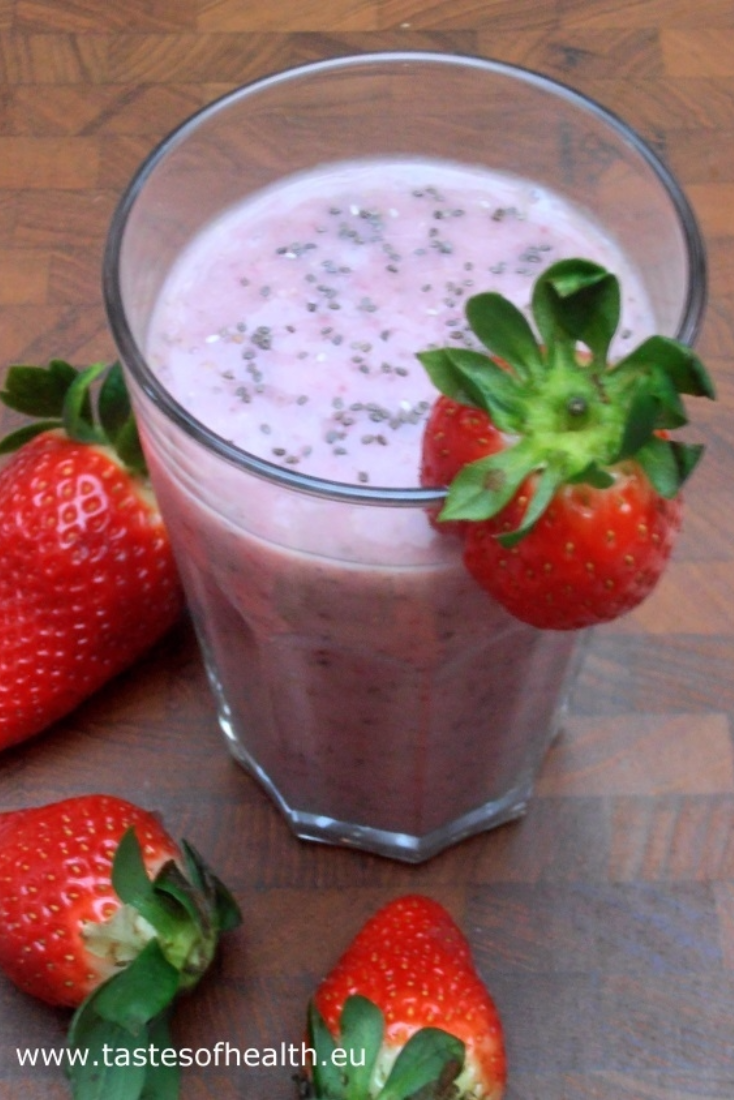
Chia Seeds and Strawberry Milkshake [vegan]


milkshake, strawberry milkshake, strawberry, chia, chia seeds, healthy, recipe, recipes, milkshake


Strawberry milkshake is surely a classic in its group although probably everyone prepares it slightly differently: some add cream, some - ice cream; some use very ripe bananas, some - frozen bananas. For a very long time I prepared it as either a treat/snack or - sometimes - as an accompaniment to breakfast.

This time I wanted it to be a wholesome breakfast and that is why I added chia seeds to my more-or-less usual ingredients. Why was chia supposed to make the difference? You may remember from one of my previous posts that chia seeds are not only nutritious but also an excellent source of dietary fiber. Additionally, these seeds are weight-loss friendly because:
  • due to a pretty high (for a plant food) content of proteins - approx. 16%, they reduce appetite and
  • since chia can absorb up to 10-12 times its weight in water, it becomes gel-like, expanding in your stomach making you feel fuller so you want to eat less calories.
That way when you have this milkshake in the morning you can be sure that not only you have a delicious and nutritious start to your day but also you will not feel hungry for a few hours. And did I mention it takes only a few minutes to make it?


Chia Seeds and Strawberry Milkshake[vegan]

Ingredients

  • 200g fresh or frozen strawberries
  • 2 bananas
  • 200ml rice milk (or any other type of milk)
  • 2 tbsp chia seeds
Takes , serves 2.

Instructions

  1. Process everything in a blender for 40-60 seconds.

milkshake, strawberry milkshake, strawberry, chia, chia seeds, healthy, recipe, recipes, milkshake


Wednesday, 9 March 2016

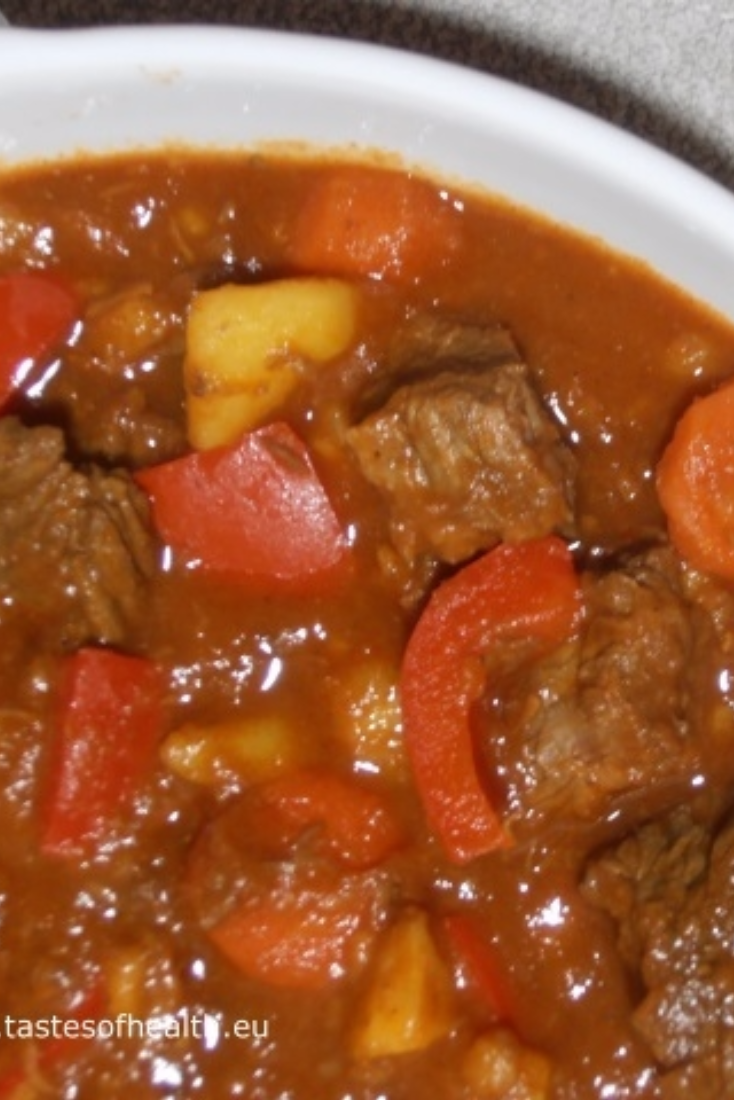
Hungarian Goulash


goulash, Hungarian goulash, goulash recipe, beef, peppers, recipe, stew

When a few months ago I visited Budapest, apart from enjoying the beautiful city, I was obviously interested in the local food. We had a chance to try a few dishes and cakes that we liked very much and that I wanted to cook myself. Goulash was one such meal.

I spent some time looking for a traditional Hungarian goulash recipe and as it often happens I found many variations. Some of them asked for ingredients I don’t use (e.g. lard for frying), some asked for lots of liquid to make it more a soup rather than a stew. So at the end I combined my knowledge and came up with the recipe below. It is based on some staple ingredients used in Hungarian goulash (paprika spices, peppers, potatoes, carrots) and staple rules (e.g. not using flour to thicken the sauce but cooking the meat for a long time so it creates gelatin). I served the goulash with bread dumplings and I was very happy with the delicious result. My husband must have even been happier: he had the leftovers for breakfast!

INGREDIENTS (for 4 portions):

2 tbsp oil for frying,
2 medium onions, thinly cut,
1 tsp smoked mild paprika,
500g beef (shin or shoulder), cut into 3cm cubes,
2 garlic cloves, thinly sliced,
1.2-1.5l vegetable stock,
1 tsp caraway seeds,
3 tsp hot paprika paste (1 tsp hot paprika powder can be used instead),
1 bay leaf,
salt and pepper,
2 carrots, diced, *
1 parsnip diced, *
2 medium potatoes, diced, *
1 tbsp tomato paste,
1 pepper, cut into 2-3 cm pieces

METHOD:
  1. Warm up the oil in a big frying pan; add the onions and fry on a medium heat for 2-3 minutes until the onions start getting brown.
  2. Add the mild paprika and stir it with the onions.
  3. Increase the heat, add the cubes of beef and fry stirring from time to time until the beef is slightly browned (approx. 5 minutes).
  4. Add the garlic, caraway seeds, bay leaf, hot paprika paste or powder, pour in the stock, season and simmer covered on a low heat for 1.5-2 hours till the meat is tender.
  5. Stir in the carrots, parsnip and potatoes, cook for approx. 30 minutes more.
  6. When the vegetables are soft, add the tomato puree and peppers and bring to boil.
  7. Serve with bread dumplings, pasta or mashed potatoes.
The vegetables should be diced into pieces of approximately the same size.

goulash, Hungarian goulash, goulash recipe, beef, peppers, recipe, stew


Saturday, 5 March 2016

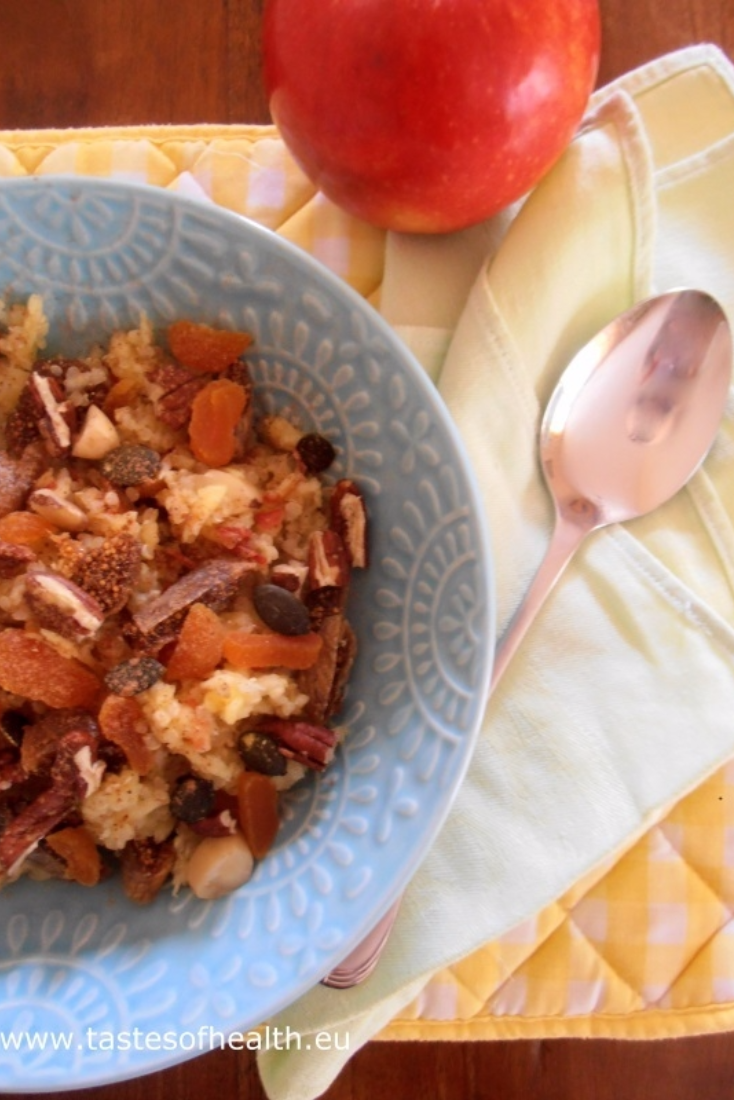
Quinoa Porridge with Apples


quinoa, porridge, quinoa porridge,  healthy breakfast, breakfast, breakfast recipes, healthy, healthy breakfast ideas, bircher muesli


I have already written about quinoa and its unique features, especially important for people who follow plant based diets. And because of the health benefits, I have used quinoa in dishes instead of rice, in salads and even in a cake. But since I never used it for breakfast dishes, I decided to give it a try. 

When I was at university, there was a time when each day I ate my healthy breakfast - "doctor Bircher's muesli". The name of the dish came from a Swiss doctor who served it to his patients in his clinic. The dish is made of porridge oats that are not cooked but soaked in water overnight, grated apple and all sorts of nuts and dried fruit. So I decided to borrow this concept, but use quinoa (cooked) instead of oats. 

Although I am unable to compare health benefits between the two options, one thing is for sure: the quinoa variation is at least as tasty as the oat one, so you can try it and enjoy.

INGREDIENTS (for 1 portion):

1 apple, cored,
a squeeze of lemon juice,
3 tbsp cooked quinoa*,
3 dried figs, chopped,
4 dried apricots, chopped,
a handful of chopped nuts,
1 tsp pumpkin seeds,
a pinch of cinnamon.

METHOD:
  1. Grate the apple (with its skin), sprinkle with a squeeze of lemon juice and mix with the cooked quinoa.
  2. Add the dried fruit, nuts, seeds and some cinnamon, stir.
  3. The porridge can be optionally served with a dollop of yoghurt and some honey.

* The quinoa can be cooked a day earlier as per the following instruction (the rest can be used in salads or the next day):

1 cup quinoa,
2 cups water,
a pinch of salt,
dash of olive oil

Put the quinoa to a fine mesh strainer, rinse it under running cold water rubbing the seeds with each other with your fingers (for at least 1 minute) and drain well. Heat a drizzle of olive oil in a pot over a medium heat and fry the drained quinoa for about 1 minute till the rest of water evaporates. Add water, salt and bring to a boil. Lower the heat and cook covered for approx. 15 minutes. Take it out from the heat and let it rest covered for 5 minutes more. Fluff the quinoa with a fork.

Subscribe to our Delicious and Healthy Recipes Newsletter

* indicates required


Wednesday, 2 March 2016

Bread Dumplings [Semmelknoedel]


bread dumplings, dumpling, dumplings, knoedel, semmelknoedel, recipe, bread, recipes


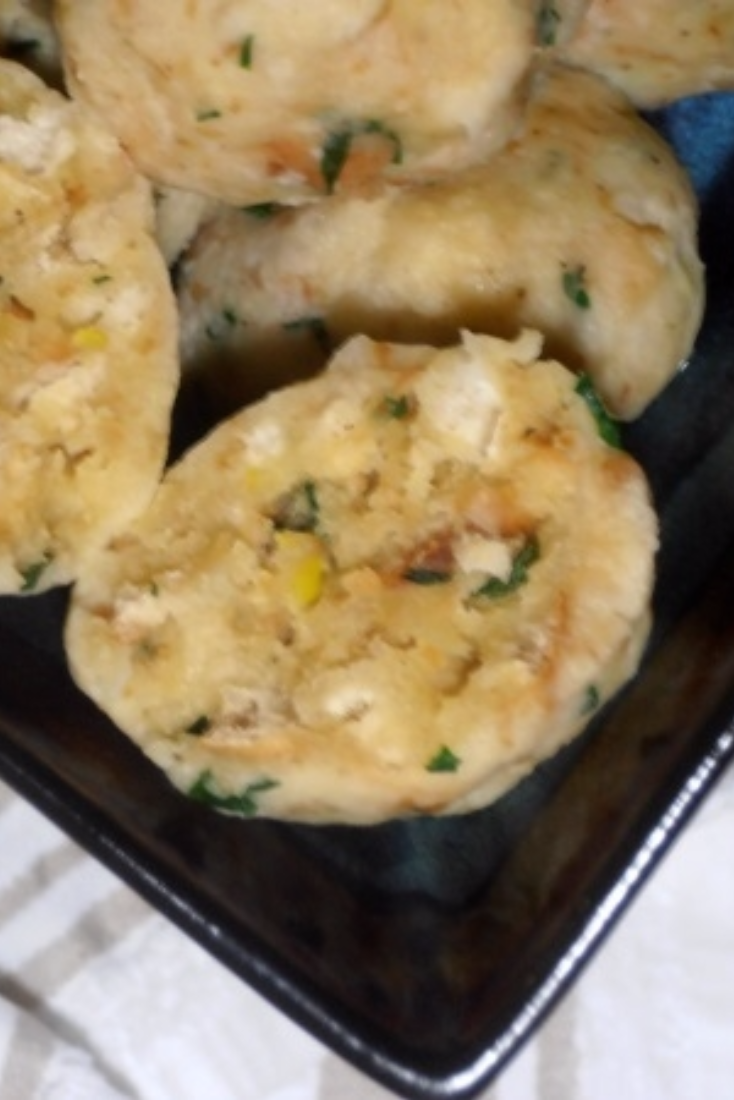
My husband is half Austrian so no wonder that every now and then he craves for some great, traditional Austrian food. Dumplings are a good example of that cuisine although they are also extremely popular in Czech, Slovakia and Hungary. A few years ago my husband’s godmother taught me how to make Serviettenknoedel – a big bread dumpling that is boiled in a tea towel (hence its name) and then sliced into portions. Although my dumpling tasted great when I made it myself, it unfortunately fell apart, and I guess it does require practice to make it perfectly.

Therefore, individual bread dumplings are a much easier but still a very delicious option. They taste really great with roast pork or duck served with gravy or with a goulash. And although I know dumplings are neither super healthy nor super light, I can assure you they are super delicious. If you worry about your waistline, you can take my approach: I make them only a few times per year. That way we enjoy them tremendously but don’t feel guilty when we have them.

INGREDIENTS (for approx. 18 dumplings):

500g stale baguette or rolls (2-3 days old) cut into 1-2cm cubes,
250-350ml milk,
2 tbsp butter,
1 onion, thinly sliced,
1 tbsp parsley, thinly chopped,
2 eggs,
0.5 tsp salt,
1-2 pinches of ground pepper,
0.5 cup breadcrumbs (they may not be required).

METHOD:
  1. Place the cubes of baguette/rolls in a big bowl.
  2. Warm up the milk till it almost boils, pour 2/3 of it into the bowl, stir and leave for 15 minutes so the baguette soaks in the milk. If after that time the cubes look like they are still very dry, pour the rest of the milk and stir again.
  3. Melt the butter in a small frying pan on a medium heat, add the onion, stir and fry for 3-5 minutes till golden but don’t let the onion burn.
  4. Add to the bowl with soaked cubes the fried onion, parsley, eggs, salt and pepper and mix very well with your hand until very well combined. If the cubes were originally very dry, they will not fall apart completely and that is fine, it is important though that the mixture is well combined.
  5. In a big pot boil plenty of salted water (there should be approx. 8-10cm of water).
  6. With slightly wet hands form a small testing dumpling (if it is too difficult to form it, the mixture may not be hard enough and in this case you will have to add some breadcrumbs and mix it well again) and put it into the boiling water. If the dumpling falls apart, then you will have to add some more breadcrumbs.
  7. Form approx. 18 round dumplings (about 5 cm diameter) from the tested mixture and gently put them to the boiling water (if the pan is not big enough to take all of them in one go, you may have to cook the dumplings in 2 batches.
  8. Cook on a medium heat for 15 minutes. To check if they are cooked through, cut one dumpling in half.

Subscribe to our Delicious and Healthy Recipes Newsletter

* indicates required