Tuesday, 30 December 2014

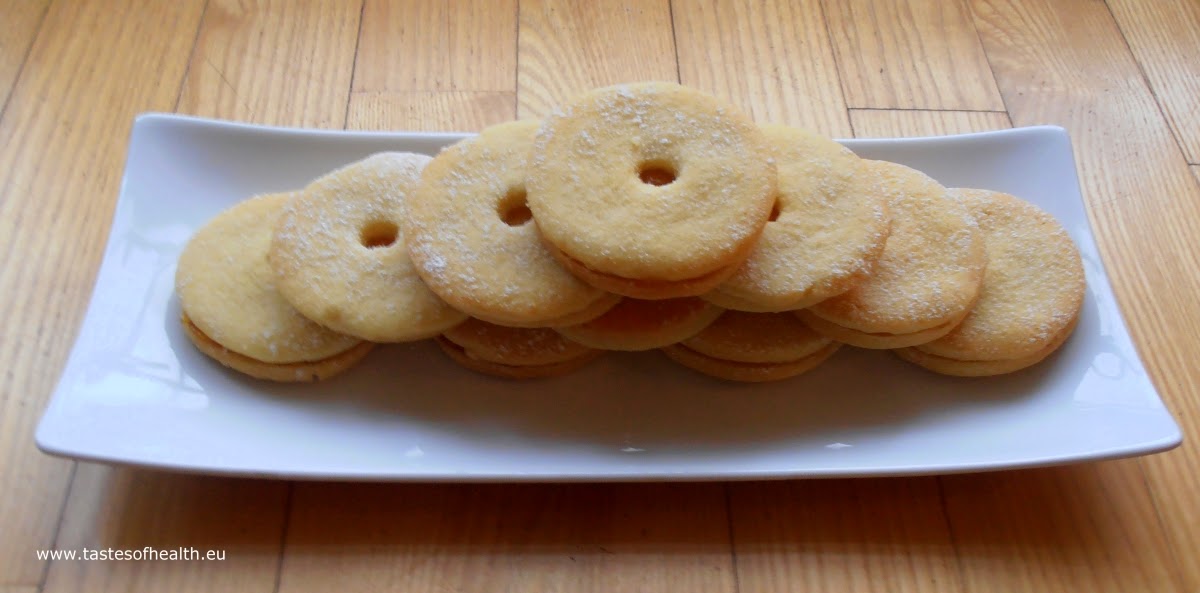
Hedi's Almond Biscuits


almonds, biscuits, cookies,


I come from a family where there had to be (many) cakes for each celebration and at least one every Sunday. Of course we also ate biscuits but generally these were the bought ones. This changed when I was introduced to my husband’s Austrian godmother – Hedi - and her biscuits. Before Christmas she is always busy preparing a selection of treats so when you open a tin that comes from her, it is as you were opening a box of chocolates: there are so many types of biscuits, each looking better than the other one that you really don’t know which one to choose.

The Almond Biscuits are one of our favourites: buttery, soft, melting in your mouth. Hedi usually uses apricot jam but I have made them with strawberry and raspberry jam and they tasted equally good.

INGREDIENTS (for approx. 20 biscuits):

260g all purpose flour (plus extra for rolling)
180g icing sugar,
160g butter,
80g ground almonds,
2 egg yolks,
a few tbsps of apricot/strawberry/raspberry jam,
Icing sugar for dusting.

METHOD:
  1. In a food processor whizz together the flour, sugar, almonds and butter till they resemble fine crumbs.
  2. Add the egg yolks and process until all is combined.
  3. Form a ball, cover it in cling film and let it rest in a fridge for at least 30 minutes.
  4. Preheat an oven to 160 degrees Celsius.
  5. Roll out the dough pretty thinly (approx. 5 mm) on a floured surface, cut out 5-6 cm diameter circles and in half of the biscuits cut out a small circle in the middle.
  6. Transfer the biscuits onto the baking tray covered with baking paper leaving some space between them (they will not rise a lot). The dough is not very elastic so be careful when you transfer the cut out biscuits as they may break.
  7. Bake the biscuits for approx. 15 minutes until golden; let them cool down on a baking tray.
  8. When cold, spread some jam on a whole biscuit, cover it with a biscuit with a hole in the middle, sprinkle with icing sugar.
almonds, biscuits, cookies,


Friday, 26 December 2014

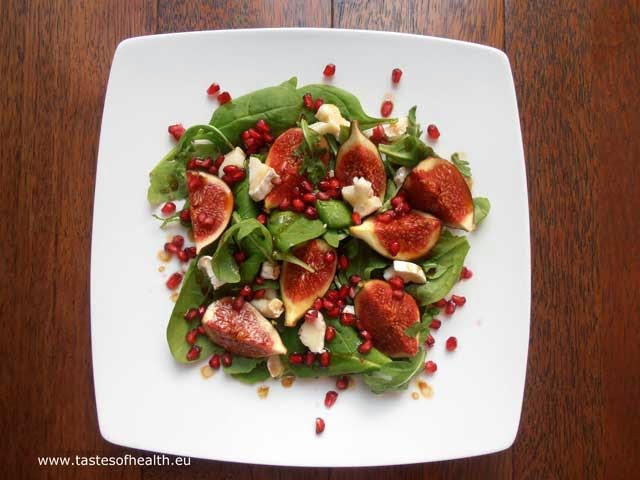
Salad with Figs, Pomegranate and Goat's Cheese (vegetarian)


fig, goat's cheese, pomegranate, salad, vegetarian, honey, recipe, recipes


This is a variation of a recipe I posted some time ago for Grilled Goat’s Cheese Salad with Figs. Although both salads seem to be similar, there are a few major differences. This salad is much lighter - there is less of goat’s cheese in it – so it can be served as a starter or part of a salad buffet as it doesn't have to be arranged separately on each plate. And obviously it takes less time to prepare since no grilling is required. Another difference – pomegranate seeds which not only add a refreshing taste but also make this salad look as it was sprinkled with red rubies. Nevertheless - whichever salad you choose, I am sure you will enjoy it!

INGREDIENTS (4 portions):
6-8   figs cut into quarters,
100g rocket,
50g spinach,
150-200g goat’s cheese (roulade with a rind or a softer cheese that can be easily divided into pieces),
seeds from 2 pomegranates,

Dressing:
3 tbsp olive oil,
2 tbsp balsamic vinegar,
1.5 tbsp pomegranate molasses,
1 tbsp honey,
Salt and pepper

METHOD:
  1. In a big bowl mix the rocket, spinach and half of the pomegranate seeds.
  2. Arrange the figs and cheese divided into small pieces on top of the salad leaves.
  3. Mix all the dressing ingredients, pour it on the salad and sprinkle with the rest of the pomegranate seeds.
fig, goat's cheese, pomegranate, salad, vegetarian

Tuesday, 23 December 2014

Oriental Spiced Pumpkin Pie (vegetarian)

vegetarian, pumpkin, pie, oriental, spinach, raisins, shallots, recipe recipes, filo pastry


Having a vegetarian at home sometimes makes cooking more challenging. And celebrations like Christmas is one of those times as you would like to prepare something special: very tasty, good looking but also nutritious. This pie ticks all the boxes. It is packed with wonderful ingredients and flavours and the filo pastry allows you to create ruffle-like decorations to make the pie look beautiful.

Although it is a savoury dish, it is rather on a sweet side thanks to the pumpkin and honey. However the spicy harrisa sauce balances the pie beautifully so for sure you will not feel like you are having a dessert for main meal!

INGREDIENTS (6-8 portions):

2 tsp coriander seeds,
2 tsp cumin seeds,
1 tsp paprika,
0.5 tsp cinnamon,
6 tbsp olive oil,
900g pumpkin (I used Hokkaido), peeled and cut into 2 cm cubes,
12 shallots quartered,
4 cm piece root ginger, grated,
140g whole blanched almonds,
140g shelled pistachios,
75g raisins (or cranberries),
3 tbsp clear honey,
200g fresh spinach,
Salt and pepper,
4-8 large sheets of filo pastry (depending on its size),
Extra olive oil for brushing the filo pastry.

Sauce:
200g plain yogurt,
2-3 tbsp harrisa paste,
1 tbsp chopped mint leaves,
Salt and pepper.

METHOD:
  1. Preheat an oven to 200C (or 180C fan).
  2. Over a medium heat dry fry the cumin and coriander seeds till they release aroma, grind them using a pestle and mortar, add paprika, cinnamon, 0.5 tsp salt and 4 tbsp olive oil and mix everything together.
  3. Place the pumpkin cubes in a roasting tin, poor the spiced olive over it and mix well to coat all the pieces (best done with your hands).
  4. Put to the oven and roast for 30 minutes or until the pumpkin is cooked through.
  5. In the meantime heat 2 tbsp of olive oil in a frying pan over a medium heat, add the shallots and fry them stirring for approx. 5 minutes till they start getting slightly brown.
  6. Add the ginger, 100g pistachios and 100g almonds, fry for further 2 minutes.
  7. Add the raisins (or cranberries), 2 tbsp honey and the spinach, fry stirring till the spinach is wilted, mix everything with the roasted pumpkin when it is ready.
  8. Grease a 23cm diameter loose-bottomed baking tin.
  9. The filo pastry sheets should be kept under a damp tea towel to prevent them from drying out. Each filo pastry sheet should be brushed on one side with olive oil before it is put to the baking tin. If sheets are big enough, put one in so it covers the bottom and two opposite sides of the tin with some overhang and then turn the tin 90 degrees and put the second sheet the same way (now the bottom is covered by 2 layers and side by 1 layer, with some overlaps). Repeat the steps with 2 more sheets of filo pastry. If the sheets are smaller, then place one in the tin so it covers the bottom (or at least two thirds of it) and 1 side with some pastry overhanging and then put the second one the same way but to cover the opposite side of the tin. Turn the tin 90 degrees and put two other sheets the same way. Repeat the steps so there are at least 2 layers of filo pastry everywhere.
  10. Put the pumpkin mixture to the tin, spread it and cover with the overhanging filo pastry creating desirable pattern. In case the filo wouldn't cover the top of the pie completely, at first use another sheet and only then decorate with the rest of the pastry. The pie can be prepared up to this stage and kept in a fridge covered with cling film a day in advance.
  11. Put to the oven and bake for 30-35 minutes.
  12. Just before the pie is ready, toast the rest of almond and pistachios until golden, mix with 1 tbsp of honey and pour over the pie.
  13. Serve it with a sauce prepared by mixing all the ingredients together.
vegetarian, pumpkin, pie, oriental

Wednesday, 17 December 2014

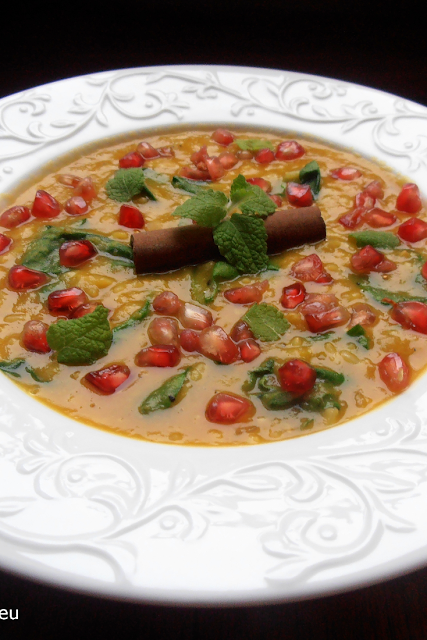
Aromatic Iranian One Pot Dish with Split Peas (vegetarian/vegan)


vegetarian, vegan, one pot, split peas, pomegranate, recipe, recipes, healthy


Cinnamon was probably the first spice I was introduced to, at least this is what I can remember! When I was a little girl, my grandmother used to cook for me semolina sprinkled with cinnamon and sugar, she also used to bake yeast cakes with apples and cinnamon; so this spice has been present in my life from very early on. And now it is still probably my favourite one as there are so many dishes I cook that wouldn’t taste the same without it.

This Iranian dish is one of them: when I cook it, the wonderful aroma of cinnamon spreads around the kitchen and other parts of the house and makes all of us want to eat it immediately. However in case of this meal, waiting really pays off because it is not only super tasty and aromatic but also – thanks to the pomegranate seeds – it looks absolutely stunning.

INGREDIENTS (4 portions):

2 tbsp olive oil,
2 onions thinly chopped,
4 garlic cloves thinly chopped,
2 cinnamon sticks,
2 tsp ground cumin,
2 pinches of saffron,
1.5l vegetable stock,
200g split peas,
200g brown rice,
2 big handfuls of spinach (chopped, if it is not baby spinach),
3 spring onions chopped,
2 tbsp lemon juice,
2 tbsp pomegranate molasses,
salt and pepper,
chopped mint or coriander leaves (or both),
pomegranate seeds.

METHOD:
  1. On a medium heat warm up the olive oil in a large saucepan, add the onions and fry them for a few minutes till translucent. 
  2. Add the garlic and spices (cinnamon, cumin and saffron), fry for a further minute stirring; add the split peas and 1l of stock. Bring to boil, lower the heat and cook for 40 minutes stirring every now and then to make sure the split peas don’t get stuck to the bottom of the saucepan. The dish should be watery at this stage, if it isn't, add more stock.
  3. Add rice to the dish and cook everything for further 30 minutes, till the rice is soft.
  4. Add the spinach, spring onions, lemon juice, molasses, salt and pepper. Stir well, check the taste.
  5. Serve in bowls garnished with chopped herbs and pomegranate seeds.
vegetarian, vegan, one pot, split peas

Monday, 15 December 2014

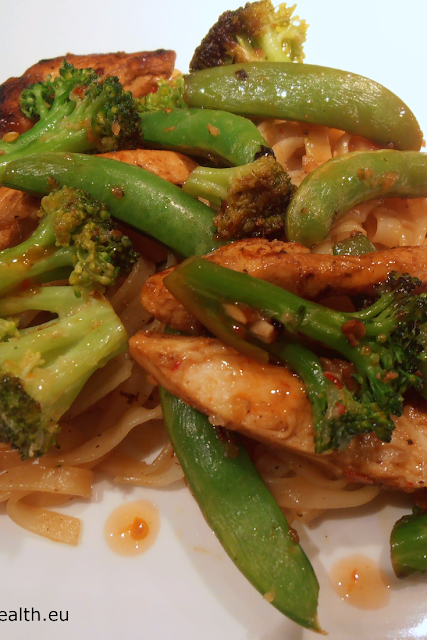
Thai Style Chicken Stir Fry with Broccoli and Snow Peas

stir fry, chicken, broccoli, snow peas, recipe, recipes


I love stir fries. I love cooking them because when you have all ingredients ready, they only take minutes to finish which means you can freshly prepare the dish for your guests and they will not even notice you are not with them at the table. And I love eating them, as quick stir frying of vegetables keeps them crunchy and appealing because their colours stay vivid and bright.

This stir fry, like all the other ones, can be served with rice but I have recently started to use rice noodles more often. They are cooked in a very short time (some types don’t even have to be cooked but only soaked in boiling water) and taste almost like wheat pasta. And this is great information for people who either cannot eat wheat products, or – like me – try to keep their love for pasta under control.

INGREDIENTS (4 portions):

500g chicken breasts,
1 tbsp lime juice,
1 tbsp olive oil,
1tsp honey,
0.25 tsp chilli flakes,
Salt and pepper,
1 broccoli cut,
250g snow peas,
2 cloves of garlic,
1 tbsp grated ginger,
3 tbsp lime juice,
5 tbsp sweet chilli sauce,
0.5 tbsp honey,
200g rice noodles,
1.5 tbsp olive oil.

METHOD:
  1. Cut the chicken breasts into long strips.
  2. In a bowl mix the marinade ingredients: 1tbsp olive oil, 1tbsp lime juice, 1tsp honey, chilli flakes and a bit of salt and pepper; put the chicken to the marinade and mix well to cover. Leave to marinate for at least 1 hour.
  3. Cut broccoli into small florets (the rest could be used in a vegetable soup), cut endings of snow peas and if possible remove strings.
  4. Mix the lime juice and the sweet chilli sauce.
  5. Heat 0.5 tbsp of olive oil in a wok, add marinated chicken and stir-fry till it is golden, place on a plate and keep in a warm place. To make sure the chicken is nice and crispy, divide it and fry it in two batches.
  6. Cook the rice noodles per the packet instruction.
  7. Heat the rest of the olive oil; add the garlic and ginger fry till they release their aroma.
  8. Add broccoli, stir fry for 3 minutes, add the snow peas, stir fry for another 2 minutes.
  9. Add the chicken and the mixed lime juice and chilli sauce, stir, add the cooked rice noodles and give it another stir.

Saturday, 13 December 2014

Chickpea and Spinach Soup (vegetarian)


vegetarian, soup, chickpea, spinach, potato, recipe,recipes


There is nothing better than a bowl of hot soup on a cold and dark day: you have it and straight away you feel much better. I like creamy soups very much but I know they are insufficient  and they have to be followed by a second course. And sometimes there is simply not enough time to make two courses. 

This Chickpea and Spinach Soup is a complete vegetarian, one pot meal with plant proteins from chickpeas and lots of goodness from spinach. I have always known that spinach is good for us but since I realized how good, I have been trying to include it in many dishes to make sure it regularly appears in our diet.  So I add spinach to salads, soups and pasta dishes but I also use it as a main hero e.g. in Spanakopita.

As far as goodness is concerned, spinach is on top of the list of nutrient dense foods as it has very few calories but it is an excellent source of  vitamins K and A, manganese, folate, magnesium and iron. Spinach also helps to protect us against inflammatory, cardiovascular and bone problems as well as cancer. And if you are still not convinced how good spinach is for you, a whole long list of its benefits can be found in this link.

INGREDIENTS (4 portions):

2tbsp olive oil,
4 garlic cloves, crushed,
1 onion thinly chopped,
2tsp ground cumin,
2tsp ground coriander,
1-1.2l of vegetable stock,
350g potatoes peeled cut into 2cm cubes,
1 can (420g) of chickpeas,
1tbsp cornflour,
150ml milk,
2tbsp tahini paste,
200g shreded spinach,
Salt and pepper.

METHOD:
  1. Heat the olive oil in a large pot, add the garlic and onion and fry on a low heat for 5 minutes till they are soft.
  2. Add the cumin and coriander, stir and fry for 1 more minute.
  3. Pour the stock, add the potatoes, increase the heat. When the soup starts boiling, lower the heat and simmer it for approx. 10 minutes.
  4. Add the chickpeas and cook for 5 minutes more.
  5. In a mug blend together the corn flour, tahini paste and milk, add to the soup and stir.
  6. Add the spinach and season.

Source: “Vegetarian - the best-ever recipe collection” by Linda Fraser

Thursday, 11 December 2014

Pretty in Pink Salad with Quinoa (vegan)


salad, quinoa, vegan, beetroot, raisins, walnuts, healthy, recipe, recipes


When my daughter decided to become a vegetarian, I worried how she was going to get complete proteins without eating meat products. So I was happy when I learnt that certain combinations of plant ingredients (e.g. beans & rice, hummus & pita bread, tofu & rice, beans & tortilla, lentils & bulgur, pea & bread) will provide the complete proteins even if not eaten together at the same meal but within the same day. But I was even happier to learn there are actually some types of plant food that by themselves supply us with all essential amino acids, and quinoa is one of them.

So I serve quinoa quite often now and we all do enjoy it a lot. However due to its natural bitterness, it has to be prepared well before cooking to eliminate this slightly nasty taste. Once it’s cooked properly (as per instructions included in the recipe below), it can be used in this yummy and pretty looking pink salad.

INGREDIENTS (4 portions):

1 cup quinoa,
2 cups water,
0.25 tsp salt,
dash of olive oil,
0.5 cup raisins,
0.5 cup walnuts broken into pieces,
1.5 cup pomegranate seeds (from approximately 1 big or 2 small pomegranates),
0.5 red onions finely chopped,
juice from 1 lemon,
2 beetroots (approximately 300-350g) chopped into 1.5 cm cubes,
3 handfuls chopped parsley,
Salt and pepper.

METHOD:
  1. Prepare the quinoa: put it to a fine mesh strainer, rinse it under running cold water rubbing the seeds with each other with your fingers (for at least 1 minute) and drain well. Heat a drizzle of olive oil in a pot over a medium heat and fry the drained quinoa for about 1 minute till the rest of water evaporates. Add water, 0.25 tsp salt and bring to boil. Lower the heat and cook covered for approx. 15 minutes. Take it out from the heat and let it rest covered for 5 minutes more. Fluff the quinoa with a fork. The quinoa has to be dry, in case there is still some water left, transfer it to a strainer and let it drain completely.
  2. While you are waiting for the quinoa to be ready, combine the onion and lemon juice and let it marinate for a few minutes.
  3. Combine all the ingredients, add salt and pepper according to your taste and stir gently.
salad, quinoa, vegan,


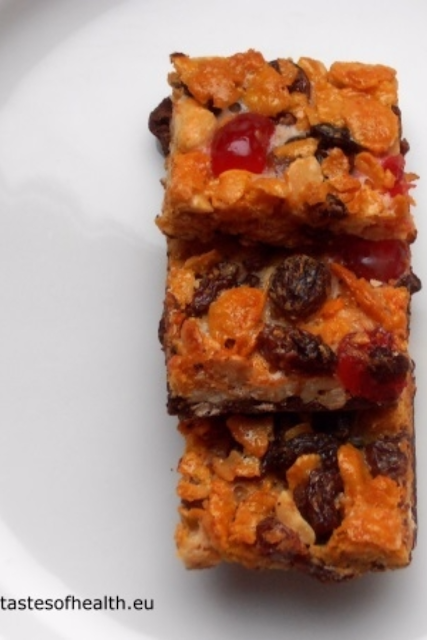
Luxurious Chocolate Florentines


chocolate, florentines, cornflakes, peanuts, cookies, biscuits, recipe, recipes


These are perfect treats for this special season but in truth – for any season. Obviously they cannot be easily put to a healthy food category but if we really wanted to, we could find health benefits of some ingredients (e.g. dark chocolate is a source of magnesium after all). But we really don’t have to as the taste of these Florentines speaks for itself: they are chewy and crunchy at the same time, sweet and simply wonderful. 

It was my father-in-law who called them “luxurious” as they are not the thin and tiny Florentines  you may get with a cup of coffee in some coffee shops: they are thick and generous, they are luxurious in taste and in size! There is also another great advantage of these Florentines – they are really quick and easy to make and could be almost entirely (maybe except for melting the chocolate and cutting) prepared by a few year old child.

INGREDIENTS:

300g dark chocolate broken into pieces,
3 cups crushed cornflakes,
1 cup raisins,
0.75 cups roasted unsalted peanuts
100g read glace cherries,
1 cup sweetened condensed milk.

METHOD:
  1. Melt the chocolate in the microwave or over a pan of simmering water.
  2. Line a base and sides of a 30x40cm baking tray with greased aluminum foil (you will probably need 2 sheets of foil, they should overlap).
  3. Spread the chocolate evenly over the aluminum foil and then put the tray to a fridge till the chocolate sets completely.
  4. Preheat an oven to 180 Celsius degrees (160 for a fan oven).
  5. In a big bowl combine the rest of the ingredients and mix well.
  6. Spread the mixture evenly over the set chocolate base; use back of a tablespoon to press it down.
  7. Bake for 15-20 minutes.
  8. Take the tray out from the oven, let the Florentines cool down completely (the chocolate base must be set again) and cut into squares.
chocolate, florentines

Sunday, 7 December 2014

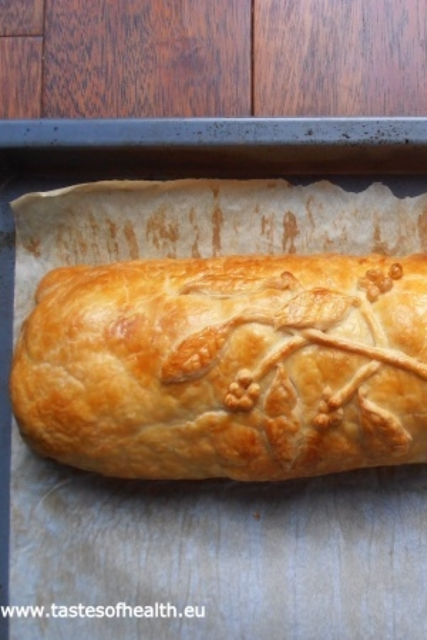
Inge's Vegetable Strudel (vegetarian)


vegetables, strudel, vegetarian, bechamel, bechame sauce, carrots, onions, broccoli, cauliflower, puff pastry, recipe, recipes


Mother-in-law – daughter-in-law relationship can be very difficult. I was very lucky to have had a mother-in-law who was not only a wonderful person but also a great cook. I learnt a lot from her and this recipe for the vegetable strudel is hers, too. 

The recipe is pretty long but please don’t be put off as firstly –I have included a lot of tips to make sure the strudel turns out perfectly, secondly - it is really worth the effort, and thirdly - it is a perfect starter when you are having guests. As stated in the recipe all the vegetables and béchamel sauce can be prepared a day earlier, in truth the whole dish can be prepared a day in advance (except for brushing the strudel with beaten egg) and kept in the fridge. The next day you will have to take it out from the fridge 1 hour before you would like to serve the dish and while you are waiting for your oven to get hot, brush the strudel with the egg. Then baking for 40 minutes, 15 minutes of resting and voilà –perfect starter not only for vegetarians!

INGREDIENTS (6-8 portions):

1/3 cauliflower cut into small florets,
1/3 broccoli cut into small florets,
2-3 carrots cut into 0.5cm slices,
2 onions cut into half-slices,
1 can of beans (kidney or butter) rinsed and drained,
1.5 tbsp ground linseeds,
1 tbsp olive oil,
1 tsp sugar,
salt & pepper,
350-500g rolled ready-to-use puff pastry,
1 egg, beaten.

Béchamel sauce:
2 tbsp olive oil,
3 tbsp all purpose flour,
400ml milk,
0.5 tsp ground nutmeg,
salt & pepper.

METHOD: 
  1. Cook al dente each type of the vegetables separately in boiling water with added salt and 0.5 tsp sugar (it is very important to make sure the water is seasoned well). I cook the vegetables in the same water in the following order (not to discolour the ones cooked later): cauliflower, broccoli, carrots.
  2. After each lot of the vegetables is cooked, drain them well on a strainer and put on a plate with a sheet of kitchen roll on, to get rid of all the water. Let the vegetables cool down completely.
  3. Heat the olive oil in a frying pan, add the onions, salt, pepper,  0.5tsp sugar and fry on a low heat till onions are caramelised (about 10 -12 minutes). Check the seasoning and leave to cool down.
  4. Make the béchamel sauce: in a small, heavy-based pot warm up the olive oil, add the flour and stir it quickly and very well. Pour the milk (cold), vigorously whisk it and bring it to a simmer on a low heat, season well (salt, pepper and nutmeg). Constantly stir the sauce till it boils and thickens. Check the seasoning again, adjust if necessary. When done, immediately transfer the béchamel to a bowl and cover with cling film (this will prevent from forming a skin). Leave it to cool. The preparation of vegetables and béchamel sauce should be done a few hours before we are going to serve the strudel (even a day earlier) to make sure everything is cold.
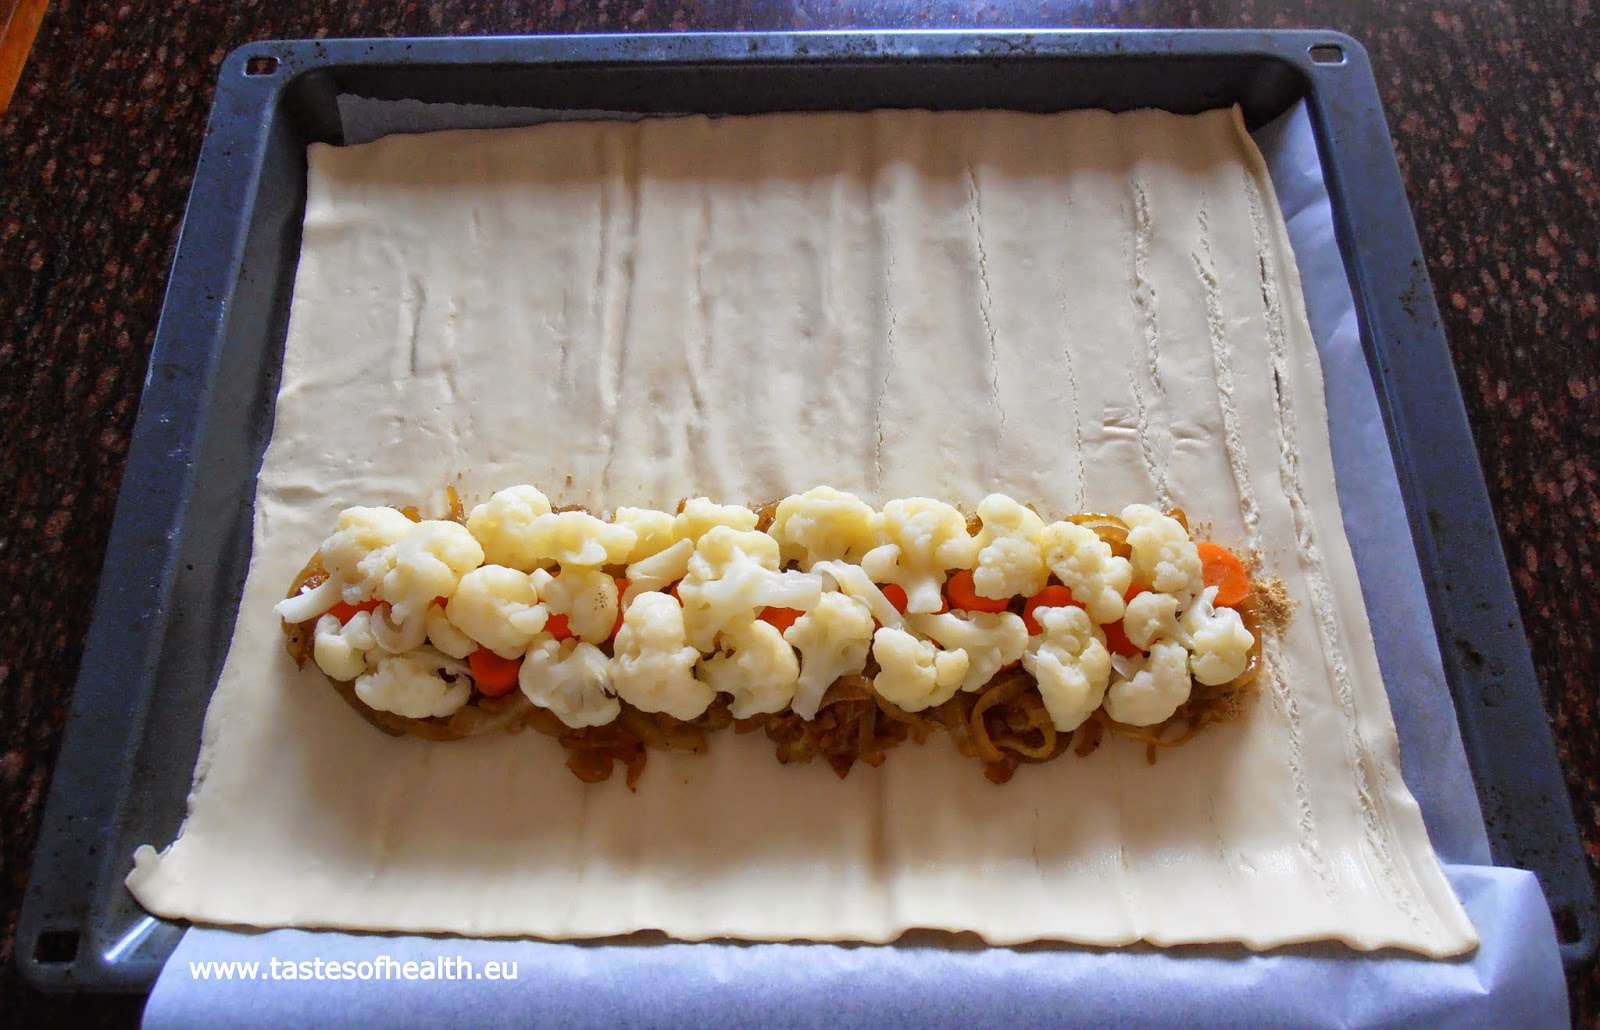
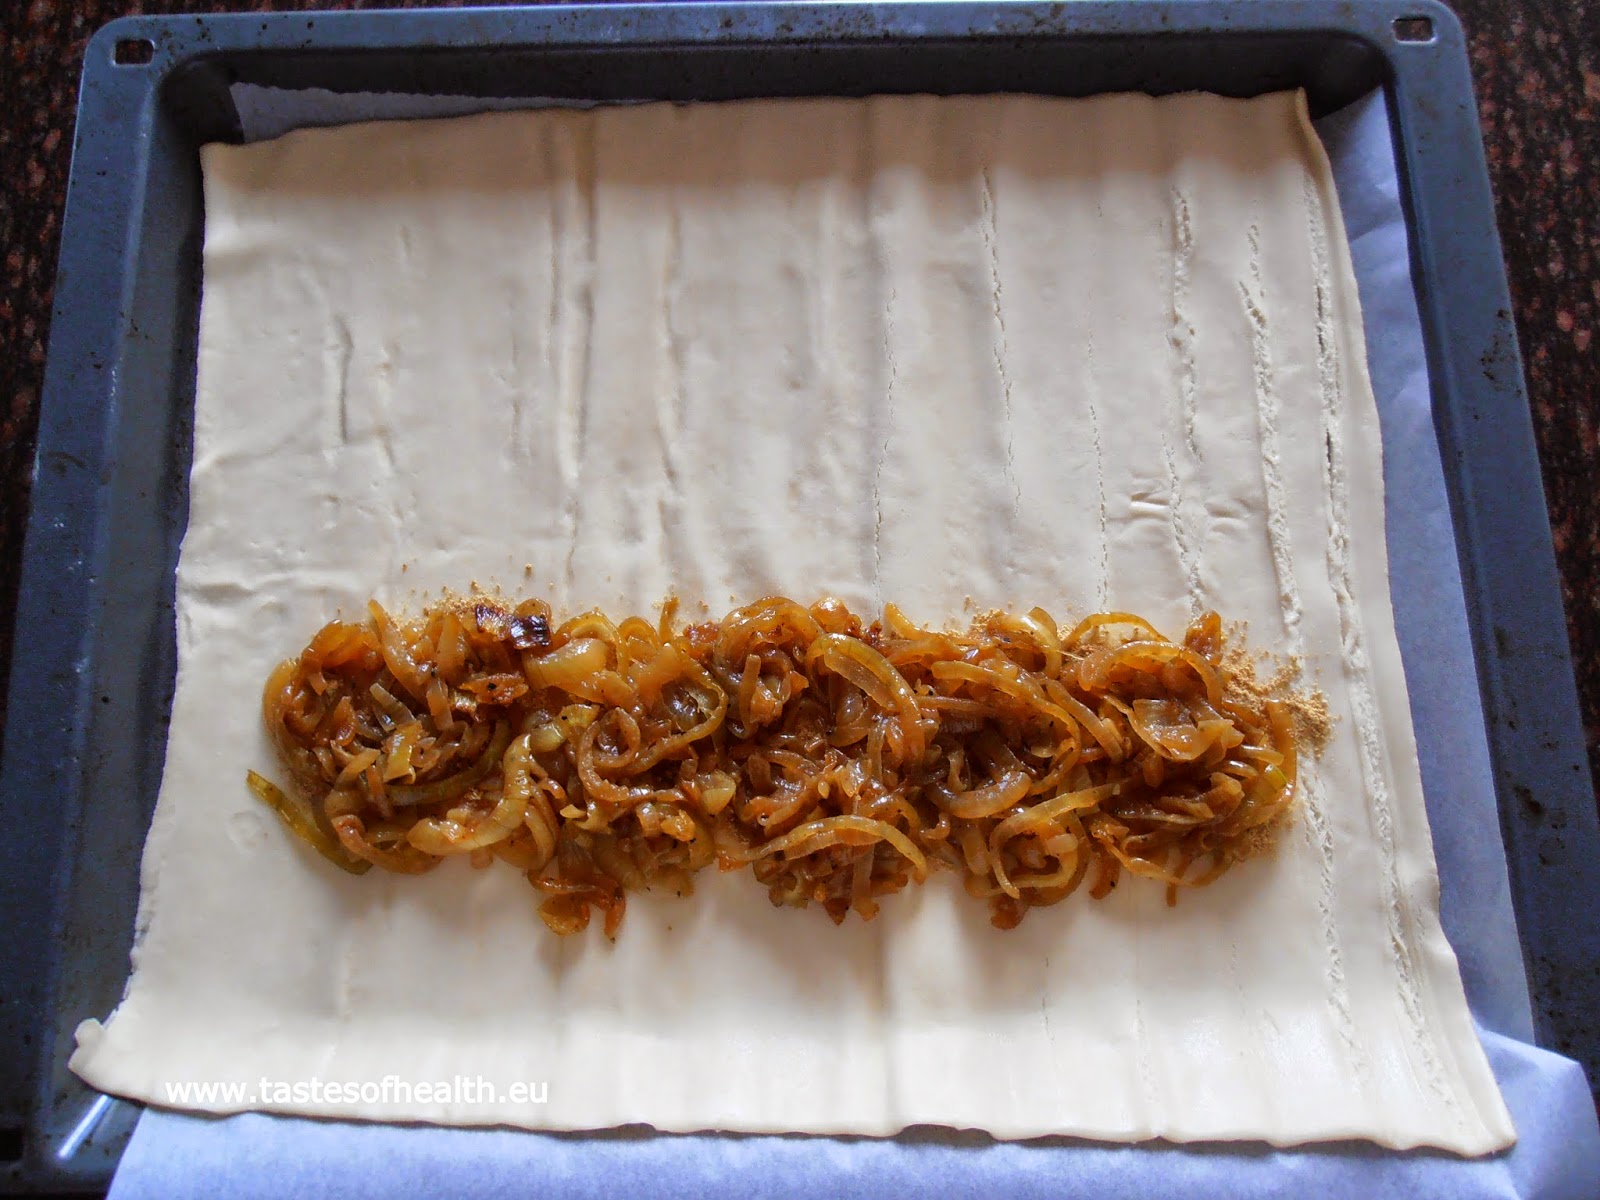
  5. Put greaseproof paper on a baking tray and put the puff pastry on it. In the middle of a half of the pastry that is closer to you, spread the ground linseeds to a rectangle about 7-10cm width, leaving approx. 3-5 cm on the shorter sides and 5-7 cm of the longer side  not covered by the linseeds (see a photo below).
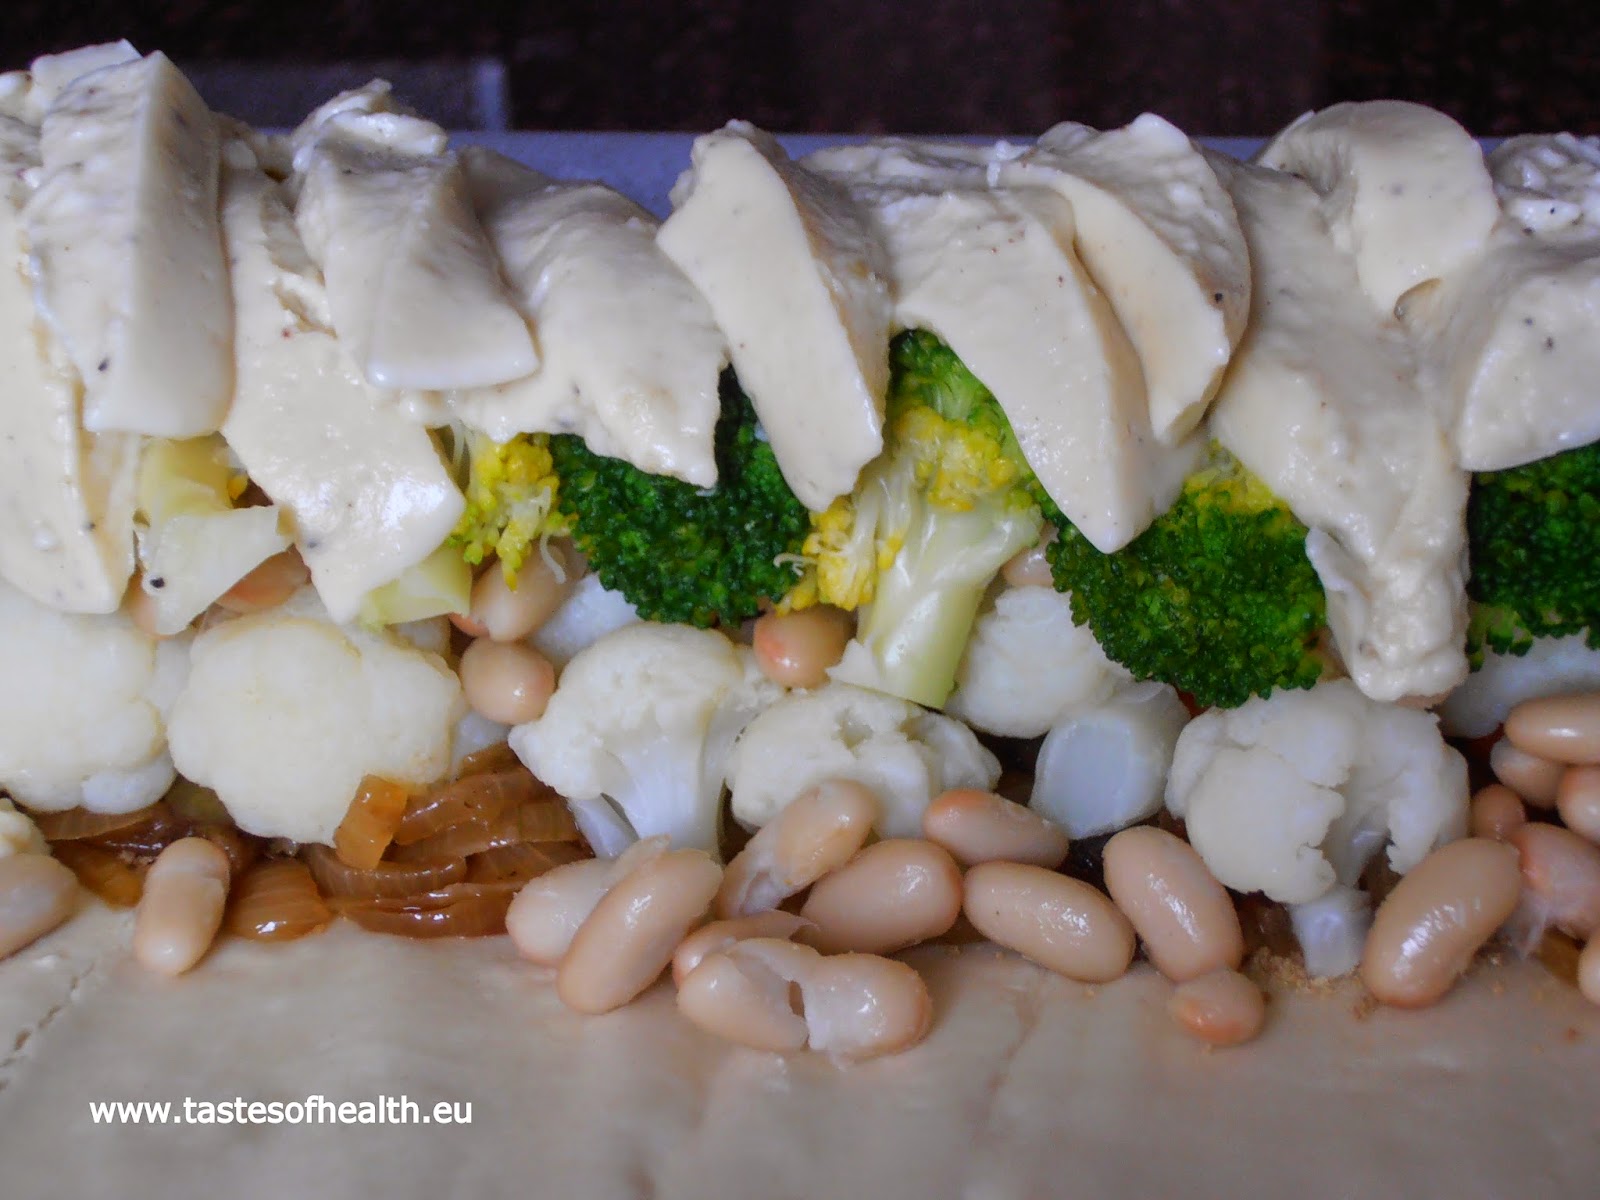
  6. On top of the linseeds spread caramelized onions, carrots, cauliflower, beans, broccoli and at the end – the béchamel (the sauce will be very thick, so you can cut it into slices).
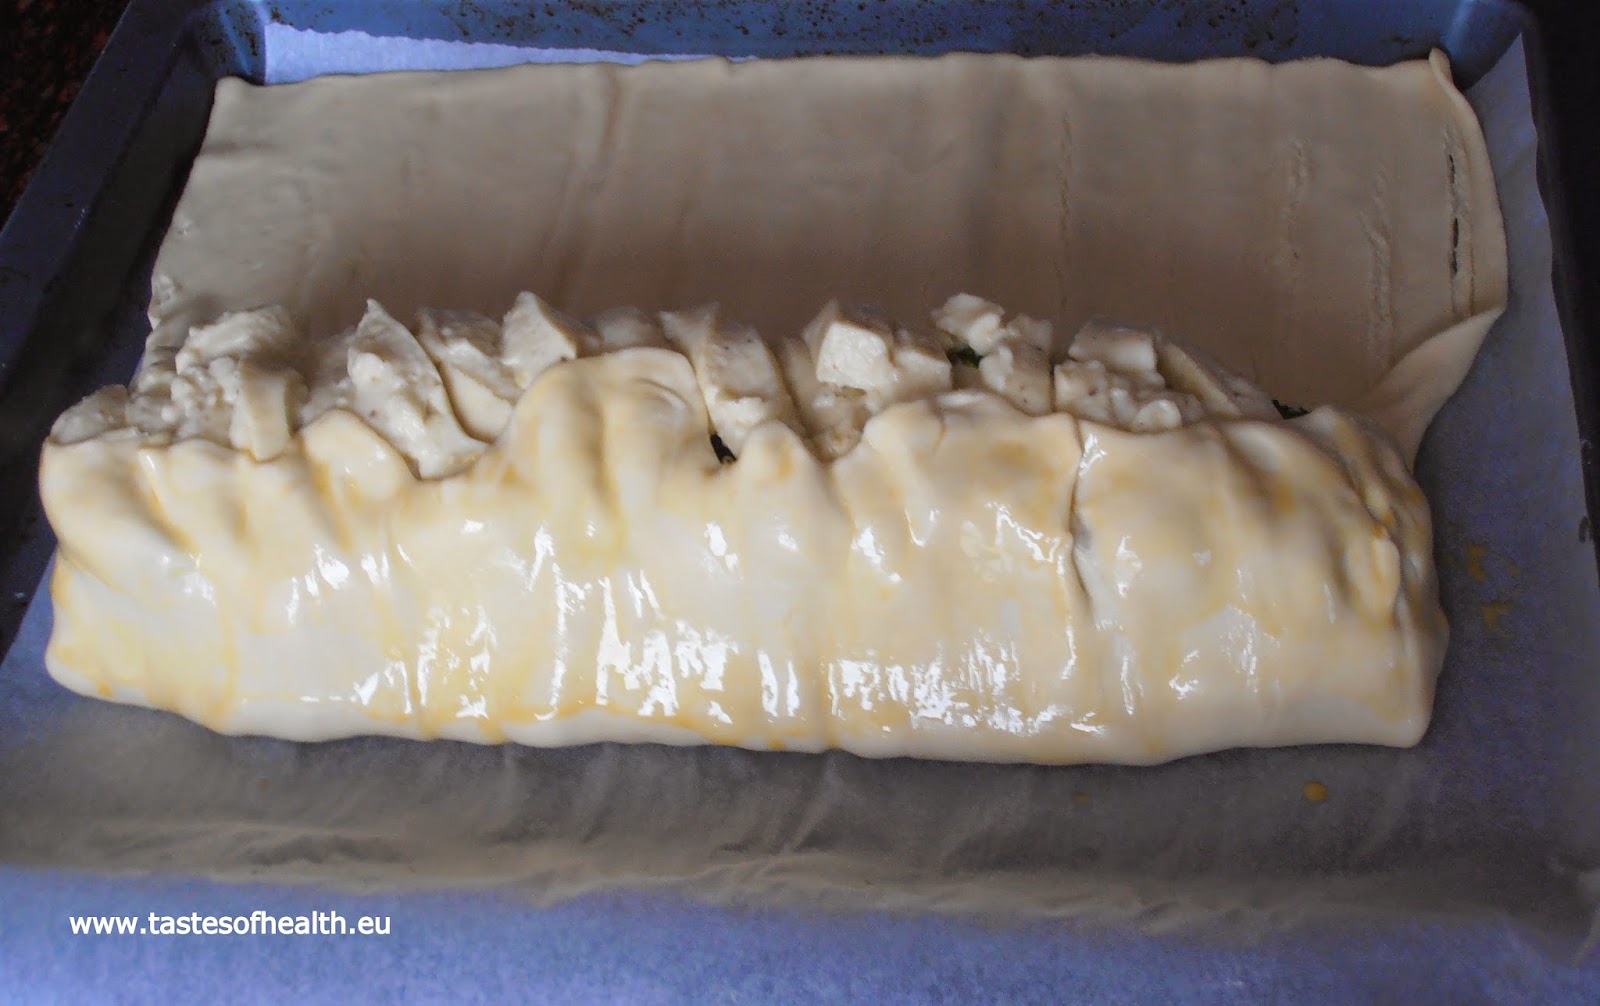
  7. Rise up onto the filling the shorter sides of the pastry and the long side that is close to you. Press it gently so it stays on the filing and brush the egg on it. Now move the other half of the pastry gently on top of the filling and seal the strudel. Brush the whole strudel with the egg.
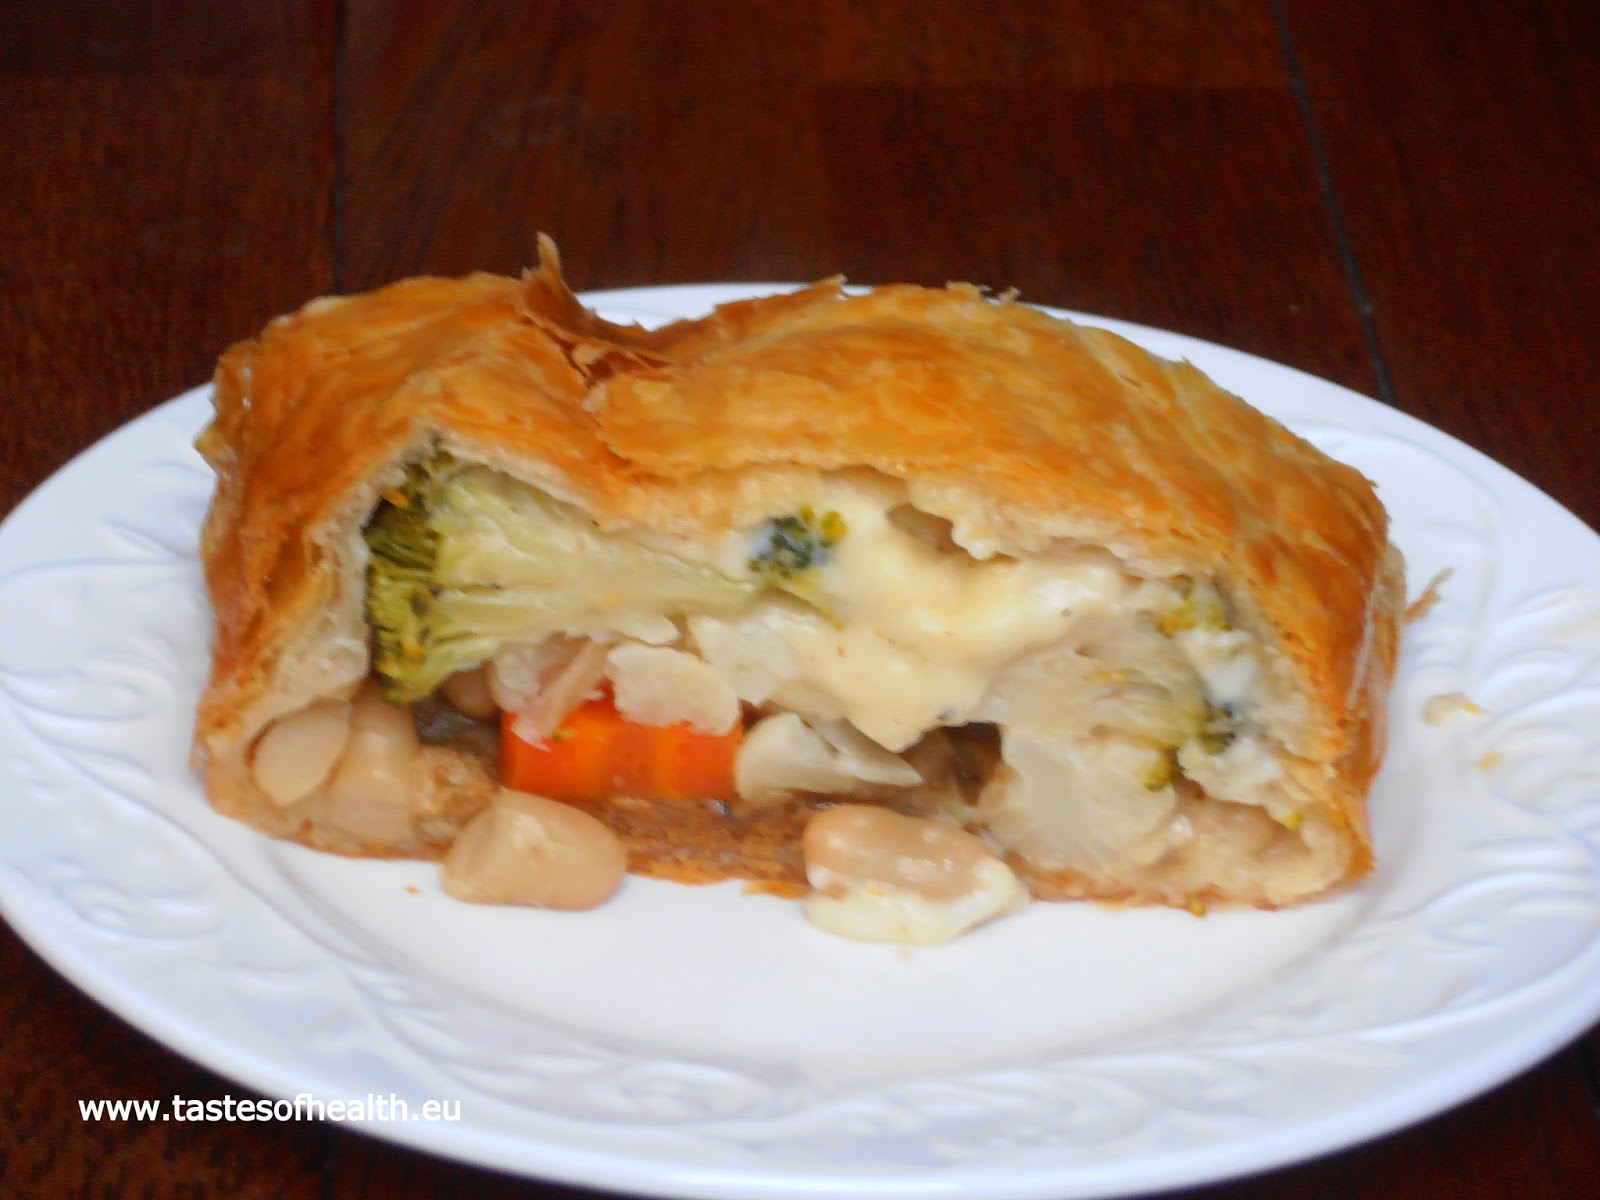
  8. Bake it in an oven preheated to 220 Celsius degrees (200 fan oven) for 10 minutes, then lower the temperature to 190 (170 fan oven) and bake for another 30 minutes till golden. Take it out from the oven and let it cool for at least 15 minutes before you cut it into slices.


vegetables, strudel, vegetarian

vegetables, strudel, vegetarian

vegetables, strudel, vegetarian

vegetables, strudel, vegetarian

vegetables, strudel, vegetarian


Saturday, 6 December 2014

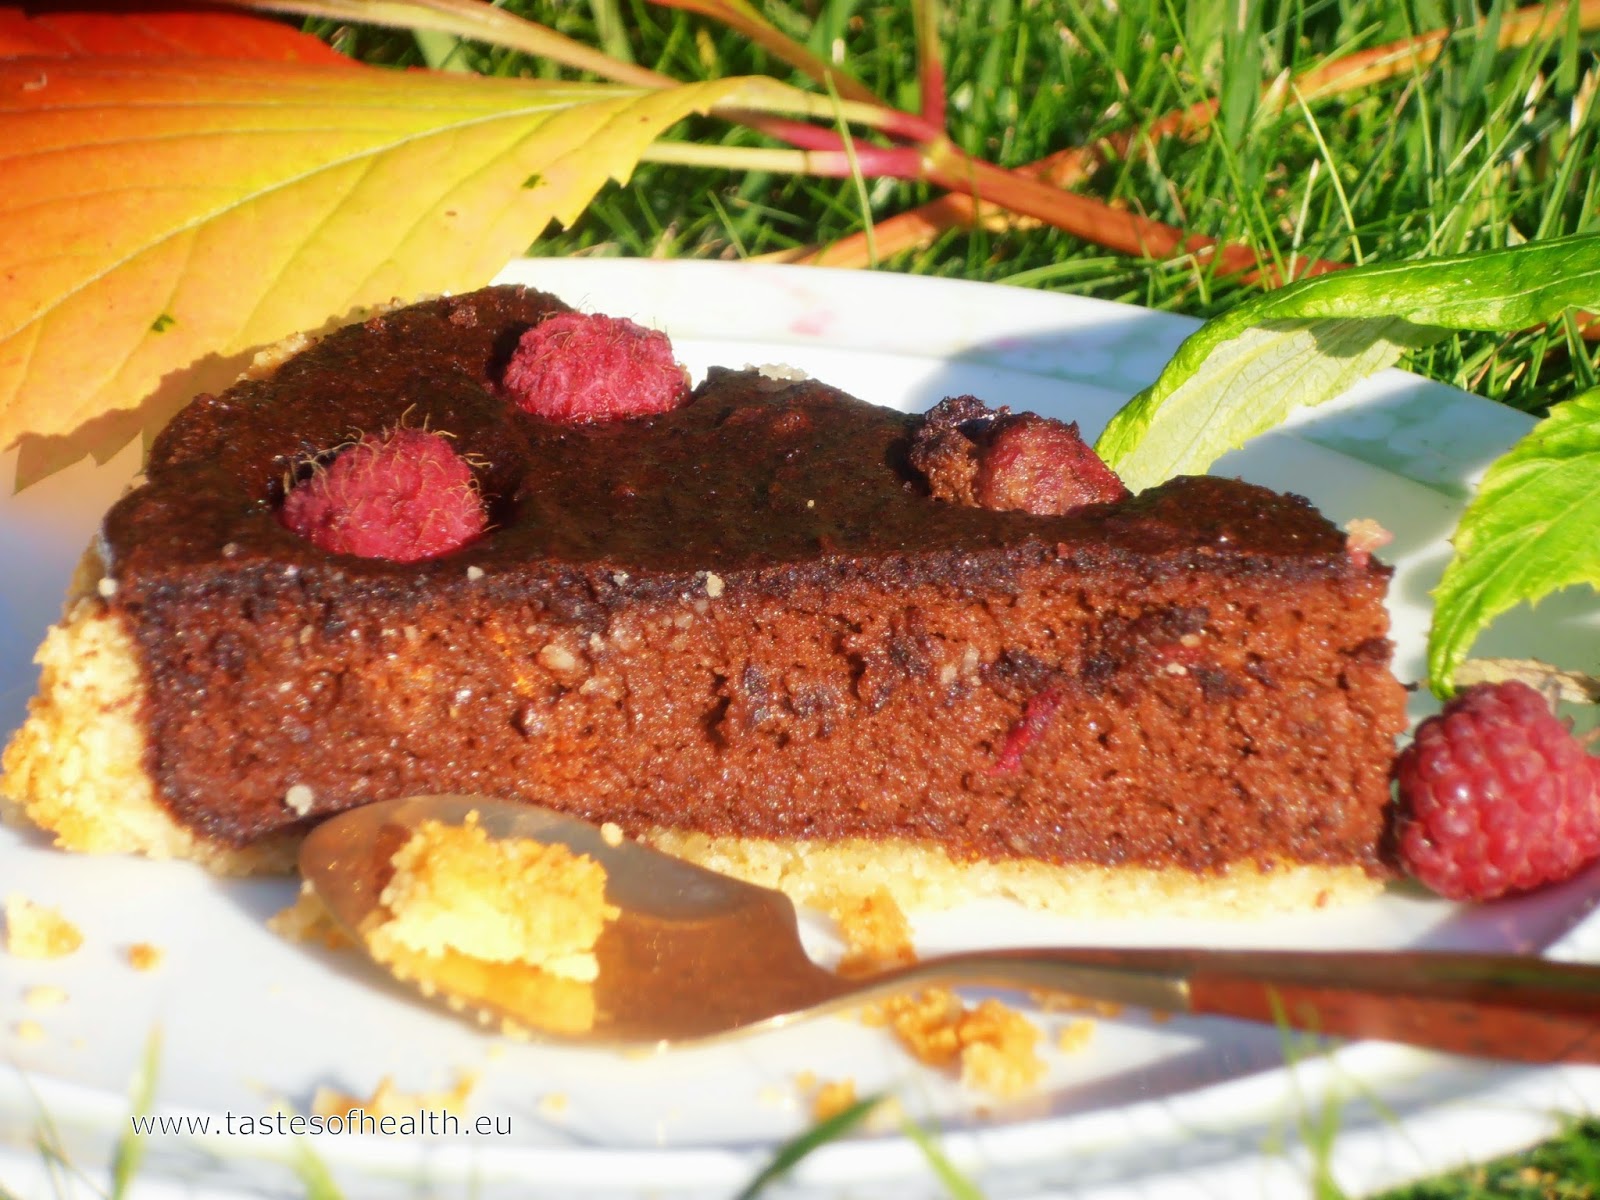
Millet Chocolate Mousse Tart (gluten free)


millet, gluten free, chocolate tart, tart,chocolate, recipe, recipes, cake


My first experience with millet was poor: I really didn't like the bitter taste. But having read so many articles about health benefits of eating millet, I decided to give it another try. I did some research and learnt how to prepare it to eliminate the bitter taste: before you cook it, you have to either dry fry it for approx. 1 minute till it releases its aroma, or you have to pour boiling water into a pan with the millet, stir it well, transfer to a fine mesh strainer and drain it. I personally prefer the first method as it is faster and almost fuss-free and this is especially important in the morning when still half asleep I prepare healthy breakfast for my daughter (millet with fruit).

In the recipe below I used millet to make something more complex - a filling for a chocolate tart. Adding whisked egg whites made the millet chocolate mixture light, almost like a mousse and I really liked that. 

Since millet is gluten free I didn't want to “spoil it” by using wheat flour to make a base so I used a recipe with ground almonds instead. The result was very delicious, especially for a millet and chocolate lover: light and airy millet chocolate mousse in a delicate wheat flour-free crust.

INGREDIENTS (8 portions):

Base:
150g ground almonds,
1 tbsp Demerara sugar,
pinch of salt,
0.5 tsp cinnamon,
75g butter.

Mousse:
100g millet,
pinch of salt,
375ml water,
100g dark chocolate,
1 tbsp cocoa,
2 eggs separated,
70ml sunflower oil,
3 tbsp Demerara sugar,
1 tsp baking soda,
0.5 tsp vanilla extract,
some raspberries.

METHOD:
  1. In a bowl mix ground almonds, salt, cinnamon and sugar.
  2. Cut butter into small pieces, add to the dry mixture and work with your fingers through, till it resembles small crumbs.
  3. Put the crumbs together to form a ball.
  4. Grease sides of a 20 cm round baking tin and put a greaseproof paper on the bottom.
  5. Working with your fingers spread the almond dough on the bottom of the tin and raise it slightly (1.5-2 cm) on the sides.
  6. Put the tin with the base to a fridge for 10-15 minutes and start preheating an oven to 175 Celsius degrees.
  7. Put the millet to a frying pan and start heating it up (dry) till it releases aroma.
  8.  Transfer the millet to a pot; pour boiling water mixed with salt and after it reaches the point of boiling, cook gently for 15-20 minutes till the millet absorbs the water and is soft.
  9. Put the base to the oven and bake for 10 minutes.
  10. When the millet is cooked but still hot add the chocolate broken into small pieces, stir well till it melts.
  11. Put the chocolate millet, oil, sugar, cocoa, baking soda, vanilla and egg yolks into a food processor and process it till the mixture is smooth.
  12. Whisk the egg whites till stiff and add half to a bowl with the chocolate mixture, stir gently and then repeat with the other half.
  13. Spread the mixture gently over the baked almond base and put raspberries on top, pressing them down gently.
  14. Bake for 30 min.


millet, gluten free, chocolate tart


Recipe for the almond base comes from craftsy.com

Tuesday, 2 December 2014

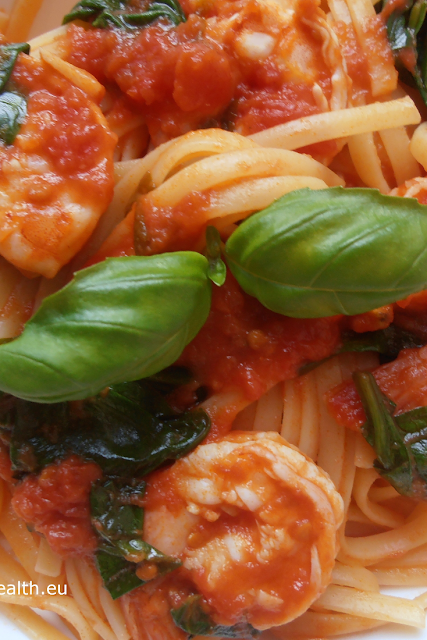
Bavette with Prawns and Spicy Tomato Sauce


prawns, tomato sauce, shrimps, tomato, pasta, recipe, recipes, healthy


I think I must have been Italian in my previous life – I love their food. And pasta has always had a special place in my heart: whenever I am in an Italian restaurant, whether it is in Italy or anywhere else, I always order pasta and I never get bored of it. At home I have to stop myself from cooking pasta more often than once per week (only because I try to cut on refined grains - luckily I can use whole meal pasta so I have an excuse!).

This recipe is simply wonderful: very easy and only a few ingredients that work perfectly well with each other. It is so simple that it can be prepared after a long day at work without much effort but from the other hand – festive enough to be served for guests. I have tested it many times and my guests have always asked for second helpings!

INGREDIENTS (4 portions):

3 garlic cloves thinly chopped,
0.5 chilli (without seeds, quarter chopped and quarter left as one piece),
2 tbsp chopped parsley,
2 tins of tomatoes,
2 tbsp olive oil,
0.5 tsp sugar,
Salt and pepper,
100g fresh spinach,
400g prawns without shells,
400g bavette (or spaghetti),
basil.

METHOD:

  1. Heat the olive oil in a heavy pan on a medium heat; add the garlic, chilli and parsley, fry stirring constantly for a short while till aroma is released.
  2. If you are using whole tomatoes, cut them into smaller pieces at first, then add to the pan and increase the heat so the mixture boils.
  3. Decrease the heat and cook for 15 min. till the sauce thickens. In the meantime you can check its taste – add sugar and if the sauce is too spicy, discard the piece of chilli.
  4. Cook the pasta as per the packet instruction.
  5. Add the spinach to the sauce, stir.
  6. Adjust the seasoning and add the prawns to the sauce. If you are using cooked prawns, just reheat them; if raw – cook them in the sauce till they change their colour to pink.
  7. Sprinkle with chopped basil.


prawns, tomato sauce

Monday, 1 December 2014

A Look at Food - what to eat and what not to eat (or at least eat in small quantities)


diet, eating healthy, nutrients, healthy, nutrition


Although there is no bad food there are only bad diets, some types of food are better for us than other types.

Our diet should be rich in nutrient dense food because it provides us with all sorts of goodness (nutrients) without the bad stuff (fat, added sugar) and only with a small amount of calories. But we have to be careful not to “spoil” the nutrient dense food by preparing it with added sugar or solid fats. For example 85g of chicken breast has 138 kcal if baked but 246 kcal if breaded and fried (Dietary Guidelines for Americans 2010).  

If you would like to check how nutrient dense your favourite ingredients are, please follow this link but here, straight away there is a short list of food we should eat more:
  • Vegetables (especially dark green vegetables which are on top of the list of nutrient dense food, but also red and orange ones as well as peas and beans),
  • Fruit,
  • Whole grains (they should amount to at least 50% of all grains intake),
  • Fat-free or low-fat dairy products,
  • Wide range of low calorie and low fat proteins (not only meat that should really be replaced by fish, but also legumes, nuts, soy products),
  • Oils (instead of solid fats).

Energy dense food is the complete opposite: it has very few nutrients but lots of calories often referred to as empty calories. I am afraid majority of us know exactly which products belong to this group: the ones we do enjoy tremendously but as soon as we finish them we feel guilty we had them.... 

So we should eat (much) less of them and at the same time we should reduce consumption of the following (DGA 2010):
  • Sodium < 2300mg/day (preferably even < 1500mg/day) – that means approximately 1 teaspoon of salt per day (or even less than 0.5 teaspoon in the second case),
  • Saturated fatty acids < 10% of total daily calorie intake,
  • Cholesterol < 300mg/day,
  • Trans fatty acids (hydrogenated fats) as low as possible,
  • Refined grains,
  • Solid fats and added sugar (SoFAS) < 5-15% of the total daily calorie intake,
  • Alcohol.

I know from my own experience it is not easy to quit old habits and wonderful tastes that – unfortunately - fat and sugar give to meals but don’t we deserve to look after ourselves? Besides with a wide range of products that are good for us and should be eaten, we can get creative and make delicious but healthier meals. 

And lastly - as I wrote at the beginning of this post - there is no bad food there are only bad diets, so if we are really desperate to have a lemon meringue roulade (or something equally sinful), let’s have it, it will be OK. It will be OK as long as we don’t have it every day.