Friday, 28 August 2015

Salad with Roasted Peppers and Tomatoes [vegetarian]


Salad, vegetarian, tomatoes, peppers, roasted peppers, recipe, recipes, healthy


This salad is all about the wonderful combination of ingredients: tasty tomatoes with sweet roasted peppers, salty anchovies, slightly acidic capers, crunchy pine nuts and fragrant basil. I prefer to finish it off just before serving as I don’t like when the tomatoes go soft from being covered by dressing for too long. But a lot can be prepared much earlier to ease the pressure in case the salad is to be served for guests. The peppers can be roasted, peeled and cut even a day earlier and all the ingredients can be arranged on a serving plate a couple hours before serving so you only have to prepare the dressing.

This delicious, summery salad is an ideal solution, if you are looking for an accompaniment to your grilled or roasted meat for gathering with family or friends but it will also suit a salad buffet very well.

INGREDIENTS (4 portions, if served with other dishes):

3 red peppers,
3 tomatoes (I used raspberry and black tomatoes),
3 anchovies, drained and chopped,
1 tbsp drained capers,
1 tbsp pine nuts,
1 garlic clove, thinly sliced,

Dressing:
3 tbsp olive oil,
1 tbsp balsamic vinegar,
1 tsp lemon juice,
a few basil leaves, chopped,
salt and pepper.

METHOD:
  1. Preheat grill in an oven.
  2. Cut the peppers in half, remove stalks and seeds, cut in half lengthways again and arrange the quarters skin side up on a baking tray; put under the hot grill till the skin chars (this will take approx. 10-15 min. but check frequently as required time depends on a grill).
  3. Put the charred peppers to a bowl, cover with cling film and leave to cool.
  4. Peel the peppers and cut them into strips.
  5. Cut the tomatoes into bite-size portions.
  6. In a big bowl arrange the tomatoes, peppers, sprinkle with anchovies, capers, pine nuts and garlic.
  7. Mix all the dressing ingredients until combined and pour over the salad, season.
  8. Stir the salad before serving.
Salad, vegetarian, tomatoes, peppers, roasted peppers, recipe, recipes, healthy


Wednesday, 26 August 2015

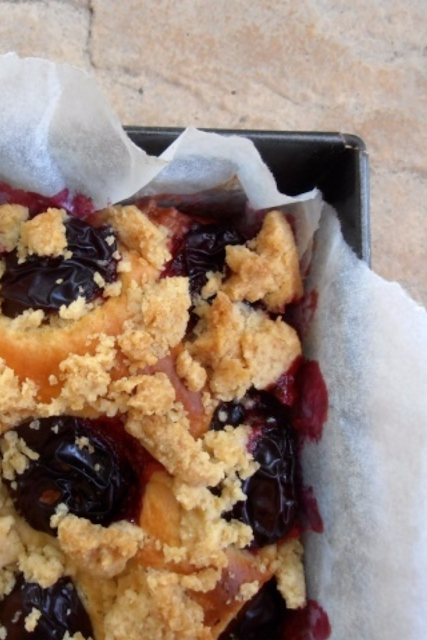
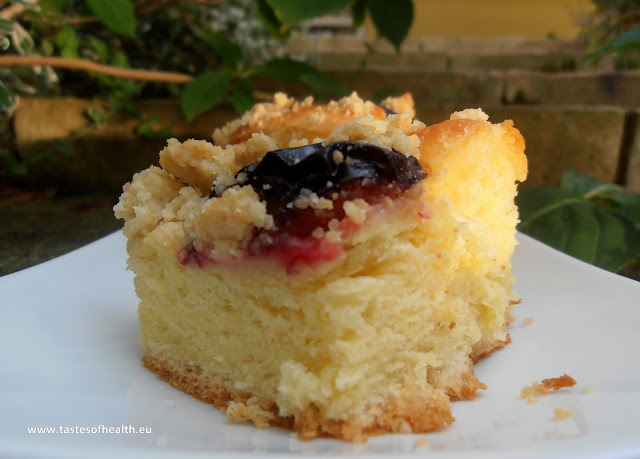
Yeast Cake with Plums and Crumble Topping [My Grandma’s Baking – Part I]


Yeast cake recipe, plums, yeast cake, recipe, crumble topping, yeast, recipes


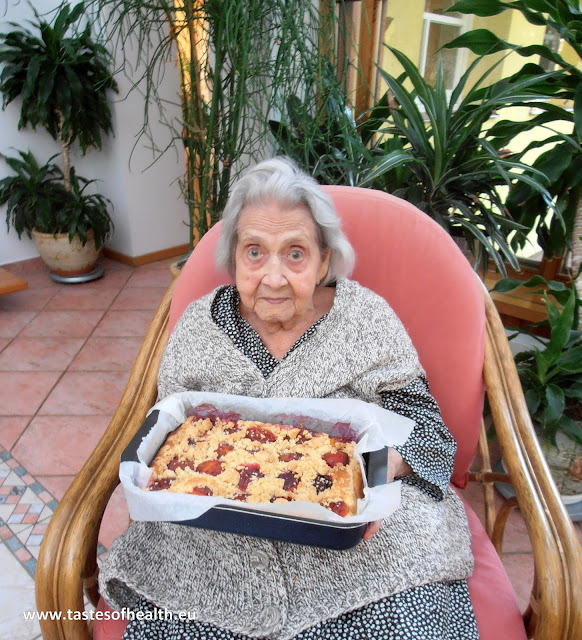
When I think about people who have influenced my cooking, my maternal grandmother is surely one of them. For as long as I can remember, there has always been at least one cake baked by her every Sunday and many, many more for special occasions. Her birthday cakes (torte) with butter cream were famous amongst family, friends and acquaintances and I can still remember us – her grandchildren – fighting over who was going to scrape bowls with the leftover butter cream. She also specialized in all sorts of yeast cakes so I knew if I was to learn to bake them properly, I should learn directly from the master.

My grandma revealed to me all the tricks on how to prepare the yeast dough (please check the recipe below for the details) but a small problem appeared when I asked her about quantities of ingredients. It occurred she always used her intuition and played by the ear! When it comes to baking I am completely different: very precise about the amounts. So I did end up weighing everything to make sure I have not only the perfect description of the yeast dough preparation but also the perfect combination of ingredients to ensure the success. And believe me, if you follow this yeast cake recipe, you will achieve a success: a delicious, light and airy yeast cake!

INGREDIENTS (for 20 pieces):
250ml milk,
60g sugar,
20g yeast,
75g butter,
2 egg yolks,
300g plain flour,
pinch of salt,
600g plums.

Crumble:
75g butter,
100g plain flour,
50g Demerara sugar.

METHOD:
  1. Warm up the milk. It should be warm but not hot, hot milk will “kill” the yeast.
  2. Pour half the milk to a cup, add 2 tbsp of sugar and the yeast, stir it and leave till it rises.
  3. Melt the butter.
  4. Beat the egg yolks with the rest of sugar till creamy.
  5. Put the flour and salt to a big bowl, add the milk and beaten egg yolks and knead for a minute until more or less combined; add the yeast mixture and knead for 1-2 minutes and finally add the melted butter. Knead the dough until it is smooth (however small lumps are fine) and it doesn’t stick to your hand anymore. It should take about 5-7 minutes.
  6. Leave the bowl with the dough in a warm place until it doubles in size. Depending on the temperature, it can take between 1 and 2 hours.
  7. Wash and dry the plums, cut them in half and remove stones. You may not need all of the plums (the amount depends on their size).
  8. Cover a bottom and sides of a rectangular 23cm x 35cm baking tray with baking paper. You may use a slightly bigger tray but I wouldn’t use a smaller one as then the cake will be too high.
  9. Transfer the dough to the prepared tray and spread it. The best way to do it is with your hands but make sure you cover your hands with oil at first to prevent the dough from sticking to them.
  10. Arrange the plums on top of the dough and leave it to rise again (approx. 10-15 min.)
  11. Preheat an oven to 180 Celsius degrees (fan oven).
  12. Prepare the crumble: melt the butter, add the flour and sugar and rub everything together.
  13. When the cake has risen, put the crumble on top of the plums and place the tray in the hot oven.
  14. Bake for 30-35 min. until the cake is baked trough (check by inserting a wooden stick, if it comes out dry, the cake is ready). 
Yeast cake recipe, plums, yeast cake, recipe,crumble topping


Friday, 21 August 2015

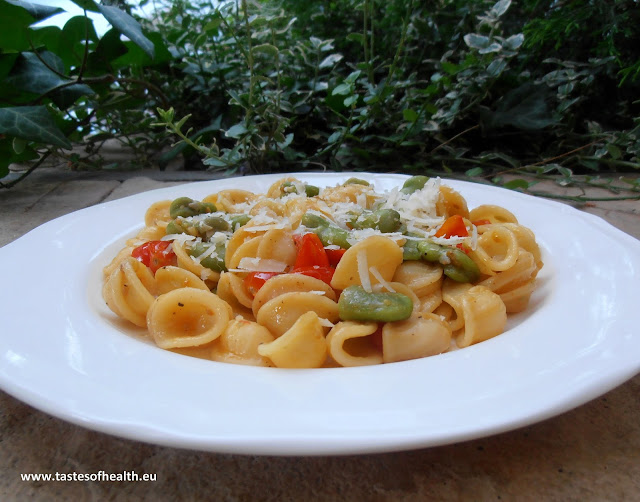
Orecchiette with Broad Beans and Tomatoes [Vegetarian]


pasta, pasta recipe, broad beans, orecchiette, tomatoes, vegetarian


Although in summer I prepare a lot of salads for us, it is nice to have something just slightly heavier from time to time, like pasta. Since hot weather doesn’t really go that well (at least in my opinion) with heavy and creamy sauces, one day I came up with this tasty pasta recipe below.

The great advantage of this dish is that the majority of ingredients I used are probably available in lots of kitchens on daily basis with broad beans being the only exception. I usually buy, cook and shell 1 kilo at a time and that way the preparation of this pasta dish takes me 20 minutes - the time I need to cook the orecchiette. If you don’t already have cooked broad beans, the preparation will take you a bit longer. But it is worth it as you will end up with a perfect, summer dish: pretty light but filling enough so that you will not look for a snack just an hour after your lunch.

INGREDIENTS (for 2 portions):
150g orecchiette,
3 tbsp olive oil,
1 shallot, finely chopped,
1 garlic clove, finely sliced,
200g cherry tomatoes, cut in halves,
3 anchovies, chopped,
150g cooked broad beans, shelled (or 300g, if you are cooking them fresh and still have to shell them)
salt and pepper,
grated Parmesan cheese to serve.

METHOD:
  1. Boil the pasta in the salted water as per packet instruction.
  2. On a medium heat warm up the olive oil, add the shallot, fry for a minute, add the garlic and fry for 2 minutes.
  3. Stir in the anchovies and tomatoes, cook for 5 minutes until the tomatoes soften; add the broad beans and warm up.
  4. Drain the pasta but keep half a cup of the cooking liquid.
  5. Add the pasta to the sauce, stir and if it is too dry add a few tablespoons of pasta water, check the taste and season.
  6. Serve with grated Parmesan cheese.
pasta, pasta recipe, broad beans, orecchiette, tomatoes, vegetarian


Wednesday, 19 August 2015

Thai Style Prawns [Shrimps] Stir-Fry


stir-fry, prawns, prawn recipes, shrimps


Although I experiment a lot with cooking new dishes, sometimes when I find a meal we love, I tend to make it often and don’t look for other options. So when I buy prawns [shrimps] and think how I should cook them, I often go back to my Pasta with Prawns recipe. It is quick, easy to make and delicious. But I do realize that by continuing to choose this yummy but safe option, I may not cook a really wonderful but other prawn dish.

So when I bought shrimps last time I decided to cook them differently: slightly spicy in a coconut sauce. The meal took only minutes to prepare (I think the jasmine rice took longer to cook!) and was very, very good. So it is a perfect dinner idea on a busy evening but it could easily be served for a dinner party with another stir-fry as well.

INGREDIENTS (for 4 portions):
500g prawns, without heads, shells and intestines,
1 tin (400ml) coconut milk,
1 tbsp oil,
salt and pepper.

Sauce:
0.5 red chilli (without seeds), thinly sliced (you can use more chilies, if you prefer this dish to be spicier),
1 onion, chopped,
5cm piece of ginger, peeled and grated,
5cm lemon grass stalk (without the hard outer leaves), chopped,
6 blanched almonds,
0.5 tsp turmeric,
0.5 tsp salt.

METHOD:
  1. Put all the sauce ingredients to a food processor, add 3 tbsp of coconut milk and process until you end up with a smooth paste.
  2. Heat the oil in a wok or a large frying pan, add the prawns and stir fry for 2-3 minutes; remove from the wok.
  3. Put the sauce and the rest of the coconut milk to the wok and bring to boil.
  4. Stir in the fried prawns, heat up and adjust seasoning.
  5. Serve with cooked jasmine rice.

This dish is inspired by a recipe from “The Complete Wok & Stir-Fry Cookbook” 


stir-fry, prawns, prawn recipes, shrimps


Friday, 14 August 2015

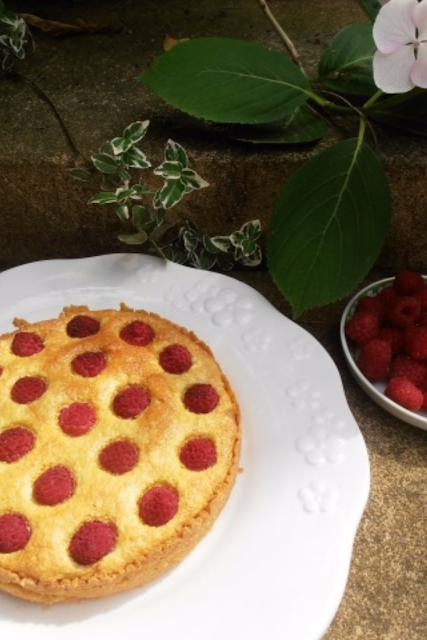
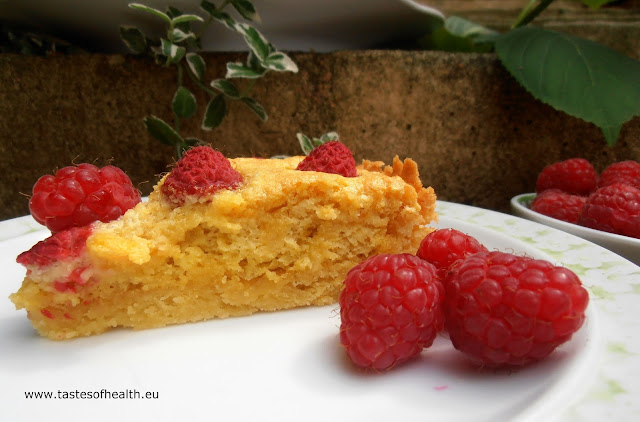
Almond Cake with Raspberries


cake, almond cake, raspberries, cake recipe


It is not a secret that I have a sweet tooth and I love cakes. In truth, my whole adventure with cooking started with baking. But I do know that cakes - although delicious - are not really the healthiest option. I do try to bake healthier versions with less sugar, no butter, no gluten etc. but it doesn’t change the fact that sometimes I do fancy a heavier cake. That is why I came up with an idea of baking… small cakes. So I use smaller baking tins and obviously end up with less cake and smaller portions. Thanks to this, I can still enjoy a piece of heavier cake but it is a much smaller piece, and after having it, I don’t feel guilty!

For this Almond Cake I used an 18cm-diameter tin which – when I saw it in a shop for the first time – looked so tiny. But you can easily divide this cake into 8 portions. But if you have guests or you fancy a bit more of it, you can simply double the ingredients, use a bigger tin and extend baking time (for the whole cake with the filling) by approx. 10-15 minutes.

INGREDIENTS (for 6-8 portions):

Base:
100g diced butter plus extra for greasing a baking tin,
125g plain flour,
40g sugar,
1 egg yolk,

Filling:
30g sugar,
2 egg yolks,
125g ground almonds,
3 egg whites,
1 tbsp Amaretto liquor,
100g raspberries.

METHOD:
  1. In a food processor (or manually) mix the butter and flour, add the sugar and egg yolk and quickly combine together; form a flattened ball and put it to a fridge for at least 1 hour.
  2. After that time heat up an oven to 200 Celsius degrees (180 for fan ovens) and grease a 18cm round baking tin with a removable base.
  3. Roll the dough between two pieces of baking paper (it is easier this way) and transfer it to the tin making sure the base and sides (min. 3-4 cm high) are covered.
  4. Bake in the oven for 15 min.
  5. Beat the egg yolks with the sugar and amaretto until creamy, add the almonds and stir.
  6. Whisk the egg whites till stiff and then add a few spoons to the almonds’ mixture to loosen it a bit, stir and add the rest of the whisked egg whites and stir again very gently.
  7. Pour on top of the baked base, decorate with raspberries and put to the oven (temperature decreased to 180 Celsius degrees or 160 for fan ovens) for 40-45 min.
cake, almond cake, raspberries, cake recipe


Wednesday, 12 August 2015

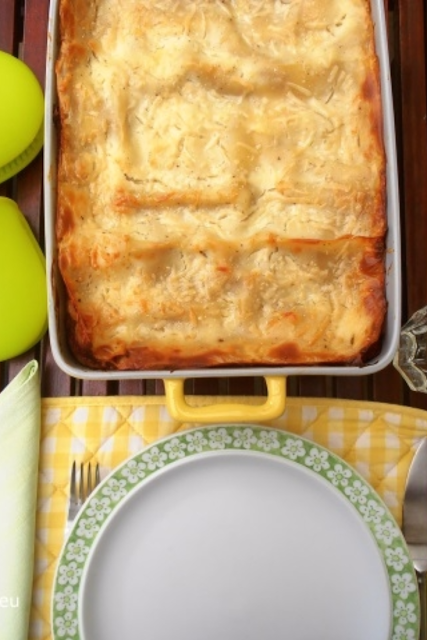
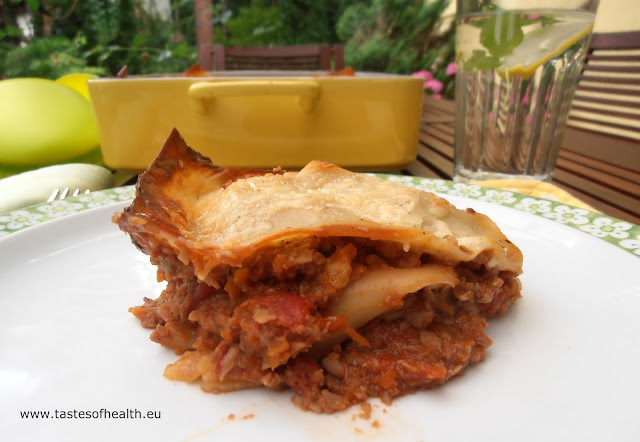
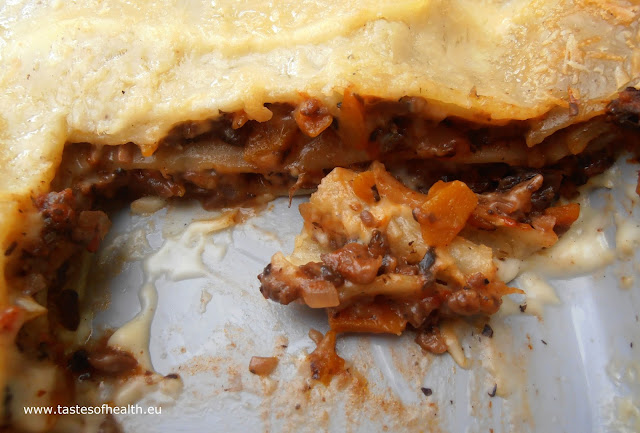
Vegetarian Lasagne with a Mushroom Bolognese Sauce


lasagna, vegetarian lasagna, béchamel sauce, lasagna recipe, Bolognese sauce, lasagne


Actually my daughters made lasagna for the first time in our home a few years ago. I was obviously with them supervising and helping where necessary, but they did vast majority of the preparation and cooking themselves. Their lasagne was really delicious so they made it a number of times but it had one weakness: it wasn’t vegetarian. And since one of my girls stopped eating meat two years ago, I was faced with a challenge to try and come up with a vegetarian lasagna recipe for a meal that would taste almost exactly the same as the meat version.

I decided to use a recipe for Bolognese sauce but - similar to Vegetarian Chilli Con Carne – I replaced the meat ingredient with mushrooms. Again, it proved to be a very good idea as the sauce tasted delicious and I would almost say – meaty!

INGREDIENTS (for 6-8 portions)
2 tbsp olive oil,
1 big onion,
3 garlic cloves,
2 carrots,
750g mushrooms,
2 tins of tomatoes, (I prefer whole ones but chopped tomatoes are fine too),
250ml red wine,
1 bay leaf,
0.5 tsp sugar,
salt and pepper,
lasagna sheets (number depends on the size and shape of a dish), preferably a type that doesn’t have to be precooked,
25g grated Parmesan cheese.

Béchamel sauce:
5 tbsp olive oil,
75g flour,
600ml milk,
25g grated Parmesan cheese,
0.5 tsp grated nutmeg,
Salt and pepper.

METHOD:
  1. Finely chop, grate or process onion, garlic and carrots.
  2. On a medium heat warm up the 2 tbsp olive oil in a big frying pan, add the vegetables and fry stirring occasionally for 5 minutes.
  3. Finely chop the mushrooms (you can also process them but be careful not to over-process them) and add to the vegetables, fry for 5-7 minutes until the liquid evaporates.
  4. Add the canned tomatoes, red wine, bay leaf, sugar and a bit of salt and pepper, stir and on a medium heat cook for 40 minutes, stirring from time to time, till the sauce thickens. When the sauce is ready, check the taste and adjust seasoning if necessary.
  5. In the meantime prepare the béchamel: in a heavy-based pot warm up the olive oil, add the flour and stir it quickly and very well. Pour the milk (cold), vigorously whisk it and bring it to a simmer on a low heat, season well (salt, pepper and nutmeg). Constantly stir the sauce till it boils and thickens. Add the Parmesan cheese, check the seasoning again, adjust if necessary.
  6. Pre-cook the lasagna sheets (if they require pre-cooking): use a big pot and cook only 2-3 sheets at a time so they don’t stick together. If you don’t use them straight away, once cooked put them on plates making sure they don’t touch each other to prevent them from sticking together.
  7. Preheat an oven to 180 Celsius degrees.
  8. Put a quarter of béchamel sauce on the bottom of a square or rectangular oven proof dish*, cover it completely with lasagna sheets. If necessary trim them so they match the size and shape of the dish.
  9. Spread half of the mushroom sauce over the lasagna sheets, then spread the second quarter of the béchamel and cover with some more lasagna sheets; repeat one more time.
  10. Cover the top layer of lasagna sheets with the rest of the béchamel and sprinkle with grated parmesan, put to the hot oven and bake for 30 minutes.
I used 22x30 cm dish and for this amount of ingredients, I wouldn't recommend using a bigger one as the lasagna would be too thin.

lasagna, vegetarian lasagna, béchamel sauce, lasagna recipe, Bolognese sauce, lasagne

lasagna, vegetarian lasagna, béchamel sauce, lasagna recipe, Bolognese sauce, lasagne


Wednesday, 5 August 2015

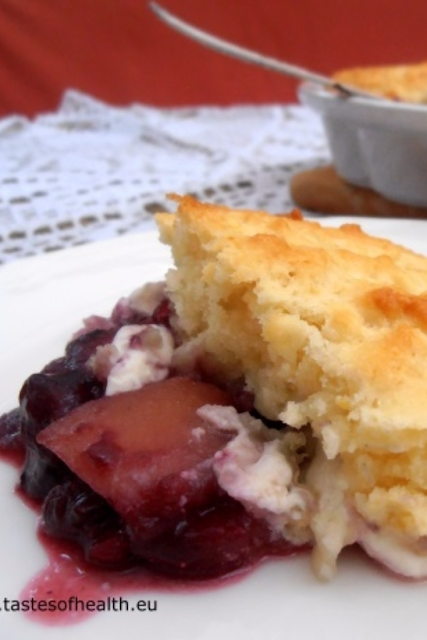
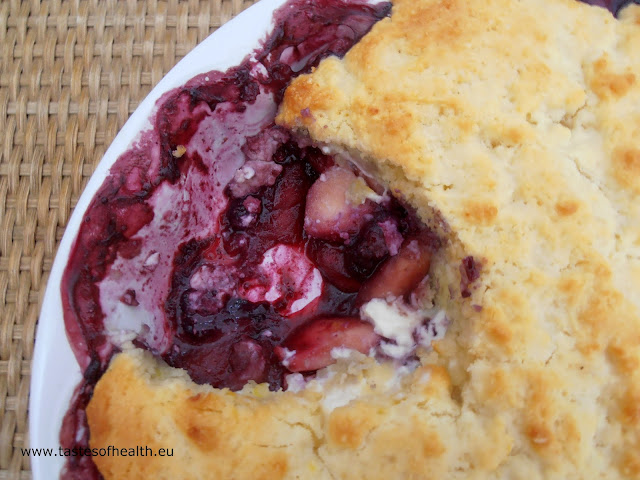
Apple and Blueberry Cobbler


dessert, apple, blueberry, mascarpone, easy dessert


Although I love testing new recipes, there are many dishes I have been cooking for years, and this Apple and Blueberry Cobbler is just one of these. When I made it for the first time, it was already so popular that my husband and brother almost chased each other to the kitchen the next day to have the leftovers for breakfast. And still now when I make it for guests, everybody loves it and it is finished in no time.

Another advantage of this easy dessert is that both fruit and batter (all ingredients but milk) can be prepared in advance (even a day ahead). And then approx. 45 minutes before you would like to serve this incredible dish (for me it is usually when I finish up preparing the main meal), you warm up your oven, add milk to the batter and arrange everything in the dish. And just when your guests are ready for dessert, your just-baked dessert is ready to be served, too.

INGREDIENTS (for 6 portions):
4 apples (approx. 600g), peeled, cored and sliced,
1 tbsp butter (plus extra for greasing),
250g blueberries (or mixture of blueberries and raspberries,) fresh or frozen,
25g sugar,
250g mascarpone cheese,
200g plain flour,
1.5 tsp baking powder,
80g butter, cut into pieces,
50g sugar,
1 lemon (finely grated zest only),
150ml milk.

METHOD:
  1. Melt 1 tbsp of butter, add the sliced apples and fry them on medium heat for 3-4 minutes.
  2. Add the blueberries and sugar, fry for 2 minutes and put aside to cool down. If the apples you use are sour, you may want to add more sugar.
  3. Grease an ovenproof dish (I used a round one, 23 cm diameter) and transfer the prepared fruit to the dish.  
  4. Put the flour and the baking powder to a bowl, add the butter pieces and with your fingers combine them together till the mixture resembles fine crumbs.
  5. Stir in the sugar and lemon zest. If you are preparing this dessert in advance, you would continue with the next steps approx. 45 min. before you would like to serve it.
  6. Preheat an oven to 200 Celsius degrees (180 degrees for fan ovens).
  7. Add the milk to the dry mixture and stir with a spoon until everything is combined.
  8. Using two teaspoons put the mascarpone on top of the fruit, and then the same way spoon the prepared batter on top of the mascarpone (the layers don’t have to be smoothened as mascarpone will melt in the oven and the batter will rise).
  9. Bake in the oven for 20-25 minutes.
  10. Let it rest for 10 minutes before serving.
dessert, apple, blueberry, mascarpone, easy dessert