Wednesday, 15 April 2015

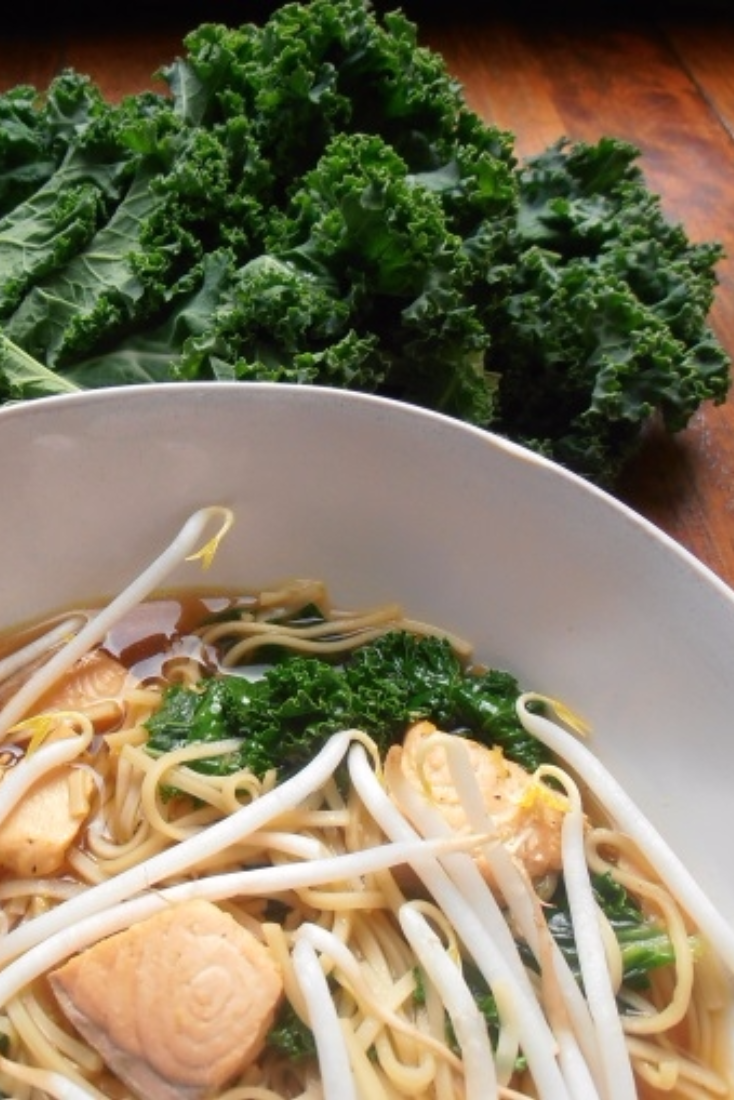
Asian Soup with Salmon and Kale


soup, soup recipe,  kale, salmon, recipe, healthy soup


I had a glimpse of how it is to be on the TV series Masterchef. I mean the moment when participants open a Mystery Box, they can see ingredients and quickly have to decide what they are going to cook. Some of them play it safe and make something they have done before, others take a risk and play it by the ear or – rather in this context – by their taste.

In my case, my Mystery Box was my fridge and the kitchen cabinets before shopping was done when there are still many - but often odd - ingredients not necessarily meant for a specific meal. Additionally everybody was getting hungry so I didn’t have all the time in the world to think what to cook and then cook it. My first idea was the safe one: stir fry. But then I thought that even though I love stir fries, I should go for something different. So I cooked this healthy soup instead.

I included in it ingredients that are typical for Asia: ginger, chilli, soya and fish sauce. White wine might not be the obvious choice, rice wine would probably be better but I didn’t have it then. Overall the combination of flavours in the stock works really well and addition of salmon, noodles and kale makes it a complete meal a whole family can enjoy on a busy weekday evening when nobody has hours to cook and nobody wants to wait for hours to eat!

INGREDIENTS (for 4 portions):

400g skinless and boneless salmon fillet cut into 2 cm cubes,
1 tsp sesame oil,
1.5l vegetable stock,
5 tbsp white wine,
2 tbsp soya sauce
1 tbsp fish sauce,
chilli flakes,
3 tsp grated ginger,
150g kale thorn into small pieces (without stems),
150g bean sprouts,
100g Chinese/wok noodles.

METHOD:

  1. Put the salmon cubes into a bowl, add the sesame oil, stir well and let it marinate until you need it.
  2. Heat up the vegetable stock, add the white wine, soya and fish sauces, chilli flakes and ginger.
  3. When the spiced stock is boiling, add the Chinese noodles (you may break them into smaller pieces so it will be easier to eat the soup), bring to boil, add the salmon and kale and cook for 2 minutes.
  4. Serve the soup with bean sprouts.
soup, soup recipe,  kale, salmon, recipe, healthy soup


Thursday, 9 April 2015

Spinach with Raisins [vegetarian]


spinach, nutrients, spinach recipes, vegetable, healthy food, recipe, vegetarian


Unlike many people, I really don’t have any bad “spinach memories” from my childhood. And it is not because I liked it, it is because I didn’t have it at all for the first several years of my life. When I finally tried it, I wasn’t impressed as it looked and – probably - tasted like boiled grass. Luckily I was wise enough to give it a second chance so when I tried pancakes with well-seasoned, slightly garlicky spinach filling, I felt it was the beginning of a long-term relationship.

This relationship evolved slowly because at first I would just have a variation of the pureed spinach with béchamel sauce and garlic served either with pancakes or even - simply but so yummy – with mashed potatoes and a fried egg. After a while, to my tiny repertoire of spinach recipes I added a spinach soup. And that was it for quite some time. That was it until I spent more time researching spinach attributes.

Probably we all have heard that spinach is a very healthy food but what does it really mean? Due to a wide variety of phytonutrients, spinach provides excellent anti-inflammatory and anti-cancer benefits, especially in case of stomach, skin, breast and prostate cancer. It also has anti-oxidant properties that prevent (or at least lower the risk) of blood-vessel related problems like atherosclerosis and high blood pressure. Spinach is an excellent source of Vitamin K, Calcium and Magnesium that are key for maintaining healthy and strong bones. And no wonder that this green leafy vegetable is on top of the list of nutrient dense food as apart from the 3 listed earlier, it is also a very good source of 16 other nutrients: Vitamins A, B1, B2, B6, C and E, Manganese, Folate, Iron, Copper, Potassium, Fibre, Phosphorus, Zinc, Protein and Choline.

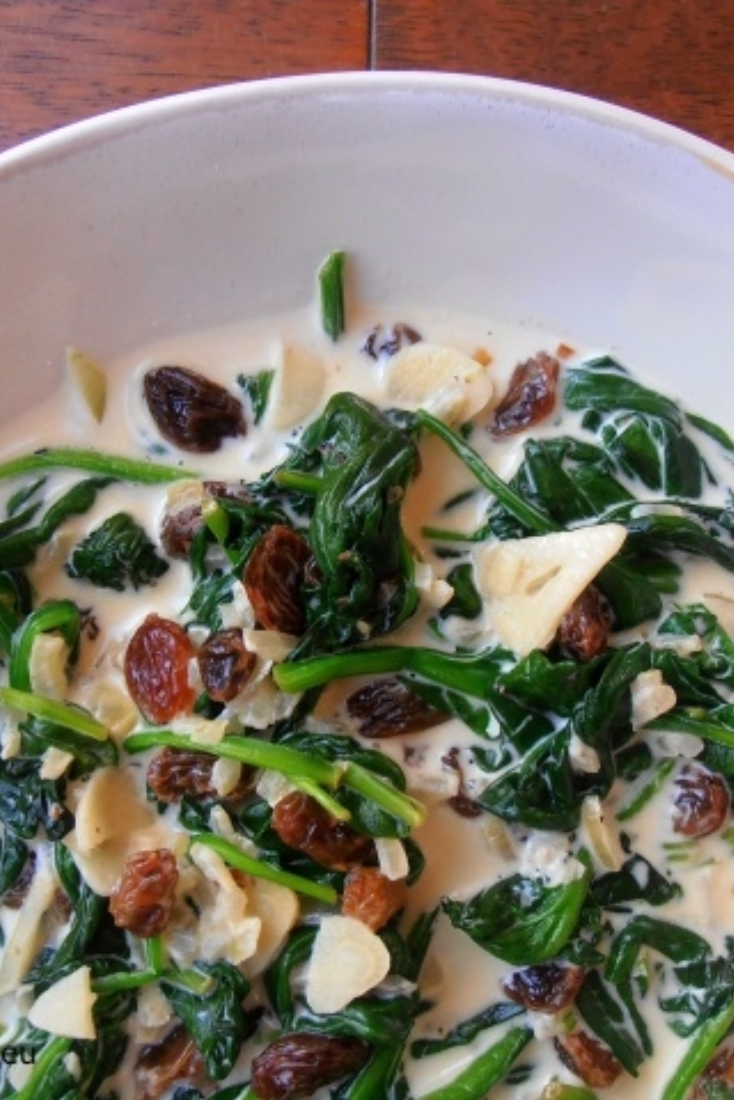
Realizing how healthy spinach really was, I decided to use it much more often. These days I include it in soups, dhals, pastas or salads. I know that addition of a few handfuls of spinach to a dish is so easy and will make it healthier and prettier. But I also know that spinach deserves to be a main ingredient like in the recipe below in which I re-created a wonderful meal I had a few years ago in a restaurant. It can be served either as a warm starter or a side dish perfect with baked/roasted fish.

My spinach story is clearly a love story. If you haven’t started yours yet, please give spinach a chance with the below recipe. It is highly likely you will fall for it just the way I did.

INGREDIENTS (2 portions):

75g raisins,
1 tbsp butter,
1 small onion, finely chopped,
2 garlic cloves, thinly sliced,
250g spinach,
100 ml double cream,
1-1.5 tbsp honey,
Salt and pepper.

METHOD:
  1. Soak the raisins in hot water.
  2. On a medium heat melt the butter in a big pot, add the onion and garlic and fry stirring for 2-3 minutes, till translucent but not burnt.
  3. Add the spinach and fry it stirring constantly until almost wilted; add the cream, honey, raisins and the seasoning.


spinach, nutrients, spinach recipes, vegetable, healthy food, recipe, vegetarian

Thursday, 2 April 2015

Cookie Dough Easter Eggs


Easter, cookie dough, Easter eggs, recipe, dulce de leche, edible cookie dough


There would be no Easter without Easter eggs. At this time of the year they appear on menus and tables in many different forms: stuffed eggs, chocolate eggs or just eggs with mayonnaise. And to this selection, I would like to add a recipe for another type – delicious and beautiful Cookie Dough Eggs that easily can be a centerpiece decoration of any Easter table.

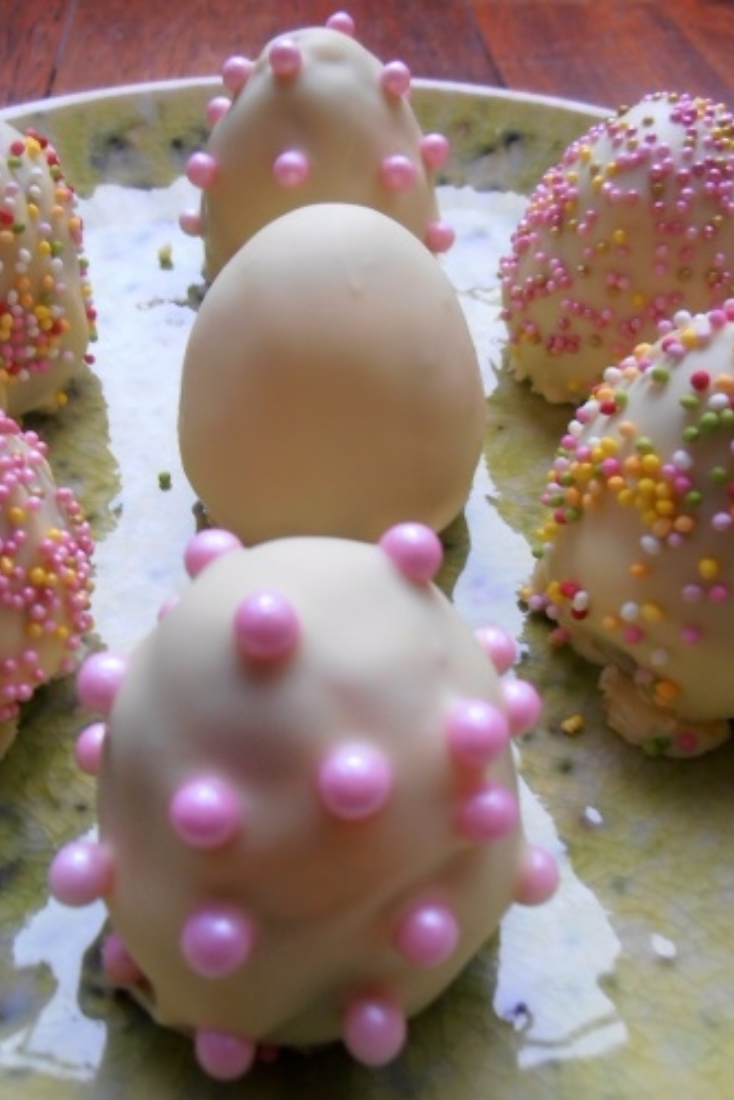
You will need very few ingredients to make them, just a bit of time to form and decorate them but in truth - this is just pure fun! When they are done, they have all the parts (though in different colours) that a regular egg has: a shell (chocolate), a white (edible cookie dough), and a yolk (dulce de leche). Although the cookie dough is prepared slightly differently - by whizzing together butter biscuits, walnuts and dulce de leche – you end up with a yummy result and additionally, you don’t have to worry about eating raw flour or eggs.

INGREDIENTS (for 8-10 eggs):

150g plain butter biscuits,
25g ground walnuts,
50g  + 150g dulce de leche,
100g white chocolate,
colourful pearls for decoration.

METHOD:
  1. On a small plate covered with cling film put 10 portions of dulce de leche and place the plate in a freezer for at least 1 hour. The portions should equal to approx. half a teaspoon and you will use the 50g of dulce de leche to prepare them. The longer they are kept in the freezer, the easier it will be to shape the eggs later.
  2. Put the biscuits and ground walnuts to the food processor, whizz them until they resemble fine crumbs, add the 150g of dulce de leche and process till everything is combined.
  3. Divide the dough into 10 equal portions and start shaping the eggs: take approximately half of the portion of the dough for one egg and with your fingers create a small disc. Put one portion of the frozen dulce de leche inside the disc, take the other half of the dough to close up the filling and roll it gently with palms of your hands to make an egg shape. Put on a plate (wider part down) and press gently to make sure the egg stands. Continue with other eggs. If you feel it is easier for you to make bigger eggs, then add more dough to each portion. This way you may end up with 8 eggs.
  4. When all the eggs are ready, put them to a fridge for minimum 30 minutes.
  5. Melt the white chocolate over a pan of simmering water, pour it to a cup.
  6. Take one egg and pierce its bottom part with a sharp fork, making sure the egg stays firmly on the fork. Dip the egg in the white chocolate, let the excess flow down. Before the chocolate sets on the egg, decorate it with pearls and then gently place on a plate. You can take the egg of the fork without damaging the decoration with another fork that you put under the egg and gently lift it off the piercing fork. Continue with the remaining eggs.
  7. The decorated eggs should be kept in the fridge.
Easter, cookie dough, Easter eggs, recipe, dulce de leche, edible cookie dough


Saturday, 21 March 2015

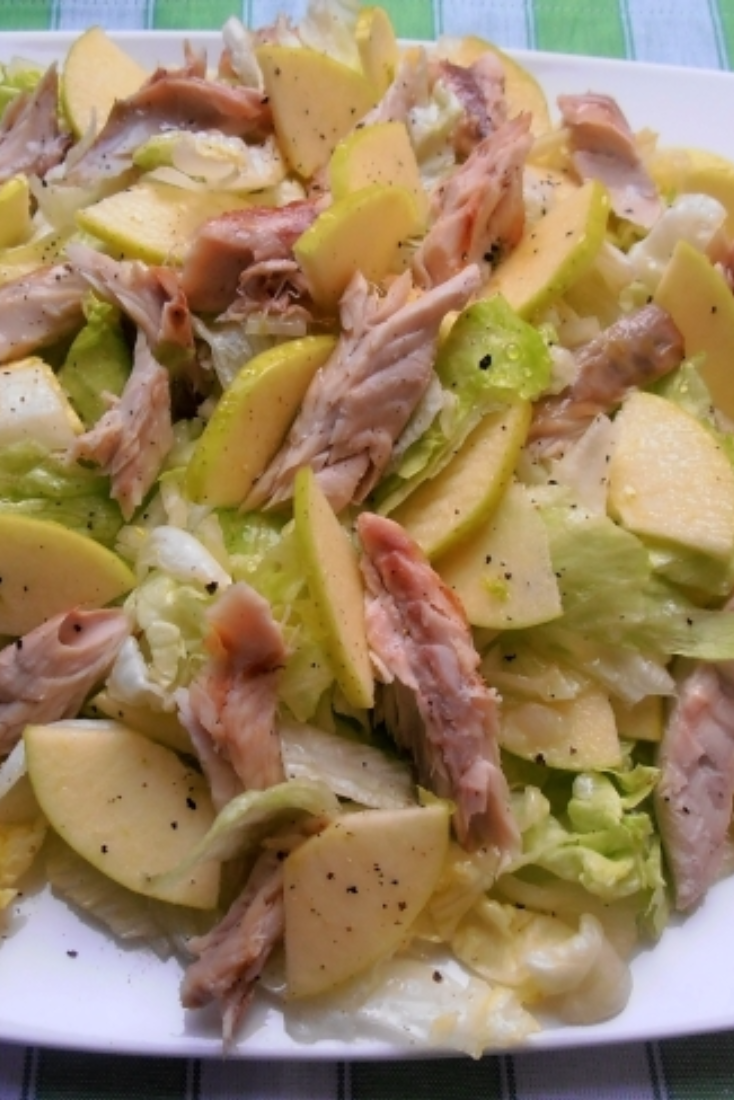
Green and Gorgeous Smoked Mackerel Salad


mackerel, salad, mackerel salad, lettuce, apples, smoked mackerel,  healthy salad, fennel


Whenever I make this salad, it always takes me back a few years to the time and place when we (or rather – my daughter) had it for the first time. A few years ago we went away for a couple of  days to a  pretty little town that in season buzzes  with life but when we were there – it was winter – it was pretty quiet and empty. We were a bit concerned, if we would be able to find an open nice place we could eat, but as we walked along we found heaven: a really amazing slow food restaurant. We had many wonderful dishes there, as we obviously would go there every day, but it was this healthy salad that stayed with us as a memory of that short holiday.

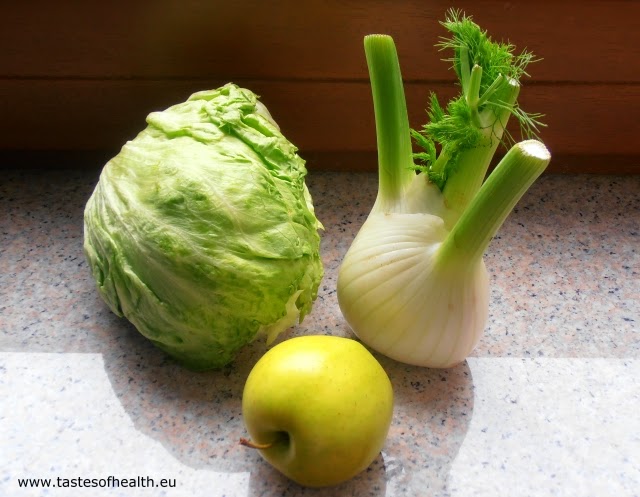
The main reason why this dish has been so memorable may be that I was just so happy that my daughter, who at that time hardly ate any raw vegetables, ordered that salad and loved it! So obviously I quickly worked out my own version and included it in menus at our home. We still love it nowadays as it is a pretty straightforward dish made from simple green ingredients (lettuce, apples, fennel)  that work together perfectly despite the fact that combining smoked mackerel and honey may not be the obvious choice!

INGREDIENTS (for 2 big portions):

1 smoked mackerel,
0.5 Iceberg lettuce, thorn into small pieces,
0.5 fennel bulb, thinly shredded,
1 big green apple (e.g. Golden delicious), quartered and thinly sliced,
3 tbsp olive oil,
1 tbsp + 1 tsp acacia honey,
1 tbsp white wine vinegar,
salt and pepper.

METHOD:
  1. Prepare the mackerel: with 2 forks (or your fingers) open the fish in the middle; take out a bone from the middle and remove all the little bones; separate small pieces of the fish from the skin and put them on a clean plate.
  2. In a big bowl mix the lettuce, fennel and apple.
  3. Make the dressing by stirring together the olive oil, vinegar and 1 tbsp honey, season.
  4. Pour the dressing over the vegetables, mix well and move onto a big serving plate (or 2 small ones).
  5. Arrange the pieces of mackerel on top of the salad mix, drizzle everything with the 1 tsp of honey.
mackerel, salad, mackerel salad, lettuce, apples, smoked mackerel,  healthy salad, fennel


Friday, 20 March 2015

Nutella and Peanut Butter Cake

Nutella, peanut butter, cake, how to make a cake


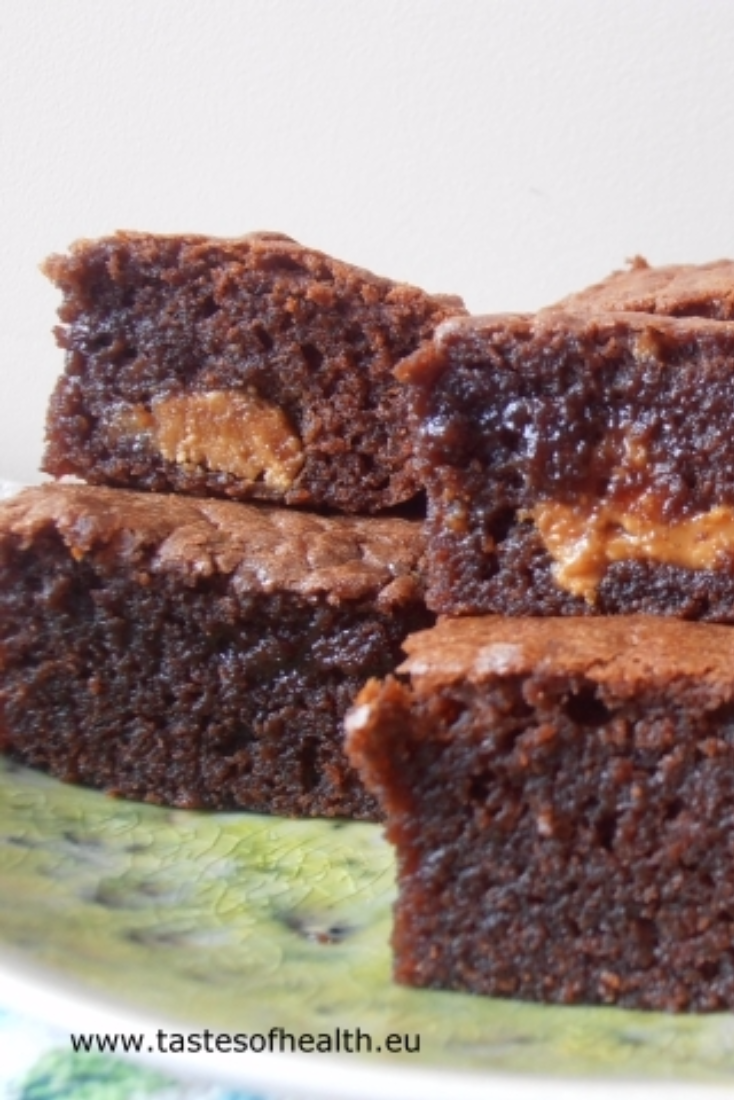
If you – just like us – belong to a peanut butter and Nutella fan tribe, this cake will take you to heaven: it includes both ingredients that combined together create an unforgettable experience. Obviously this is not the healthiest cake in the World, but I do believe that if you have it from time to time it will do no harm to your waistline nor to your overall healthy diet. But I bet it will bring a smile to your face!

It is a speedily made cake: your oven will probably need more time to heat up than you will need to prepare it. It means that - in case of unexpected guests – you could have it ready in slightly more than half an hour. And you don’t have to worry about ingredients, probably - just like us - you always have them in your cupboard ;-)

INGREDIENTS (for 16 pieces):

250g butter,
6 tbsp Nutella (or other chocolate spread),
90g Demerara sugar,
3 eggs,
80g all purpose flour,
0.75 tsp baking powder,
3 tsp cocoa powder,
1 -2 tbsp crunchy peanut butter,
sunflower oil for greasing.

METHOD:
  1. Preheat a fan oven to 160 Celsius degrees.
  2. Grease with oil and line with baking paper a 15cm x 23cm rectangle (or 20cm square) tin. This video shows a great way how to line a tin with baking paper so that it is very easy later to take the cake out.
  3. Put all the ingredients except for the peanut butter to a food processor and whizz them until combined and smooth; transfer to the baking tin.
  4. Drop small portions of the peanut butter into the cake, trying to push it to the batter; smooth the top.
  5. Bake in the hot oven for 25 minutes.
Nutella, peanut butter, cake, how to make a cake


Tuesday, 17 March 2015

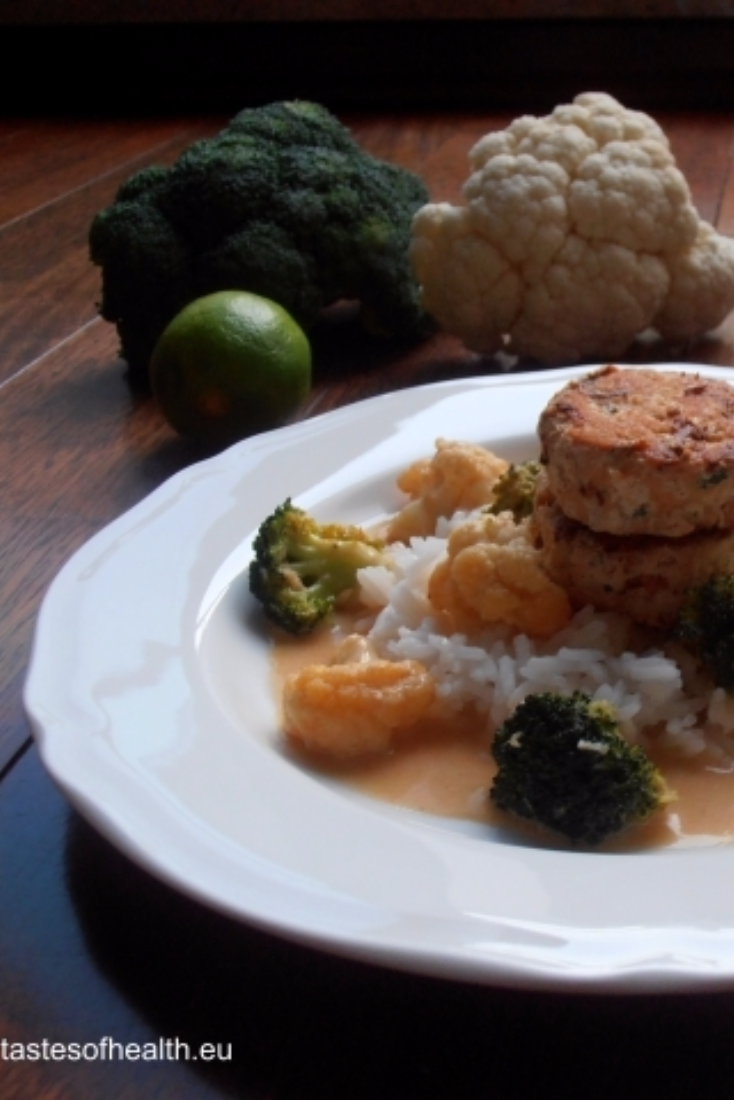
Thai Fish Cakes with Coconut Curried Vegetables


fish cake, coconut, vegetables, broccoli, cauliflower, coconut milk, fish, cod, white fish, recipe, recipes, healthy


There are quite a few advantageous of Fish Cakes. Firstly, they look like meatballs so you could trick your child who doesn't like fish to - at least - trying it (hopefully also liking it). Secondly – to make them you don’t need perfect fillets that you normally use for frying or roasting since you will have to chop the fish anyway. And thirdly – you have different options how to serve them: with a simple salad or – just like in my recipe – with broccoli and cauliflower in a curried coconut milk sauce, served with rice.

If you use my proportions of spices, you will end up with a not-too-hot dish but if you prefer it to be spicier or milder you can easily adjust the amounts. To make sure the whole batch of Fish Cakes is just the way you would like it to be, take a small portion of ready to fry fish mixture and fry a miniature test cake to check the seasoning. If it is not hot enough, add more spices. Since you can’t really make it less spicy at this stage, be careful not to add too much seasoning right at the beginning ;-)

INGREDIENTS (for 4 people):

Fish cakes:
400g fillet of white fish, skinless and boneless,
0.5 lime (juice and grated rind),
2 tbsp thinly chopped coriander,
1.5 tsp Thai red curry paste,
2 tsp grated ginger,
1 egg white,
0.25 tsp salt.
1-2 tbsp rapeseed oil for frying.

Vegetables:
1 tbsp rapeseed oil,
1 tsp grated ginger,
2 garlic cloves, grated,
1.5 tsp Thai red curry paste,
0.5 cauliflower (350g), cut into small florets,
0.5 broccoli (200g), cut into small florets,
1 can (400ml) coconut milk,
1.5 tsp Demerara sugar,
1.5 tbsp fish sauce,
juice from 0.5 lime.

METHOD:
  1. Put to the food processor all the ingredients for the fish cakes (except for the rapeseed oil) and process them till everything is combined. You have to make sure there are no bones in the fish!
  2. Form 8 round cakes from the fish mixture; put them on a plate and leave in the fridge for at least 20 minutes.
  3. Heat the rapeseed oil in a big frying pan; put in the fish cakes and fry them on a medium heat for approx. 3 minutes on each side.
  4. In another pan heat the rapeseed oil for the vegetables; add the ginger, garlic and chilli paste and fry till they release their aroma.
  5. Add the vegetables, fry for 2 minutes stirring to coat them in spices.
  6. Add the coconut milk, bring to boil and cook for 5 minutes, if you would like to have crunchy vegetables or a bit longer - for a softer version.
  7. Serve with jasmine rice.
fish cake, coconut, vegetables, broccoli, cauliflower, coconut milk


Friday, 13 March 2015

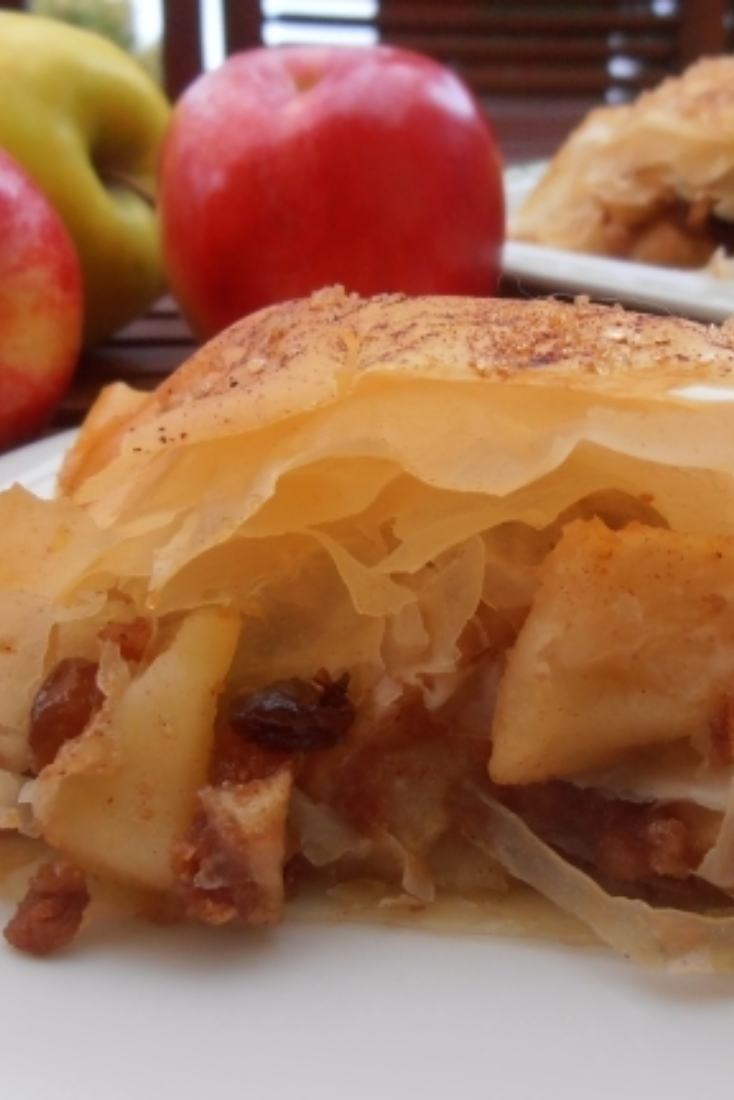
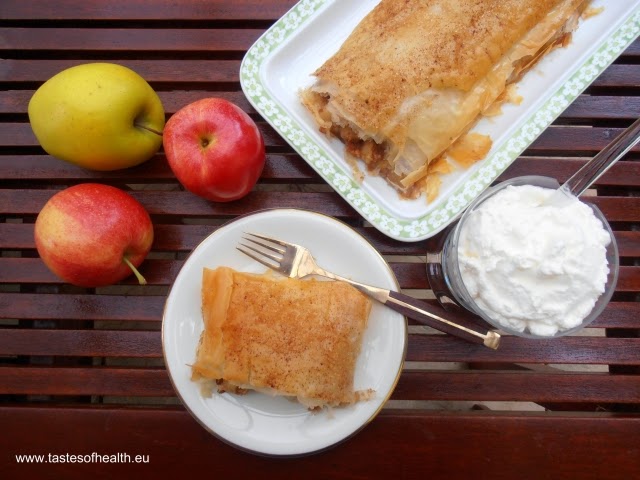
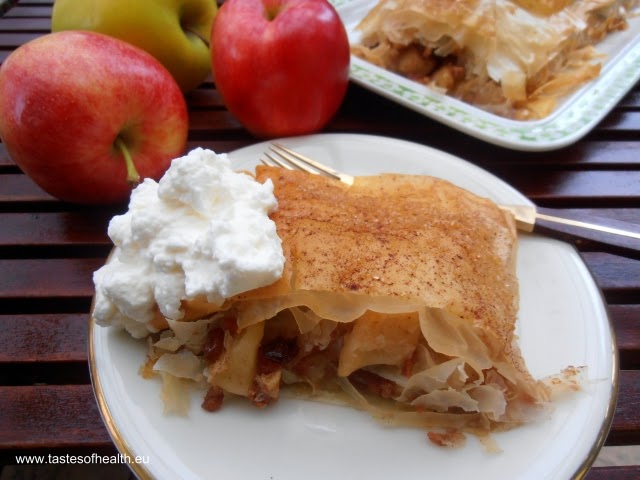
Boozy Apple Strudel


strudel, apfelstrudel, apples, boozy, raisins, recipe, recipes, cake


It is my little tradition to treat myself to Apple Strudel after a few hours of skiing, when we have a break somewhere on top of a mountain in South Tirol. Since Apfelstrudel comes from that part of Europe, I know I am likely to get the best: wonderful apple filling surrounded by thin pastry. It takes a long time to make dough for the strudel as it has to be very elastic so it can be rolled and stretched really thinly: I have heard you should be able to read a newspaper through it.

I am sure one day I will approach the original recipe but for now I wanted to make a simplified version so I decided to use filo pastry instead. It is also extremely thin and additionally - it gives a bit of a crunch to the strudel. In my version, I replaced breadcrumbs with Amaretti biscuits to enrich the strudel with a nice almond taste; I also soaked raisins in rum for a more adult version. And to make the dessert even boozier, I served it with a whipped cream combined with a bit more of rum. Obviously alcohol doesn't have to be added but on cold winter days, it does warm you up even if you are not on a ski slope!

INGREDIENTS (for 8 portions):

Strudel:
50g raisins,
2 tbsp rum,
500g apples, peeled, cored and roughly chopped into approx. 2cm pieces,
40g Demerara sugar (plus extra for sprinkling the strudel),
1.5 tsp cinnamon (plus extra for sprinkling the strudel),
70g Amaretti biscuits, crushed,
3-6 sheets of filo pastry (depending on size),
50g melted butter.

Sauce:
300ml whipping cream,
1.5 tbsp icing sugar,
3 tbsp rum.

METHOD:
  1. Soak the raisins in the rum for at least 15 minutes.
  2. Preheat a fan oven to 170 Celsius degrees.
  3. In a big bowl mix together the apples, sugar, cinnamon, raisins (don’t add rum if any left as it may make the strudel soggy) and the crushed Amaretti.
  4. Prepare the filo pastry. If the sheets are big (approx. 40cm x 30cm), place one on a baking tray covered with baking paper and brush it with melted butter. Put another sheet of filo pastry on top and again - brush with melted butter. Repeat till you have used all 3 sheets. If the sheets are smaller, put two of them overlapping each other to get the required size and follow the above instructions to get 3 layers of pastry.
  5. Place the apple mixture on one third of the prepared pastry leaving 5 cm out on the 3 sides (similarly to 3 Layered Salmon Strudel - please watch a video for details).
  6. Rise up onto the filling the shorter sides of the pastry and the long side that is close to you. Press it gently so it stays on the filling and brush with the melted butter. Now roll up the strudel from the filling end into a cylindrical shape making sure the ending is at the bottom of the strudel. If you prefer not to have too many layers of the pastry on the endings, please watch the video.
  7. Brush the strudel with the rest of melted butter; sprinkle the top with a bit of extra cinnamon and Demerara sugar  and put to the oven for 30-35 minutes.
  8. Serve it with the sauce prepared by whipping the cream and mixing it with sugar and rum.
strudel, apfelstrudel, apples, boozy

strudel, apfelstrudel, apples, boozy


Wednesday, 11 March 2015

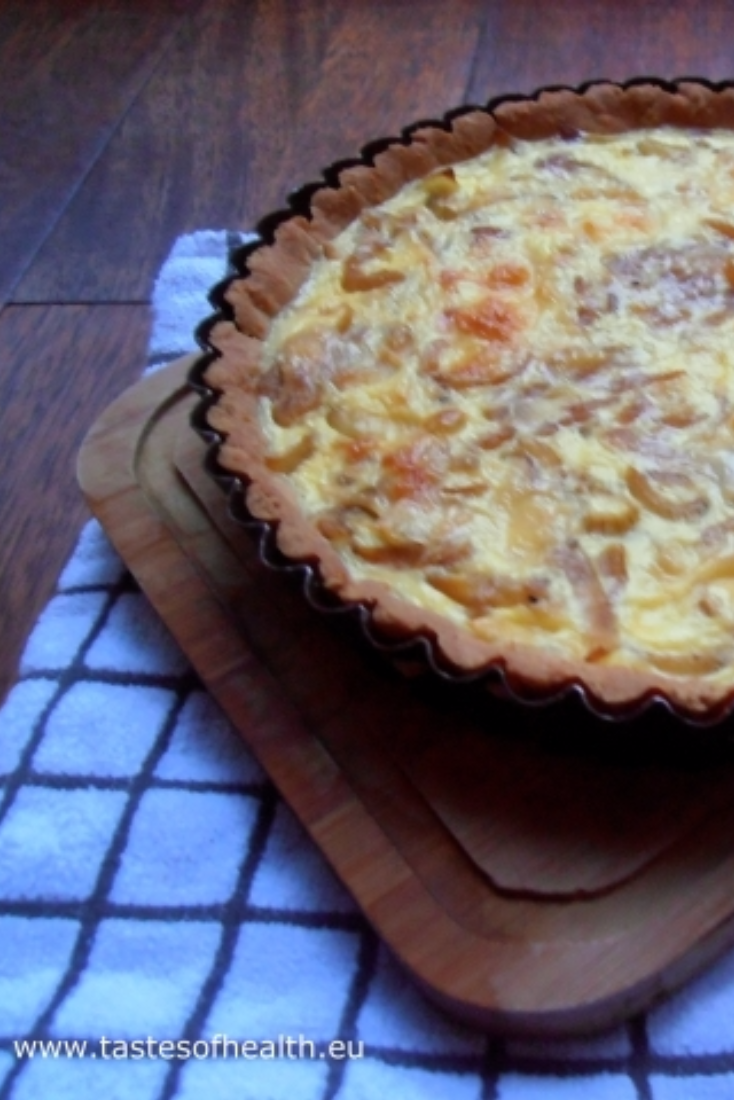
Onion Tart with Gluten-Free Pastry Crust [vegetarian]


tart, gluten-free, onion, vegetarian


There is such a huge variety of tart dishes that probably it would be difficult to find somebody who doesn't have at least one favourite. A sweet tart can be a wonderful ending to a meal but a savoury tart can be a meal on its own. And there are possibly endless combinations of ingredient fillings for those different tarts!

The below recipe uses ingredients that can be easily found in probably everybody’s fridges or cupboards and this is a great advantage of this dish from the beginning. Additionally, if you have in your freezer ready-to-use pastry (I sometimes make a double portion of the pastry and keep half of it for later), this tart can be your saviour when there is simply lack of time or dinner ideas! And the fact that it is delicious is just another advantage.

The crust for this tart is gluten-free as I used a soya, corn and rice flour combination instead of wheat flour but obviously the same amount of regular flour (total of 175g) can be used for this recipe. The gluten-free version is a bit more difficult to handle before baking as it breaks easily but I think that an addition of Parmesan cheese makes it look and taste almost like the normal (gluten) pastry once it is baked.

INGREDIENTS (6 portions):

Pastry:
55g soya flour,
60g cornflour,
60g rice flour,
0.25 tsp salt,
75g diced butter,
50g grated Parmesan cheese,
1 egg.

Filling:
5 sliced onions,
1 tbsp rapeseed oil,
0.5 tsp sugar,
3 eggs,
150 ml single cream,
50g Gouda cheese,
0.5 tsp Dijon mustard,
1 tsp salt,
pepper

METHOD:
  1. Mix together the three types of flour and salt; put into a food processor, add the butter and process until it resembles fine crumbs.
  2. Add the Parmesan cheese and egg and process until everything starts coming together.
  3. Make into 2 balls (or 1 if you are making one bigger tart), wrap in a cling film and put into a fridge for at least 30 minutes.
  4. Heat the oil in a frying pan, add the sliced onions and fry on a medium-low heat for 15-20 minutes stirring occasionally to make sure the onions are golden but not burnt. Towards the end of this process add the seasoning: sugar, 0.5 tsp salt and pepper – according to your taste.
  5. Preheat an oven to 200 Celsius degrees (no fan).
  6. From a baking paper cut 2 circles (or 1, if you are making one larger tart) the same size as bottoms of loose-bottom tart tins, put the circles into tins. I used two 18cm diameter tins but for this recipe they could be replaced with one 25-26cm diameter tin.
  7. Roll the pastry thinly and transfer each one into the tins. Since it is a gluten-free version of pastry it won’t be elastic and may break so you have to be careful when you move it around. If it breaks, you can combine the pieces together with your fingers. If you have time, put the raw tart to the fridge again while you wait for the oven to get hot.
  8. Line the pastry with baking paper, put baking beans on top and blind bake in the hot oven for 10 minutes. Remove the paper and beans and bake for 5 minutes more.
  9. In a bowl beat together the eggs, cream, 0.5 tsp salt, mustard and pepper; add the grated Gouda cheese and stir.
  10. Divide the fried onion into the two baked pastry cases, spread it and pour the egg mixture.
  11. Bake the tarts in 160 Celsius degrees (fan oven) for 20-25 minutes until the filling is set and golden. For one bigger tart extend the baking time by 5 minutes.
tart, gluten-free, onion, vegetarian


Friday, 6 March 2015

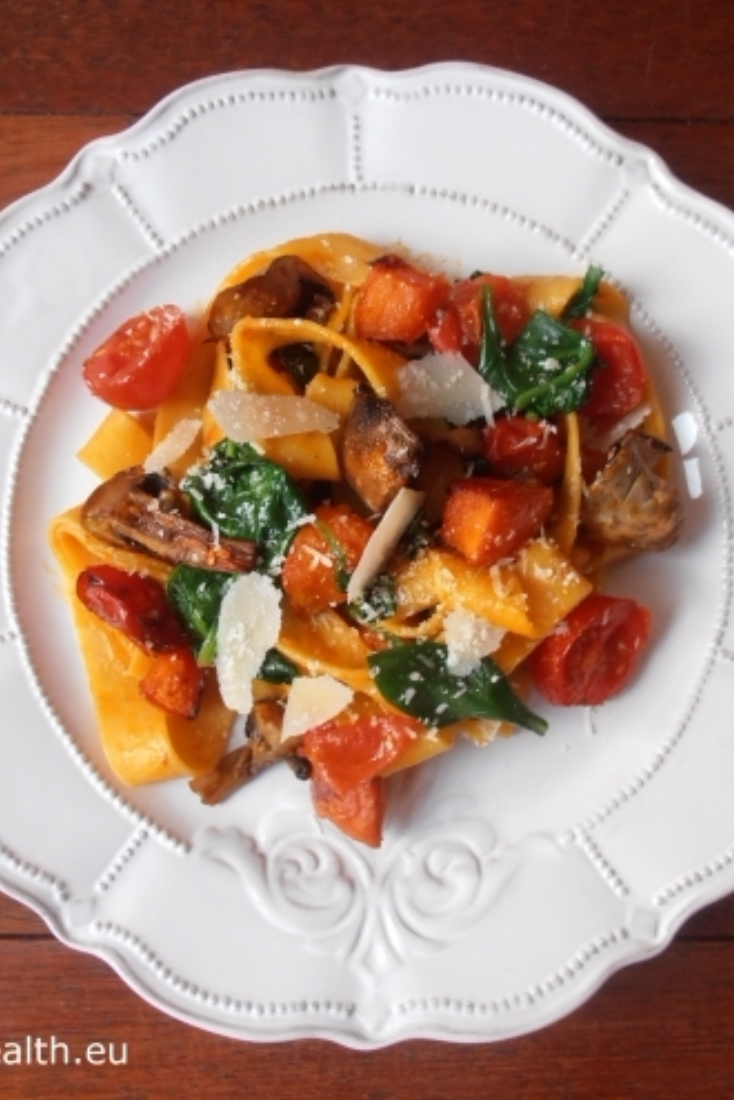
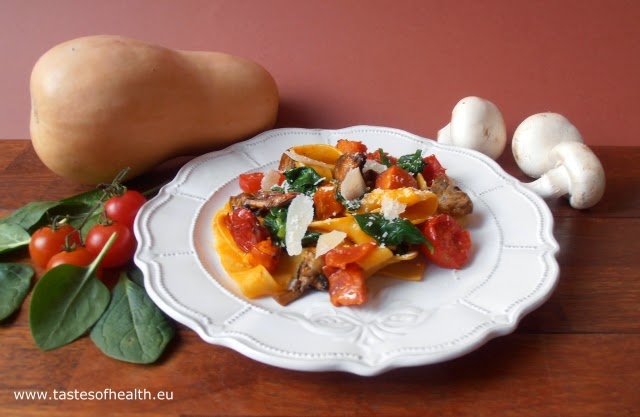
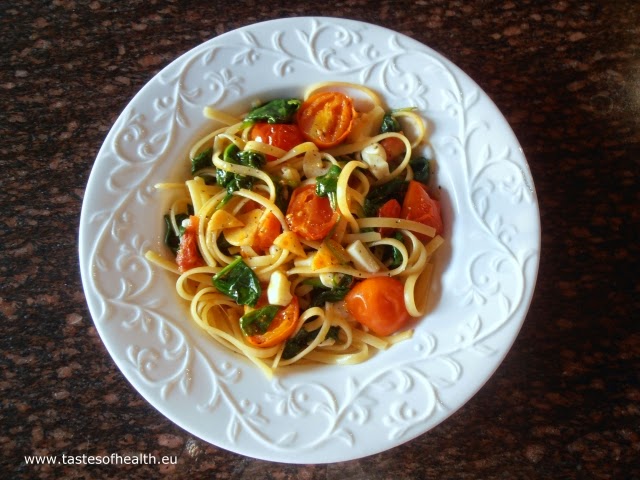
2 Method Pasta with Squash, Mushrooms and Spinach [vegetarian]


pasta, healthy, pumpkin, squash, spinach, mushrooms, tomatoes


It was almost like a love at first sight: I tried a pasta dish with pumpkin and mushrooms fried on plenty of butter and with double cream added to it for extra taste, and I fell for it completely. But just as it sometimes happens with falling in love, after the first euphoria the common sense takes over. In case of that wonderful pasta it was about fat: I knew I had to keep my cholesterol level under control which meant I couldn't have this dish as often as I would have liked.

So I had only one option: to come up with a healthier but still very tasty dish. What I didn't know then is that I would come up with two ways of making this delicious pasta dish and I would not be able to decide which one was tastier. And that is the reason why at the end I decided to include both methods. If you - just like me - don’t know which one to choose, I can give you some hints. If you prefer to have a very healthy option and an almost-straight-from-the-oven-to-the-table dish, choose the Roasting Method. But if you have more time to be involved in cooking and you are not so concerned about a bit of fat (as it does use a little butter), choose the Frying Method. However the truth is that whichever option you decide on, you will be very happy with the result!

INGREDIENTS (for 4 portions):
1 butternut squash (weighing approx. 1 kg), peeled, seeds removed and cut into 2cm cubes,
3 tbsp olive oil,
250g mushrooms (champignons), cut into quarters,
350g cherry tomatoes, halved,
2 garlic cloves, minced,
250g  spinach,
2 tsp thyme,
400g pasta (preferably tagliatelle or pappardelle),
Salt and pepper.
Parmesan cheese.
2 tbsp butter (for the Frying Method only).

METHOD 1 (Roasting):
  1. Preheat an oven to 180 degrees (fan).
  2. Place the cubes of butternut squash on a big baking tray, pour 1 tbsp of olive oil over them, sprinkle with salt and pepper, mix well (you can do it with your hands) and put to the hot oven for 20 minutes.
  3. Take the baking tray out of the oven, move the squash around in case it got stuck to the bottom of the tray; push to one side; add the mushrooms and the tomatoes. Season, pour 1 tbsp of olive oil over the added vegetables and put back to the oven for further 20 minutes.
  4. Approx. 5-10 minutes before the vegetables are done, cook the pasta per packet instruction. Keep half a cup of cooking water before you drain the cooked pasta.
  5. In a big frying pan heat the 1 tbsp olive oil, add the garlic, spinach and fry only till wilted.
  6. Add the roasted vegetables and thyme, season.
  7. Pour a few tablespoons of the pasta cooking water to the baking tray in which vegetables were roasted and deglaze it. You can do it by moving a spatula to dissolve the brown residue from the bottom of the tray – this way you will get some extra flavour.
  8. Pour the sauce to the pan with the vegetables, stir and mix gently with the cooked pasta.
  9. Serve with grated or shaved Parmesan cheese.

METHOD 2 (Frying):
  1. In a big frying pan heat up 1 tbsp of each: oil and butter, add the mushrooms and fry them (stirring occasionally) for 5-7 minutes until golden, put aside.
  2. In the same frying pan heat up 1 tbsp of oil and 2 tbsp of butter, add the cubed squash and thyme, fry on a medium heat for 15-17 minutes making sure the squash doesn’t burn. If it starts sticking too much, you may add a bit of boiled water.
  3. Just before the squash is ready, cook the pasta per packet instruction. Keep half a cup of cooking water before you drain the cooked pasta.
  4. Add the tomatoes to the squash and fry for 5 minutes more.
  5. In another frying pan heat 1 tbsp olive oil, add the garlic, spinach and fry only till wilted.
  6. Transfer the wilted spinach to the pan with the other vegetables, season and mix gently with the cooked pasta. If the dish is a bit too dry, you may add a few tablespoons of the pasta cooking water.
  7. Serve with grated or shaved Parmesan cheese.
pasta, healthy, pumpkin, squash, spinach, mushrooms, tomatoes

Tuesday, 3 March 2015

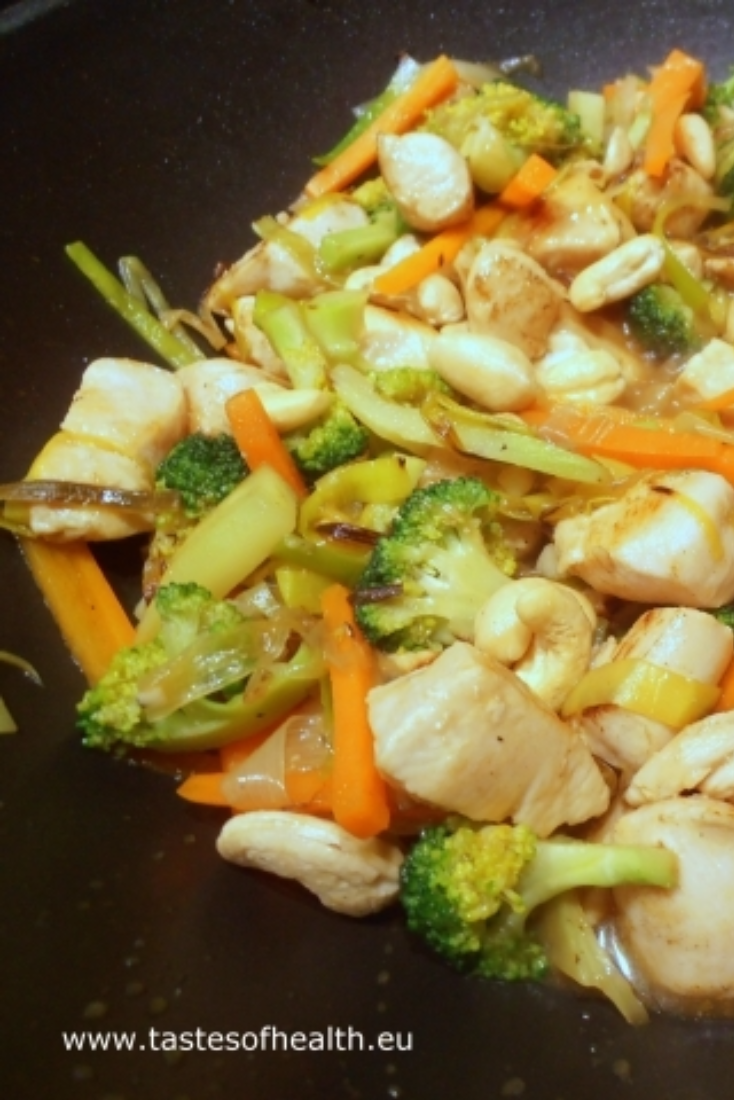
Chicken Stir-Fry with Broccoli and Cashew Nuts


chicken, stir fry, broccoli, cashews


This is a very important dish for my family because it introduced my pretty-small-then daughters to the Chinese (or at least Chinese style) cuisine. The girls were very picky eaters and there was a very narrow variety of products they would be happy to eat. But - probably like majority of mothers - I tried to slowly introduce them to new ingredients. When finally they seemed to be ready, I made this stir-fry and they loved it (OK, I still had to pick out carrots from one of the portions but at least my daughter didn't mind that the carrots touched other ingredients so it was a great success after all!). The only complaint was about the small amount of cashews so from then on I always added more of them.

When I cook this dish nowadays, I add slightly more oyster sauce to it to give a more distinct flavour. So if you cook for older children or adults, you should put 3 tablespoons of oyster sauce instead of the 2 mentioned in the recipe below.

INGREDIENTS (for 4 portions):
2 tbsp wok oil,
500g chicken breasts (or thigh fillets), skinless, cut into bite –size pieces,
1 clove garlic, crushed,
1 leek (approx. 200g), thinly sliced,
1-2 carrots (approx. 150g), cut into julienne (matchsticks) strips,
250g broccoli, cut into small florets,
1 tsp cornflour,
125ml chicken stock,
2 tbsp oyster sauce,
100g roasted, unsalted cashew nuts.

METHOD:
  1. Heat up 1 tbsp of the oil in a wok.
  2. Add the chicken in 2-3 batches, stir-fry till cooked through and golden; put aside on a plate.
  3. Heat up the rest of the oil in a wok, add the garlic, leek, carrots and broccoli; stir fry until the vegetables are cooked through but still crunchy; add the chicken.
  4. Dissolve the cornflour in the stock, add to the wok together with the oyster sauce and cashews and cook till the sauce thickens.
  5. Serve with cooked rice.
chicken, stir fry, broccoli, cashews